How to Replace Light Bulbs on a 2026 Harley-Davidson Ultra Limited (FLHTK)
Light Bulb Replacement Guide: 2026 Harley-Davidson Ultra Limited FLHTK
This comprehensive guide covers every exterior light bulb position on the 2026 Harley-Davidson Ultra Limited (FLHTK), including the headlight (low/high beam), front and rear turn signals, tail/brake light, front and rear running lights, Tour-Pak tail light, license plate light, and auxiliary lamps. The Ultra Limited is a fully dressed touring model with additional lighting compared to base touring bikes.
Quick Reference Bulb Table
| Position | Bulb Type | Wattage | OEM Part Number | LED Upgrade Option |
|---|---|---|---|---|
| Headlight (Low/High Beam) | H13 (9008) | 60W/55W | HARLEY-DAVIDSON 68166-06 | H13 LED (Sylvania ZEVO / Kuryakyn 4760) |
| Front Left Turn Signal | 1157NA (Amber) | 28.3/8.3W | HARLEY-DAVIDSON 68170-99 | 1157 Amber LED |
| Front Right Turn Signal | 1157NA (Amber) | 28.3/8.3W | HARLEY-DAVIDSON 68170-99 | 1157 Amber LED |
| Rear Left Turn Signal | 1157NA (Amber) | 28.3/8.3W | HARLEY-DAVIDSON 68170-99 | 1157 Amber LED |
| Rear Right Turn Signal | 1157NA (Amber) | 28.3/8.3W | HARLEY-DAVIDSON 68170-99 | 1157 Amber LED |
| Tour-Pak Top Turn Signal (Left) | 1157NA (Amber) | 28.3/8.3W | HARLEY-DAVIDSON 68170-99 | 1157 Amber LED |
| Tour-Pak Top Turn Signal (Right) | 1157NA (Amber) | 28.3/8.3W | HARLEY-DAVIDSON 68170-99 | 1157 Amber LED |
| Tail / Brake Light | 1157 (Dual Contact) | 28.3/8.3W | HARLEY-DAVIDSON 72690-96 | 1157 Red LED (Sylvania ZEVO) |
| Tour-Pak Tail / Brake Light | 1157 (Dual Contact) | 28.3/8.3W | HARLEY-DAVIDSON 72690-96 | 1157 Red LED (Sylvania ZEVO) |
| Front Running Light (Left) | 1157 | 28.3/8.3W | HARLEY-DAVIDSON 68170-99 | 1157 Warm White LED |
| Front Running Light (Right) | 1157 | 28.3/8.3W | HARLEY-DAVIDSON 68170-99 | 1157 Warm White LED |
| License Plate Light | 194 (W5W/T10) | 2.1W | HARLEY-DAVIDSON 72623-99 | 194 White LED |
| Tour-Pak License Plate Light | 194 (W5W/T10) | 2.1W | HARLEY-DAVIDSON 72623-99 | 194 White LED |
| Auxiliary Lamp (if equipped) | H11 | 55W | HARLEY-DAVIDSON 68289-06 | H11 LED |
Difficulty & Time Estimate
- Difficulty Level: Beginner to Intermediate (1 to 2 out of 5)
- Estimated Time: 45-75 minutes (more positions than base touring models)
- Best Done: In a well-lit area with the bike on a stand or level surface
Complete Tool List
| Tool | Size or Type | Purpose |
|---|---|---|
| Torx socket / driver | T-25 | Remove headlight trim ring and housing fasteners |
| Torx socket / driver | T-27 | Tour-Pak and turn signal housing bolts |
| Flathead screwdriver | Small | Gentle prying of trim pieces and bezel clips |
| Needle-nose pliers | Standard | Grip and pull bulbs from sockets |
| Socket wrench | 10mm | Tour-Pak mounting bolt removal (if accessing rear harness) |
| Torque wrench | Small (in-lb range) | Re-torque fasteners to spec |
| Clean microfiber cloth | Any | Clean headlight window and bulb glass |
| Isopropyl alcohol (optional) | 70-99% | Clean bulb glass if accidentally touched |
| Gloves | Nitrile | Prevent skin oils from touching bulb glass |
| Dielectric grease | Tub or squeeze tube | Coat bulb contacts to prevent corrosion |
OEM Part Numbers & Aftermarket Alternatives
| Position | OEM Part | Aftermarket Halogen | LED Alternative |
|---|---|---|---|
| Headlight H13 | Harley-Davidson 68166-06 | Sylvania SilverStar H13 | Sylvania ZEVO H13 LED / Kuryakyn 4760 |
| Turn Signal 1157NA | Harley-Davidson 68170-99 | Philips 1157NA Amber | Sylvania ZEVO 1157 Amber LED / Opt7 1157 Amber |
| Tail/Brake 1157 | Harley-Davidson 72690-96 | Philips 1157 X-tremeVision | Sylvania ZEVO 1157 Red LED / JAG-LED |
| Running Light 1157 | Harley-Davidson 68170-99 | Sylvania 1157 Long Life | LEDany 1157 Warm White |
| License Plate 194 | Harley-Davidson 72623-99 | Sylvania 194 | Sylvania ZEVO 194 White LED |
| Auxiliary Lamp H11 (if equipped) | Harley-Davidson 68289-06 | Sylvania SilverStar H11 | Sylvania ZEVO H11 LED |
Step-by-Step Instructions
Headlight (H13) — Low and High Beam
The 2026 Ultra Limited uses a 7-inch H13 (9008) halogen dual-filament headlight housed in the batwing fairing's Daymaker-style reflector.
Step 1: Turn the ignition OFF and let the headlight cool for at least 10 minutes if the bike has been running.
Step 2: Remove the three T-25 Torx screws securing the headlight trim ring to the batwing fairing. Set screws aside safely.
Step 3: Carefully pull the trim ring forward and set it on a clean cloth.
Step 4: Locate the electrical connector on the back of the H13 bulb. Press the locking tab on the connector and pull it straight off the bulb base.
Step 5: Release the wire retainer clip holding the bulb. Press the retainer inward and slide it sideways to clear the bulb tabs.
Step 6: Gently pull the old H13 bulb straight out by its base. Do not grip the glass barrel.
Step 7: Open the new H13 bulb. Handle by the base or use nitrile gloves. If you accidentally touch the glass, clean with isopropyl alcohol to prevent premature failure.
Step 8: Insert the new bulb into the reflector, aligning the three tabs (one is wider for orientation). Push firmly until fully seated.
Step 9: Reinstall the wire retainer clip. It should snap securely over the bulb tabs.
Step 10: Reconnect the electrical connector firmly until it clicks.
Step 11: Test the headlight: turn ignition ON (low beam), then switch to high beam to verify both filaments work.
Step 12: Reinstall the trim ring and T-25 screws. Tighten evenly.
Step 13: Check headlight beam alignment (see Tips section below).
Front Turn Signals (1157NA) — Amber
Step 1: Turn handlebars to access front turn signals mounted on the lower fork legs.
Step 2: Pull back the rubber access grommet at the rear of the turn signal housing.
Step 3: Turn the bulb socket counterclockwise (quarter turn) and pull it straight out.
Step 4: Remove the old 1157NA bulb: press in gently and rotate counterclockwise to unlock the bayonet pins.
Step 5: Insert the new 1157NA amber bulb into the socket. Push in and turn clockwise to lock.
Step 6: Before reassembly, activate the turn signal switch to verify amber flash.
Step 7: Reinsert the socket into the housing and turn clockwise to secure.
Step 8: Reseat the rubber grommet fully to prevent moisture intrusion.
Rear Turn Signals (1157NA) — Amber
Step 1: Access rear turn signals from behind the rear fender.
Step 2: Pull back the rubber access grommet on each turn signal housing.
Step 3: Turn the socket counterclockwise and remove it with the bulb.
Step 4: Remove the old 1157NA bulb: press and turn counterclockwise.
Step 5: Install the new bulb: push in and turn clockwise.
Step 6: Test activation before reassembly.
Step 7: Reinsert the socket and turn clockwise to lock.
Step 8: Reseat the rubber grommet.
Tour-Pak Top Turn Signals (1157NA) — Amber
The Ultra Limited's Tour-Pak includes its own top-mounted turn signals that use the same 1157NA amber bulbs.
Step 1: Access the Tour-Pak top light assembly. Open the Tour-Pak lid (if equipped with a passenger backrest, ensure clearance).
Step 2: From inside the Tour-Pak or through the underside access panel, locate the bulb socket for each top turn signal. Remove any covering screw or clip if present.
Step 3: Turn the socket counterclockwise and remove it.
Step 4: Remove the old 1157NA bulb and install the new amber 1157NA.
Step 5: Test the Tour-Pak turn signals from the bike's switch controls.
Step 6: Reinsert the socket and turn clockwise to lock.
Tail / Brake Light (1157) — Dual Contact
Step 1: Locate the main tail light housing behind the Tour-Pak mount, mounted to the rear fender extension.
Step 2: Remove the T-25 Torx screws securing the housing to the fender bracket.
Step 3: Pull the housing gently backward to access the bulb sockets.
Step 4: Identify the tail/brake socket (center position).
Step 5: Turn the socket counterclockwise and remove it.
Step 6: Remove the old 1157 bulb and install the new one (push, turn clockwise).
Step 7: Reinsert socket and secure.
Step 8: Test: ignition ON for dim tail, brake applied for bright brake, turn signal for flash.
Step 9: Reinstall tail light housing and tighten T-25 screws.
Tour-Pak Tail / Brake Light (1157) — Dual Contact
Step 1: Access the Tour-Pak tail light assembly from below or inside the Tour-Pak.
Step 2: Remove the retaining screw or clip holding the light lens assembly.
Step 3: Pull the lens/spring assembly out to expose the bulb socket.
Step 4: Remove the 1157 bulb (push and turn counterclockwise).
Step 5: Install the new 1157 bulb (push and turn clockwise).
Step 6: Test from the bike controls — should activate with brake and with rear turn.
Step 7: Reassemble the lens with the spring clips and secure with retaining screws.
License Plate Light (194 / W5W / T10)
Step 1: Locate the license plate light bracket on the rear fender, alongside the license plate.
Step 2: Reach from behind the fender to locate the wedge-base socket.
Step 3: Pull the socket straight out (no twist).
Step 4: Pull the old 194 bulb straight out.
Step 5: Insert the new 194 bulb and push the socket back into the housing.
Step 6: Verify illumination with ignition ON.
Tour-Pak License Plate Light (194 / W5W / T10)
Step 1: Access the Tour-Pak rear plate light from inside or underneath the Tour-Pak.
Step 2: Pull the wedge-base socket straight from its mount.
Step 3: Replace the 194 bulb and reinsert the socket.
Step 4: Test illumination.
Front Running Lights (1157)
The Ultra Limited shares the front running light function with the front turn signal bulb (1157 dual-filament). The dim filament provides running light illumination when the ignition is on.
Auxiliary Lamps (H11) — If Equipped
Step 1: Locate auxiliary lamps on the lower engine guard or nacelle.
Step 2: Remove the rear dust cap (turn counterclockwise).
Step 3: Disconnect the electrical connector.
Step 4: Release the wire retainer clip and remove the old H11 bulb.
Step 5: Install the new H11 bulb, align the tabs, and secure with the retainer.
Step 6: Reconnect the wiring and replace the dust cap. Test with ignition ON.
Tips, Warnings & Common Mistakes
Headlight Alignment After Replacement
After replacing the headlight, verify beam alignment for safety and legal compliance:
- Park the Ultra Limited on level ground, 25 feet from a flat wall or garage door. Use the kickstand on a level surface or have someone steady the bike upright.
- Measure from the ground to the center of the headlight.
- Mark the measured height on the wall with horizontal tape. Mark a second line 2 inches below it.
- With low beam on, the bright zone cutoff should be at or below the lower line.
- Loosen the adjustment screws on the headlight housing, aim, and retighten.
LED vs. Halogen — Pros and Cons
| Feature | Halogen | LED |
|---|---|---|
| Brightness | Good (standard) | Excellent (up to 3x brighter) |
| Color Temperature | 3200K (warm yellow) | 6000K (cool white daylight) |
| Lifespan | 500-1000 hours | 25,000-50,000 hours |
| Power Draw | Higher (60W/55W) | Lower (25-30W equivalent) |
| Heat Generation | High | Low |
| Cost | $10-20 | $30-80 |
| Plug-and-play | Yes | May need load equalizers |
LED Turn Signal Warning: The Ultra Limited's monitoring system detects reduced circuit resistance from LED bulbs and may trigger hyper-flashing. Use load equalizers (included in most LED kits) or replace the flasher relay with an LED-compatible module.
Legal Notes
- All exterior lighting must comply with DOT/FMVSS 108 standards.
- Tour-Pak turn signals must remain amber. Clear bulbs behind amber lenses may violate state law.
- LED headlights above 6000K (blue tint) may fail vehicle inspection.
- The 2026 Touring platform uses CAN bus architecture — use CAN-bus-ready LED bulbs to avoid error codes.
Common Mistakes to Avoid
| Mistake | Consequence | Prevention |
|---|---|---|
| Touching halogen bulb glass with bare fingers | Oil hotspots cause premature failure | Use nitrile gloves when handling |
| Not testing before reassembly | Discovering defective bulb after closing up | Test every bulb with ignition before trimming |
| Missing Tour-Pak bulbs | Tour-Pak lights inoperative | Remember the Tour-Pak has its own tail and turn signal bulbs |
| Skipping load equalizers for LED turn signals | Hyper-flashing and error codes | Install resistors or use LED-compatible flasher |
| Over-driving trim ring screws | Cracked or stripped fairing | Hand-tight plus snug only |
| Improper headlight alignment | Blinded oncoming drivers or reduced visibility | Always check at 25 feet on level ground |
| Wrong replacement wattage | Blown fuses, wire damage | Match or stay below OEM wattage |
| Leaving rubber boots unsealed | Water and corrosion damage | Verify all rubber boots are fully seated |
| No dielectric grease on contacts | Corrosion and intermittent operation | Apply thin coat to all bulb contacts |
Verification Notes for 2026 Model Year
The 2026 Ultra Limited received the updated Touring frame. The following should be verified against your owner's manual:
| Item | Standard Value | Notes |
|---|---|---|
| Headlight | H13 (9008) | 7-inch reflector, batwing mounting |
| Turn signal bulb | 1157NA (amber) | Standard bayonet, front, rear, and Tour-Pak |
| Tail/brake bulb | 1157 (dual contact) | Both main and Tour-Pak tail lights |
| License plate bulb | 194 (W5W wedge) | Both main and Tour-Pak plate lights |
| Running light | 1157 shared with turn signal | Dim/ bright dual-use filament |
| Auxiliary lamp (if equipped) | H11 | Confirm on your trim level |
To verify all specifications, check your 2026 Ultra Limited owner's manual included with the motorcycle, or access it through the Harley-Davidson mobile app.
This guide was prepared using Harley-Davidson OEM service manual specifications and established industry bulb cross-references for the FLHTK touring platform. Always verify against your specific owner's manual before performing maintenance.
Parts for this job
Fits FLHTK, FLHT, FLH, FL — from our catalogue of 41,000+ aftermarket parts.
 Stock Style Tail Lamp Replacement Lens Clear$7.02
 Tail Lamp Lens Plastic Clear Top$10.64
 12 Volt Bulb$12.02
 Spring Fork Spotlamp Bulb 12 Volt$12.02
 Tail Lamp Stock Type Red Plastic Lens$12.80
 Spring Fork Spotlamp Bulb 6 Volt$12.80
 Tail Lamp Lens Plastic Red$12.80
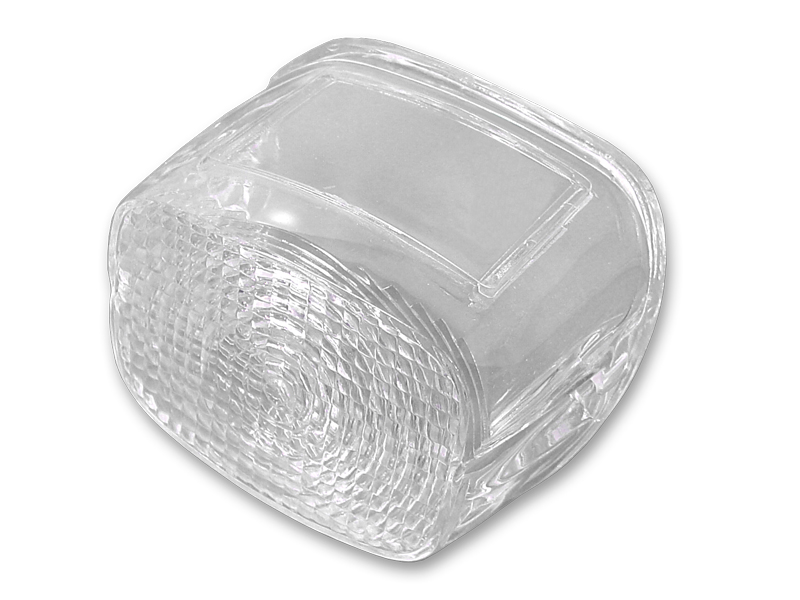 *UPDATE Tail Lamp Lens Stock Clear$12.94
 *UPDATE Tail Lamp Plastic Clear Lens$12.94
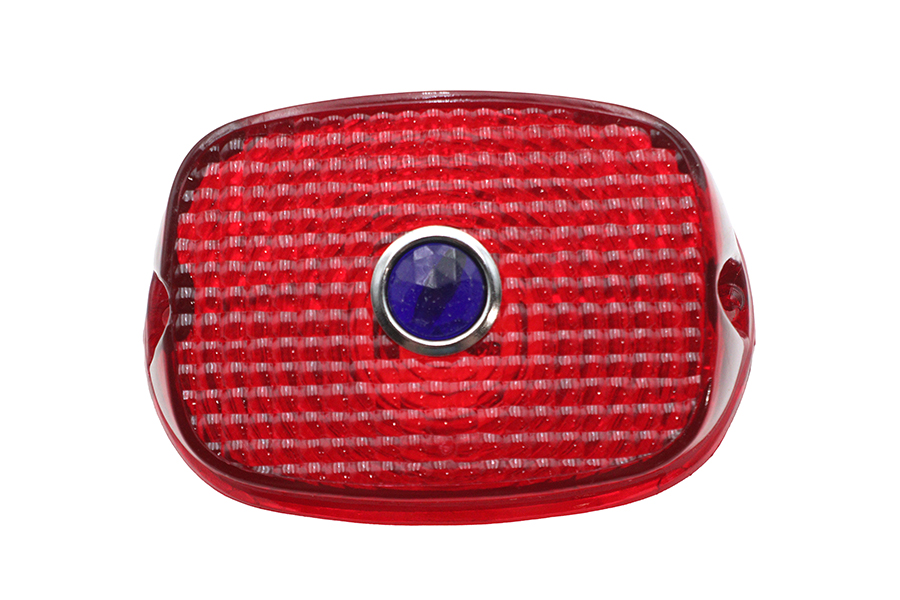 Tail Lamp Lens Red with Blue Dot$17.12
 6 Volt Bulb$19.31
 Tail Lamp Blue Dot Red Plastic Lens$21.44