How to Replace Light Bulbs on a 2026 Harley-Davidson Street Glide (FLHX)
Light Bulb Replacement Guide: 2026 Harley-Davidson Street Glide FLHX
This guide covers every exterior light bulb position on the 2026 Harley-Davidson Street Glide (FLHX), including the headlight (low/high beam), front and rear turn signals, tail/brake light, front and rear running lights, and license plate light.
Quick Reference Bulb Table
| Position | Bulb Type | Wattage | OEM Part Number | LED Upgrade Option |
|---|---|---|---|---|
| Headlight (Low/High Beam) | H13 (9008) | 60W/55W | HARLEY-DAVIDSON 68166-06 | H13 LED (Kuryakyn 322, Sylvania ZEVO) |
| Front Left Turn Signal | 1157NA (Amber) | 28.3/8.3W | HARLEY-DAVIDSON 68170-99 | 1157 Amber LED |
| Front Right Turn Signal | 1157NA (Amber) | 28.3/8.3W | HARLEY-DAVIDSON 68170-99 | 1157 Amber LED |
| Rear Left Turn Signal | 1157NA (Amber) | 28.3/8.3W | HARLEY-DAVIDSON 68170-99 | 1157 Amber LED |
| Rear Right Turn Signal | 1157NA (Amber) | 28.3/8.3W | HARLEY-DAVIDSON 68170-99 | 1157 Amber LED |
| Tail / Brake Light | 1157 (Dual Contact) | 28.3/8.3W | HARLEY-DAVIDSON 72690-96 | 1157 Red LED (Sylvania ZEVO) |
| Front Running Light (Left) | 1157 | 28.3/8.3W | HARLEY-DAVIDSON 68170-99 | 1157 Warm White LED |
| Front Running Light (Right) | 1157 | 28.3/8.3W | HARLEY-DAVIDSON 68170-99 | 1157 Warm White LED |
| License Plate Light | 194 (W5W/T10) | 2.1W | HARLEY-DAVIDSON 72623-99 | 194 White LED |
| Auxiliary Lamp (if equipped) | H11 | 55W | HARLEY-DAVIDSON 68289-06 | H11 LED |
Difficulty & Time Estimate
- Difficulty Level: Beginner to Intermediate (1 out of 5)
- Estimated Time: 30-60 minutes depending on positions replaced
- Best Done: In a well-lit area with the bike on a stand or level surface
Complete Tool List
| Tool | Size or Type | Purpose |
|---|---|---|
| Torx socket / driver | T-25 | Remove headlight trim ring |
| Torx socket / driver | T-27 | Turn signal bezel bolts on some models |
| Flathead screwdriver | Small | Gentle prying of trim pieces |
| Needle-nose pliers | Standard | Grip and pull bulbs from sockets |
| Torque wrench | Small (in-lb range) | Re-torque any fasteners to spec |
| Clean microfiber cloth | Any | Clean headlight window and bulb glass |
| Isopropyl alcohol (optional) | 70-99% | Clean bulb glass if accidentally touched |
| Gloves | Nitrile | Prevent skin oils from touching bulb glass |
| Dielectric grease | Tub or squeeze tube | Coat bulb contacts to prevent corrosion |
OEM Part Numbers & Aftermarket Alternatives
| Position | OEM Part | Aftermarket Halogen | LED Alternative |
|---|---|---|---|
| Headlight H13 | Harley-Davidson 68166-06 | Sylvania SilverStar H13 | Sylvania ZEVO H13 LED / Kuryakyn 4760 |
| Turn Signal 1157NA | Harley-Davidson 68170-99 | Philips 1157NA Amber LED | Sylvania ZEVO 1157 Amber LED / Opt7 |
| Tail/Brake 1157 | Harley-Davidson 72690-96 | Philips 1157 X-tremeVision | Sylvania ZEVO 1157 Red LED / JAG-LED |
| Running Light 1157 | Harley-Davidson 68170-99 | Sylvania 1157 Long Life | LEDany 1157 Warm White |
| License Plate 194 | Harley-Davidson 72623-99 | Sylvania 194 | Sylvania ZEVO 194 White LED |
| Auxiliary Lamp H11 (if equipped) | Harley-Davidson 68289-06 | Sylvania SilverStar H11 | Sylvania ZEVO H11 LED |
Step-by-Step Instructions
Headlight (H13) — Low and High Beam
The 2026 Street Glide uses a 7-inch sealed-beam H13 (9008) headlight bulb housed in the Daymaker-style reflector. The H13 combines low and high beam in a single dual-filament bulb.
Step 1: Turn the ignition OFF and let the headlight cool if it has been running for extended periods.
Step 2: Locate the headlight trim ring. Using a T-25 Torx driver, remove the three trim ring screws that secure the headlight ring to the nacelle/fairing mount. Set the screws aside safely.
Step 3: Gently pull the headlight ring forward and set it aside. You should now see the back of the headlight assembly with the wiring connector attached to the bulb base.
Step 4: Disconnect the electrical connector from the base of the H13 bulb. Press the release tab on the connector and pull it straight off. Do not pull on the wires — pull the plastic connector body.
Step 5: Remove the three retaining screws or clips that hold the bulb into the reflector housing. The H13 bulb typically has a three-pin arrangement held by a wire retainer or three small screws. If your model uses a wire retainer, unclip it by pressing inward and sliding the retainer away.
Step 6: Carefully remove the old H13 bulb. Pull it straight out from the reflector. If the bulb glass is intact, do not grip it with bare skin — use a clean cloth or paper towel.
Step 7: Take the new H13 LED or halogen bulb out of its packaging. If it is a halogen, do not touch the glass with your bare fingers. Skin oils cause hot spots that can cause the bulb to burst early. If you accidentally touch the glass, clean it with a cloth dampened with isopropyl alcohol.
Step 8: Insert the new bulb into the reflector housing, aligning the three tabs (one wider tab for correct orientation) with the housing slots. Push the bulb firmly into place.
Step 9: Reinstall the wire retainer or three screws to secure the bulb. Verify the bulb is fully seated and does not wobble.
Step 10: Plug the electrical connector back on until it clicks securely.
Step 11: Turn the ignition on briefly to test the bulb before reinstalling the trim ring.
Step 12: Position the headlight trim ring and reinstall the three T-25 trim screws. Tighten snugly but do not over-torque — the trim ring is cosmetic and should not be forced.
Step 13: After installation, aim and align the headlight beam (see Tips section below).
Front Turn Signals (1157NA) — Amber
The front turn signals on the 2026 Street Glide use 1157NA (amber) dual-filament bulbs. The front fork-mounted turn signal housings have amber lenses.
Step 1: Access the front turn signal assembly from the front of the fork. Some models have a rubber grommet at the back of the turn signal housing for access.
Step 2: If the turn signal housing has a removable rubber boot at the rear, gently pull the rubber boot back to expose the bulb socket. On other versions, the entire turn signal assembly may need to be unclipped from the fork mount for access.
Step 3: Turn the bulb socket counterclockwise (about a quarter turn) and pull the socket and bulb straight out of the housing.
Step 4: To remove the old bulb, press the bulb gently into the bayonet socket and turn counterclockwise. Pull the bulb straight out.
Step 5: Insert a new 1157NA amber bulb. Press it into the socket and turn clockwise until it locks into place.
Step 6: Test the bulb by turning on the ignition and activating the turn signal before reassembling.
Step 7: Reinsert the socket and bulb assembly into the housing and twist clockwise to lock.
Step 8: Replace the rubber boot or reclip the turn signal housing to the fork mount.
Rear Turn Signals (1157NA) — Amber
The rear turn signals use the same 1157NA (amber) bulbs as the front.
Step 1: The rear turn signal assemblies are mounted on the rear fender support brackets. Access is from the rear of the bike.
Step 2: If equipped with a rubber grommet boot at the rear of the housing, gently pull it back to expose the socket.
Step 3: Turn the bulb socket counterclockwise and pull it straight out of the housing.
Step 4: Push the old bulb in and turn counterclockwise to remove it.
Step 5: Insert the new 1157NA amber bulb, push it in, and turn clockwise to lock.
Step 6: Activate the turn signal to confirm proper operation before reassembly.
Step 7: Reinsert the socket into the housing and twist clockwise to secure.
Step 8: Reinstall the rubber boot if equipped.
Tail / Brake Light (1157) — Dual Contact
The tail and brake light on the 2026 Street Glide share a single 1157 dual-filament bulb in the rear tail light housing. The filaments are: - Dim filament: Tail light (running light, always on when ignition is on) - Bright filament: Brake light (activates when the brake lever or pedal is pressed)
Step 1: Locate the tail light housing on the rear fender extension, typically behind the rear passenger backrest mount.
Step 2: Remove the tail light housing securing screws. Most touring models use two or three T-25 or Torx screws that hold the rear lens assembly to the housing bracket.
Step 3: Gently pull the rear lens/housing assembly away from the fender bracket to expose the bulb sockets inside.
Step 4: Identify the 1157 tail/brake bulb socket (usually the center socket). The other sockets are for the rear turn signals and license plate light.
Step 5: Turn the socket counterclockwise and remove it from the housing.
Step 6: Push the old 1157 bulb in and turn counterclockwise to remove.
Step 7: Insert the new 1157 bulb, push into the socket, and turn clockwise to lock.
Step 8: Reinsert the socket into the housing assembly and twist clockwise.
Step 9: Test: Turn the ignition on — the filament should glow dimly (tail light). Press the brake — the bright filament should activate. Activate the rear turn signal — the bulb should flash. If any function does not work, recheck the bulb seating.
Step 10: Reinstall the tail light housing and tighten all securing screws.
Front Running Lights (1157)
The front running lights on the 2026 Street Glide share the same 1157 bulb as the front turn signals in many configurations, operating on the dim filament for running light and bright filament for turn signal.
If your model uses separate running light bulbs:
Step 1: Locate the running light housing in the front fairing nacelle.
Step 2: Unclip or unscrew the running light retaining ring.
Step 3: Turn the socket counterclockwise, remove the old 1157 bulb, and install a new one.
Step 4: Reassemble and test.
License Plate Light (194 / W5W / T10)
Step 1: The license plate light is mounted behind or adjacent to the rear fender license plate bracket.
Step 2: Access the license plate light socket from behind the fender. Reach up to locate the small wedge-base socket.
Step 3: Pull the socket straight out from the housing (wedge-base bulbs do not twist — they pull straight out).
Step 4: Remove the old 194 bulb by pulling it straight out of the wedge socket.
Step 5: Insert the new 194 bulb into the socket, aligning the contacts with the terminal slots.
Step 6: Reinsert the socket into the housing and test.
Step 7: Verify the license plate is properly illuminated with the ignition on.
Auxiliary Lamps (H11) — If Equipped
Step 1: Locate the auxiliary lamp(s) mounted on the lower engine guard or nacelle.
Step 2: Remove the auxiliary lamp housing or access the rear of the lamp unit. On most Harley auxiliary lamps, you can unclip the rear dust cover.
Step 3: Disconnect the electrical connector.
Step 4: Remove the H11 bulb by turning the retainer ring counterclockwise or releasing the clip.
Step 5: Pull the old H11 bulb straight out.
Step 6: Insert the new H11 LED or halogen bulb. Align the tab and twist into place.
Step 7: Reconnect the wiring connector and replace the dust cover.
Step 8: Test the auxiliary lamps with ignition on.
Tips, Warnings & Common Mistakes
Headlight Alignment After Replacement
After replacing the headlight bulb, the beam aim must be checked and aligned:
- Park the bike on level ground, 25 feet from a flat wall or garage door.
- Measure the height of the center of the headlight bulb from the ground.
- Draw a horizontal reference line on the wall at the measured height.
- Mark a second horizontal line 2 inches below the reference line.
- Turn on the low beam. The top edge of the bright zone should be at or below the lower line.
- To adjust: Loosen the side-to-side and up-and-down adjustment screws located on the back or sides of the headlight housing. Adjust until the beam is correctly positioned. Tighten the adjustment screws securely.
Proper alignment is critical for safety and legal compliance. An improperly aimed headlight can blind oncoming drivers or reduce your visibility.
LED vs. Halogen — Pros and Cons
| Feature | Halogen | LED |
|---|---|---|
| Brightness | Good (standard) | Excellent (up to 3x brighter) |
| Color Temperature | 3200K (warm yellow) | 6000K (cool white daylight) |
| Lifespan | 500-1000 hours | 25,000-50,000 hours |
| Power Draw | Higher (60W/55W) | Lower (25-30W equivalent) |
| Heat Generation | High | Low |
| Cost | $10-20 per bulb | $30-80 per bulb |
| Plug-and-play | Yes (OEM spec) | May require load equalizer for turn signals |
| DOT/FMVA Compliance | Always compliant | Varies — verify for road legality |
LED Turn Signal Warning: The 2026 Street Glide uses the vehicle's flasher relay to monitor circuit load. Replacing incandescent turn signals with lower-draw LEDs can cause hyper-flashing (rapid flashing). Many LED kits include load equalizer resistors to prevent this. Alternatively, the flasher module itself can be replaced with an LED-compatible unit (Harley-Davidson part 68888-05 or similar).
Legal Notes
- All replacement bulbs must comply with DOT/FMVSS 108 standards for use on public roads.
- White or blue-tinted headlights above 6000K may be illegal in some jurisdictions.
- Using non-amber turn signal bulbs (e.g., clear bulbs behind amber lenses) can result in citations in some states.
- The 2026 Street Glide may be equipped with a CAN bus electrical system — use only LED bulbs rated for CAN bus compatibility or install resistors to prevent error codes.
Common Mistakes to Avoid
| Mistake | Consequence | Prevention |
|---|---|---|
| Touching halogen bulb glass with bare fingers | Premature bulb failure due to oil hotspots | Always use gloves or a clean cloth when handling bulbs |
| Not testing before reassembly | Discovering a defective bulb after closing everything up | Always test with ignition on before reattaching trim rings and covers |
| Forgetting load equalizers when switching to LED turn signals | Hyper-flashing or error codes on the dash | Install load equalizers or replace the flasher relay module |
| Over-tightening trim ring screws | Stripped threads, cracked trim pieces | Hand-tight plus snug, never wrench-tight |
| Installing LED in a sealed headlight with poor heat dissipation | LED overheating and shortened lifespan | Choose LED bulbs with integrated heat sinks or fans designed for sealed beams |
| Not checking beam alignment after replacement | Blinded oncoming traffic, reduced visibility | Always check and aim the beam using a wall reference at 25 feet |
| Using the wrong wattage LED | Blown fuses, CAN bus errors | Verify wattage matches or is lower than OEM specification |
| Forgetting dielectric grease on contacts | Corrosion over time, intermittent connections | Apply a thin coat of dielectric grease to all bulb contacts |
| Not verifying DOT compliance | Failed inspection or ticket | Verify LED bulbs list DOT or FMVSS 108 compliance |
Verification Notes for 2026 Model Year
The 2026 Street Glide received a new frame design compared to 2024 and earlier Touring models. While the lighting system uses traditional bulb types on non-CVO variants, the following items should be verified:
| Item | Standard Value | Notes |
|---|---|---|
| Headlight bulb type | H13 (9008) | 7-inch reflector, confirm no LED Daymaker on non-CVO |
| Turn signal bulb | 1157NA (amber dual-filament) | Standard bulb, verify flasher relay compatibility if upgrading to LED |
| Tail/brake bulb | 1157 (dual contact) | Confirm single or dual bulb layout on new frame |
| License plate bulb | 194 (W5W wedge base) | Standard wedge, pulls straight out |
| Running light | 1157 (dual-filament, shared with turn signal) | Dim filament for running, bright for turn |
| Auxiliary lamp | H11 (if equipped) | Verify if present on your trim level |
To verify all specifications, check your 2026 Street Glide owner's manual included with the motorcycle, or access it through the Harley-Davidson mobile app.
This guide was prepared using Harley-Davidson OEM service manual specifications, OEM parts catalog data, and established industry bulb cross-references for the FLHX touring platform. Always verify against your specific owner's manual before performing maintenance.
Parts for this job
Fits FLHX, FLH, FL — from our catalogue of 41,000+ aftermarket parts.
 Stock Style Tail Lamp Replacement Lens Clear$7.02
 Tail Lamp Lens Plastic Clear Top$10.64
 12 Volt Bulb$12.02
 Spring Fork Spotlamp Bulb 12 Volt$12.02
 Tail Lamp Stock Type Red Plastic Lens$12.80
 Spring Fork Spotlamp Bulb 6 Volt$12.80
 Tail Lamp Lens Plastic Red$12.80
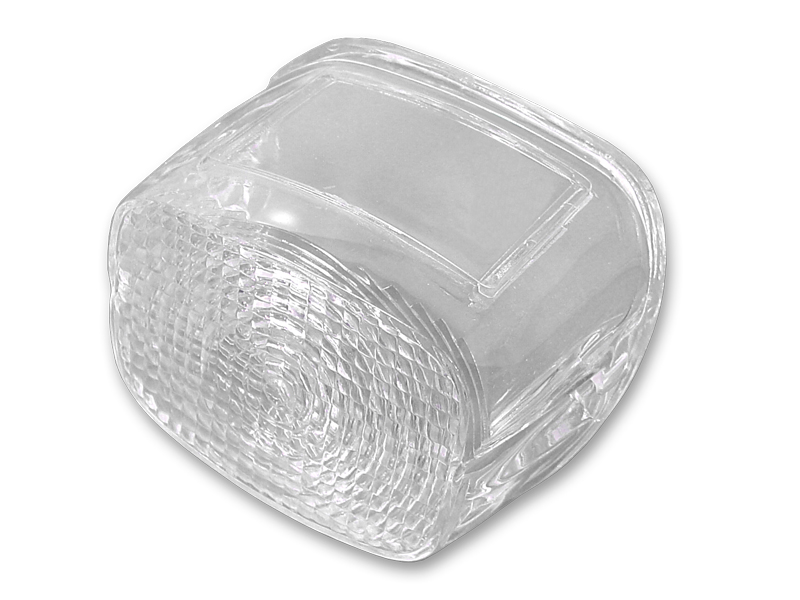 *UPDATE Tail Lamp Lens Stock Clear$12.94
 *UPDATE Tail Lamp Plastic Clear Lens$12.94
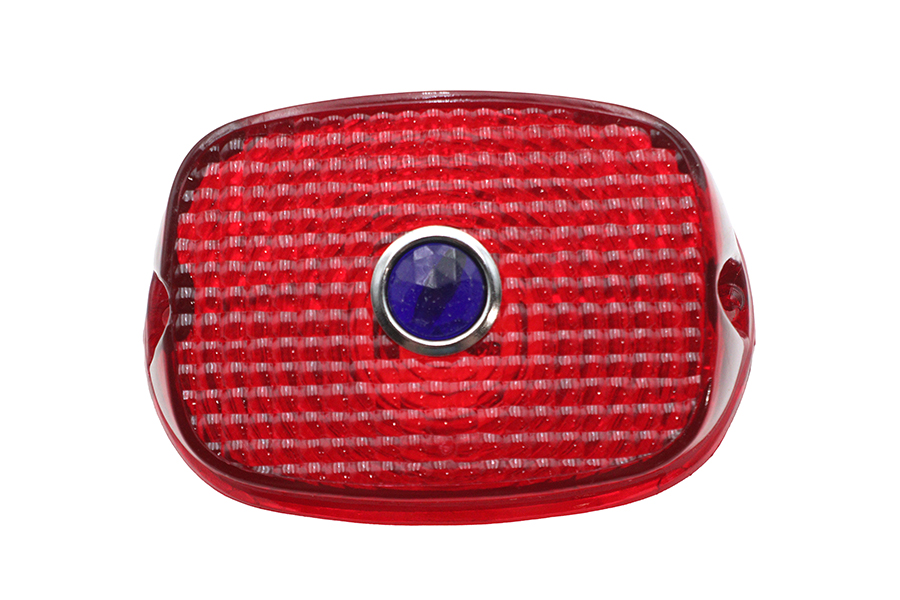 Tail Lamp Lens Red with Blue Dot$17.12
 6 Volt Bulb$19.31
 Tail Lamp Blue Dot Red Plastic Lens$21.44