How to Replace Light Bulbs on a 2026 Harley-Davidson Sport Glide (FLSB — Milwaukee-Eight 107)
Light Bulb Replacement Guide: 2026 Harley-Davidson Sport Glide FLSB
This guide covers every exterior light bulb position on the 2026 Harley-Davidson Sport Glide (FLSB), built on the Softail frame and powered by the Milwaukee-Eight 107 engine. The Sport Glide features a combination of halogen and LED lighting, with a Daymaker LED headlight from the factory and traditional halogen bulbs for turn signals and tail/brake lights.
Quick Reference Bulb Table
| Position | Bulb Type | Wattage | OEM Part Number | LED Upgrade Option |
|---|---|---|---|---|
| Headlight | LED Sealed Unit (from factory – 7-inch Daymaker LED) | 35W / 40W | HARLEY-DAVIDSON 68000209 | Upgrade optics only – unit is sealed |
| Front Left Turn Signal | 1157NA (Amber) | 28.3/8.3W | HARLEY-DAVIDSON 68170-99 | 1157 Amber LED |
| Front Right Turn Signal | 1157NA (Amber) | 28.3/8.3W | HARLEY-DAVIDSON 68170-99 | 1157 Amber LED |
| Rear Left Turn Signal | 1157NA (Amber) | 28.3/8.3W | HARLEY-DAVIDSON 68170-99 | 1157 Amber LED |
| Rear Right Turn Signal | 1157NA (Amber) | 28.3/8.3W | HARLEY-DAVIDSON 68170-99 | 1157 Amber LED |
| Tail / Brake Light | 1157 (Dual Contact) | 28.3/8.3W | HARLEY-DAVIDSON 72690-96 | 1157 Red LED (Sylvania ZEVO) |
| License Plate Light | 194 (W5W/T10) | 2.1W | HARLEY-DAVIDSON 72623-99 | 194 White LED |
| Front Running Light (Left) | 1157 | 28.3/8.3W | HARLEY-DAVIDSON 68170-99 | 1157 Warm White LED |
| Front Running Light (Right) | 1157 | 28.3/8.3W | HARLEY-DAVIDSON 68170-99 | 1157 Warm White LED |
Difficulty & Time Estimate
- Difficulty Level: Beginner (1 out of 5)
- Estimated Time: 20-40 minutes (headlight is sealed LED — no bulb swap needed)
- Best Done: In a well-lit area with the bike on a level surface
Complete Tool List
| Tool | Size or Type | Purpose |
|---|---|---|
| Phillips head screwdriver | #2 | Rear fender light assembly screws |
| Torx socket / driver | T-25 | Headlight mounting hardware |
| Flathead screwdriver | Small | Turn signal lens prying |
| Needle-nose pliers | Standard | Grip and pull wedged bulbs |
| Socket set | 5/16" | License plate light bracket |
| Clean microfiber cloth | Any | Clean bulb glass and lenses |
| Isopropyl alcohol | 70-99% | Clean glass if accidentally touched |
| Gloves | Nitrile | Prevent skin oils on bulb glass |
| Dielectric grease | Tub or squeeze tube | Coat contacts to prevent corrosion |
OEM Part Numbers & Aftermarket Alternatives
| Position | OEM Part | Aftermarket Halogen | LED Alternative |
|---|---|---|---|
| Headlight (Sealed LED) | Harley-Davidson 68000209 | N/A | Custom Dynamics LED projector 7" |
| Turn Signal / Tail 1157 | Harley-Davidson 68170-99 / 72690-96 | Sylvania 1157 Long Life | Sylvania ZEVO 1157 LED |
| License Plate 194 | Harley-Davidson 72623-99 | Sylvania 194 Long Life | Auxbeam 194 LED 6000K |
Step-by-Step Replacement Instructions
Step 1 — Safety First
- Park on a level surface and turn the ignition OFF.
- Remove the key fob from the bike.
- Allow the motorcycle to cool completely.
- Wear nitrile gloves when handling any halogen bulbs.
Step 2 — Headlight
The Sport Glide comes from the factory with a sealed 7-inch Daymaker LED headlight. There is no replaceable bulb — the entire sealed optical unit must be replaced if it fails.
If factory LED headlight replacement is needed: 1. Turn the handlebars for better access behind the headlight. 2. Remove the two T-25 Torx bolts securing the LED headlight to the fork bracket. 3. Disconnect the main wiring harness connector behind the headlight. 4. Remove the old sealed LED unit from the bracket. 5. Position the new 7-inch LED headlight into the bracket. 6. Reconnect the wiring harness connector. 7. Install and hand-tighten the T-25 Torx bolts. 8. Torque bolts to 60-96 in-lbs.
Note: Some owners replace the stock Daymaker with aftermarket projector-style 7-inch LED headlights. Follow the aftermarket manufacturer instructions for those units.
Step 3 — Front Turn Signal Bulbs (1157NA — Amber)
Front turn signals are fork-mounted, bullet-style units.
- Turn the handlebars to access the desired turn signal.
- Gently pry off the amber lens cover using a cloth-wrapped flathead screwdriver.
- Push the bulb in and twist counter-clockwise to release from the socket.
- Extract the old 1157NA bulb.
- Insert the new 1157NA amber bulb and twist clockwise to lock.
- Press the lens cover back into place until it snaps.
- Repeat on the other side.
Step 4 — Rear Turn Signal Bulbs (1157NA — Amber)
Rear turn signals are mounted on the fender struts.
- Loosen the base bolt securing each housing to the fender.
- Pull the housing outward to expose the rear wiring.
- Remove the rear rubber grommet cover.
- Push the bulb in and twist counter-clockwise to release.
- Remove the old 1157NA bulb.
- Insert the new bulb and twist clockwise to lock.
- Replace the rubber grommet and verify it seals.
- Reinstall the housing and tighten base bolt to 60-96 in-lbs.
Step 5 — Tail / Brake Light Bulb (1157 — Dual Contact)
The Sport Glide has a rear fender-mounted tail light assembly.
- Remove the two Phillips head screws from the tail light lens cover.
- Set the lens cover aside.
- Push the 1157 bulb in gently and rotate counter-clockwise.
- Remove the old bulb.
- Align the two offset pins on the new 1157 with the socket tabs.
- Push in and twist clockwise to lock.
- Wipe the lens interior with microfiber cloth.
- Reinstall the lens cover and screws. Torque to 15-25 in-lbs.
Step 6 — License Plate Light Bulb (194 / W5W / T10)
The license plate light bracket is mounted beneath the rear fender.
- Locate the license plate light housing above the plate.
- Remove the 5/16" bolt or Phillips screw holding the bracket.
- Pull the 194 wedge bulb straight out of the socket.
- Push the new 194 bulb straight into the socket.
- Reinstall the housing and tighten the fastener.
Step 7 — Front Running Light Verification
The Sport Glide uses dual-filament 1157 bulbs serving as both running light and turn signal in the front.
- Running light uses the dimmer filament; turn signal uses the brighter filament.
- After bulb replacement, verify both filaments illuminate independently.
Step 8 — Test All Lights
- Insert key fob; turn ignition to ON.
- Verify the factory LED headlight illuminates.
- Test left turn signal — front and rear should flash amber together.
- Test right turn signal — same verification.
- Press front brake lever — tail light should brighten.
- Press rear brake pedal — same brightening confirmed.
- Verify tail light maintains dim running glow.
- Confirm license plate light is illuminated.
Step 9 — LED Upgrade Considerations
When upgrading halogen positions to LED on the Sport Glide:
- Headlight: Already LED from factory. Some owners upgrade to aftermarket projector or halo-style 7-inch LED units.
- Turn Signal LEDs: The Softail CAN bus may hyper-flash with low-draw LEDs. Install Harley-Davidson load equalizer (p/n 68194-04) per turn signal pair.
- Tail/Brake LED (1157): Most 1157 LED bulbs work plug-and-play on the Sport Glide Softail platform.
- Polarity: Flip LED bulbs 180 degrees if they do not illuminate.
- Error Codes: CAN bus may log lighting faults for un-resisted LED retrofits. These clear after cycling ignition with proper resistors installed.
Step 10 — Final Verification
- Confirm all lens covers are fully seated and weather sealed.
- Check all fasteners are tightened to specification.
- Verify no tools are left on or near the motorcycle.
- Take a short test ride to confirm proper lighting performance in real conditions.
Tips & Warnings Table
| Category | Detail |
|---|---|
| ⚠️ WARNING | The Sport Glide headlight is a sealed LED unit — there is no bulb to replace. Replace the entire unit if the LED fails. |
| 🔧 TIP | Keep spare 1157NA and 1157 bulbs handy. A $3 bulb replacement is much better than riding at night with no brake light. |
| 💡 TIP | When using LED turn signals, wire load equalizers in parallel directly at the turn signal connector for cleanest CAN bus simulation. |
| ⚠️ WARNING | CAN bus fault codes may appear for LED installations without proper load resistors. These will not clear until proper resistance is present. |
| 🔧 TIP | Apply dielectric grease to all bulb contacts. Essential for the Sport Glide given its dual touring/sport use exposes lights to moisture and vibration. |
Common Mistakes to Avoid
| Mistake | Consequence | Prevention |
|---|---|---|
| Trying to replace a "headlight bulb" on a sealed LED | Wasted time; no bulb exists | Accept sealed unit; replace entire headlight if needed |
| Using 1156 single-filament in dual-filament position | Running light or brake light will not function | Use 1157 dual-contact for turn/brake positions |
| Forgetting load equalizers with LED turn signals | Hyper-flashing; dash warnings; ride failure | Install CAN bus load equalizers at signal wiring |
| Touching halogen bulb glass with bare fingers | Early bulb failure | Always wear nitrile gloves |
| Overtightening tail light screws | Cracked lens housing | Torque to 15-25 in-lbs only |
| Skipping final light test | Defective bulb discovered only when needed | Always test all lights before riding |
Proper Disposal
- Halogen bulbs: Safe for regular household trash. Wrap in paper before discarding.
- LED headlight assemblies: Take to electronics recycling center or Harley-Davidson dealer — contains driver circuitry.
- Burnt-out bulbs: Auto parts stores typically accept them for recycling at no cost.
Verification Checklist
- [ ] Headlight LED illuminates (sealed factory unit)
- [ ] Front left turn signal flashes amber
- [ ] Front right turn signal flashes amber
- [ ] Rear left turn signal flashes amber
- [ ] Rear right turn signal flashes amber
- [ ] Tail light shows dim running glow
- [ ] Brake light brightens on front brake lever
- [ ] Brake light brightens on rear brake pedal
- [ ] License plate light is illuminated
- [ ] All lens covers seated and sealed
- [ ] All fasteners torqued to specification
- [ ] No tools left on or near motorcycle
- [ ] CAN bus fault codes cleared (if applicable)
Guide created for the Harley-Davidson Sport Glide FLSB with Milwaukee-Eight 107 engine. Always refer to the official Harley-Davidson Service Manual for the latest specifications and torque values.
Parts for this job
Fits FLSB, FLS, FL — from our catalogue of 41,000+ aftermarket parts.
 Stock Style Tail Lamp Replacement Lens Clear$7.02
 Tail Lamp Lens Plastic Clear Top$10.64
 12 Volt Bulb$12.02
 Spring Fork Spotlamp Bulb 12 Volt$12.02
 Tail Lamp Stock Type Red Plastic Lens$12.80
 Spring Fork Spotlamp Bulb 6 Volt$12.80
 Tail Lamp Lens Plastic Red$12.80
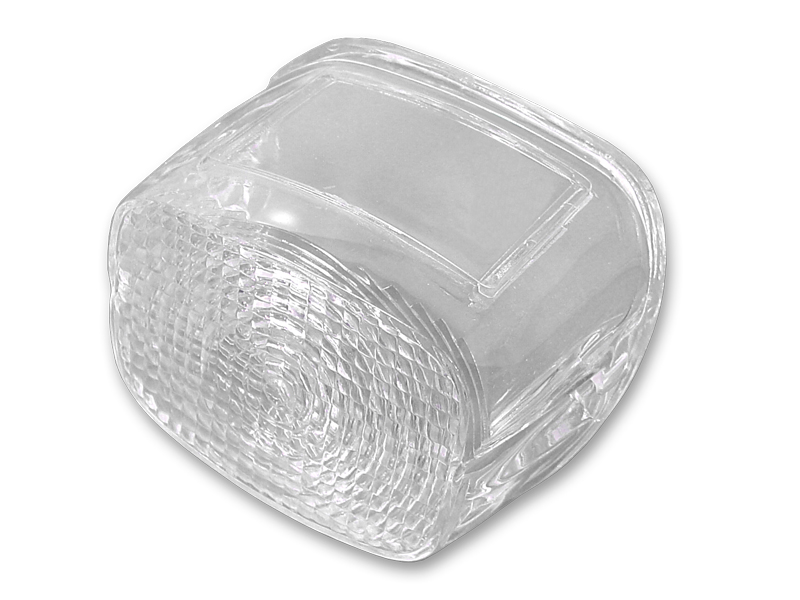 *UPDATE Tail Lamp Lens Stock Clear$12.94
 *UPDATE Tail Lamp Plastic Clear Lens$12.94
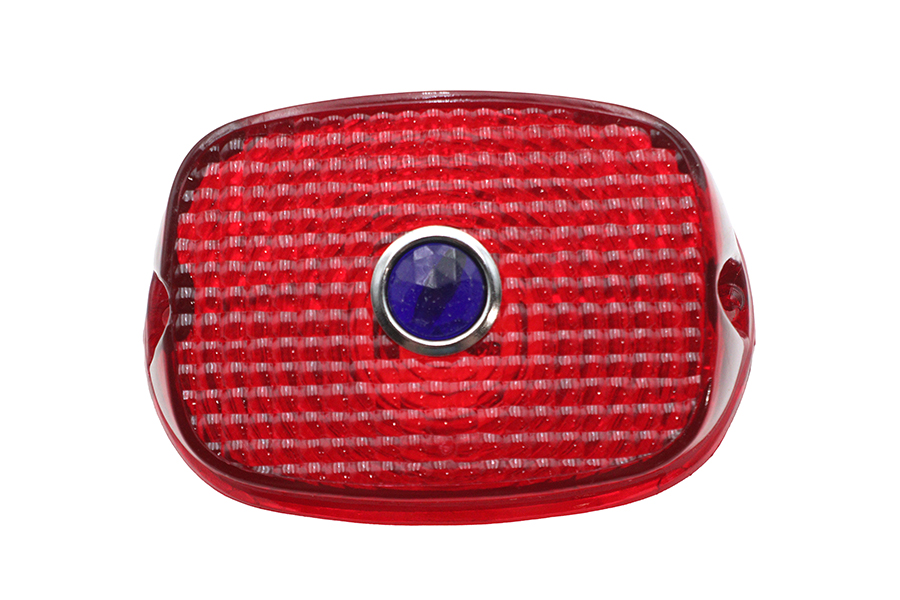 Tail Lamp Lens Red with Blue Dot$17.12
 6 Volt Bulb$19.31
 Tail Lamp Blue Dot Red Plastic Lens$21.44