How to Replace Light Bulbs on a 2026 Harley-Davidson Low Rider S (FXLRS — M8 114)
Light Bulb Replacement Guide: 2026 Harley-Davidson Low Rider S (FXLRS — M8 114)
This guide covers every exterior light bulb position on the 2026 Harley-Davidson Low Rider S (FXLRS), the stripped-down performance Softail powered by the Milwaukee-Eight 114 engine. The Low Rider S uses traditional replaceable halogen bulbs throughout — no sealed LED assemblies. The headlight uses an H4 halogen bulb (dual beam), all front turn signals use 1157NA amber bulbs, all rear turn signals use 1157 amber bulbs, and the combined tail/brake/running light uses a 1157 dual-filament bulb. This is the standard Softail lighting architecture, making the Low Rider S straightforward and cost-effective to maintain, with bulbs available at any auto parts store.
Quick Reference Bulb Table
| Position | Bulb Type | Wattage | OEM Part Number | LED Upgrade Option |
|---|---|---|---|---|
| Headlight (Low/High Beam) | H4 12V Halogen (dual filament) | 60/55W | HARLEY-DAVIDSON 68168-08 (or H4-generic) | H4 LED conversion bulbs (see OEM & Alternatives section) |
| Front Left Turn Signal | 1157NA (Amber) | 32/3 CP | HARLEY-DAVIDSON 68130-88T | 1157NA LED replacement bulbs |
| Front Right Turn Signal | 1157NA (Amber) | 32/3 CP | HARLEY-DAVIDSON 68130-88T | 1157NA LED replacement bulbs |
| Rear Left Turn Signal | 1157NA (Amber) | 32/3 CP | HARLEY-DAVIDSON 68130-88T | 1157NA LED replacement bulbs |
| Rear Right Turn Signal | 1157NA (Amber) | 32/3 CP | HARLEY-DAVIDSON 68130-88T | 1157NA LED replacement bulbs |
| Tail / Brake Light | 1157 (Dual Filament) | 29/8.3W | HARLEY-DAVIDSON 68165-85 | 1157 LED replacement bulbs |
| Running Lights (Tail) | 1157 low filament | 8.3W | Same as tail/brake bulb | 1157 LED replacement (same bulb) |
| License Plate Light | 1157 low filament spill / integrated | — | No separate bulb on Low Rider S | N/A — illumination provided by tail light assembly |
Important Note: The 2026 Low Rider S uses replaceable halogen bulbs at every exterior lighting position. Every bulb listed above can be swapped individually without replacing an entire assembly. This is distinctly different from the LED-only Sportster S platform and is consistent with the broader Softail lineup.
Difficulty & Time Estimate
- Difficulty Level: Beginner to Intermediate (1 to 3 out of 5)
- Estimated Time:
- Turn signal bulb: 10-15 minutes per side
- Tail/brake bulb: 15-25 minutes
- Headlight bulb (H4): 20-35 minutes
- Best Done: In a well-lit area with the bike on a stand or level surface, wheels blocked
Complete Tool List
| Tool | Size or Type | Purpose |
|---|---|---|
| Torx socket / driver | T-25, T-27 | Remove headlight bezel ring and mounting hardware |
| Torx socket / driver | T-27 | Tail light mounting fastener, seat bolt |
| Hex wrench set | Imperial (3/32", 1/8", 5/32") | Turn signal bezel and lens screws |
| Flathead screwdriver | Small (1/8") | Pry clips, disconnect electrical connector retainers |
| Needle-nose pliers | Standard | Handling small clips, bulb positioning |
| Socket wrench | 3/8" drive, 7/16" socket | Turn signal bracket and mounting nuts |
| Torque wrench | ft-lb and in-lb range | Re-torque all fasteners to specification |
| Clean microfiber cloth | Any | Clean headlight reflector interior and lens surfaces |
| Cotton or nitrile gloves | Clean | Handle halogen bulbs without contaminating glass |
| Dielectric grease | Tub or squeeze tube | Coat electrical connections to prevent corrosion |
| Compressed air | Canned | Blow debris from headlight and tail light housings before reassembly |
| Rubber gripper glove | Any type | Grip stubborn tail light lens without scratching chrome |
OEM Part Numbers & Aftermarket Alternatives
| Position | OEM Part | Aftermarket LED / Halogen | Notes |
|---|---|---|---|
| Headlight (H4) | Harley-Davidson 68168-08 | Philips H4 12V 60/55W (OEM-equivalent halogen), Sylvania H4 SilverStar, Auxbeam H4 LED, Hitosino H4 LED 6000K | H4 bulbs are universal — any H4 12V dual-beam bulb fits the Low Rider S headlight shell. LED upgrades require checking for CANbus compatibility and may require beam re-aiming. |
| Front Turn Signals (1157NA) | Harley-Davidson 68130-88T | Sylvania 4157NA Amber, Philips 3157NALL, Diode Dynamics 3157NA LED, VLEDS 1157NA Amber | 1157NA and 3157NA are cross-compatible. Amber lenses pair with amber bulbs for legal compliance. |
| Rear Turn Signals (1157NA) | Harley-Davidson 68130-88T | Sylvania 4157NA Amber, Diode Dynamics 3157NA LED, JDM ASTAR 1157NA LED, Auxbeam 1157NA | Same bulb as front. LED upgrade may require load equalizer to prevent hyperflash on the Softail flasher module. |
| Tail / Brake / Running (1157) | Harley-Davidson 68165-85 | Sylvania 1157 Long Life, Philips 1157 Standard, Diode Dynamics 1157 LED Red, Auxbeam 1157 LED | 1157 is a dual-filament bulb: low filament (8.3W) = running/tail light, high filament (29W) = brake light. Single bulb handles all three functions. |
Note: The Low Rider S M8 114 uses a traditional 12V electrical system with standard automotive-style bayonet and plug-in bulb bases. Any quality H4 headlight bulb, 1157NA turn signal bulb, or 1157 tail/brake bulb from any reputable brand will work. When upgrading to LED, note that LED bulbs draw significantly less current than halogen — this may cause the Softail's flasher module to hyperflash. This is resolved by installing an LED-compatible flasher relay or adding load-equalizer resistors inline.
Step-by-Step Instructions
Headlight (H4 Halogen — Dual Beam)
The Low Rider S uses a single H4 halogen bulb housed in a blacked-out round headlight shell. The H4 bulb provides both low beam (55W) and high beam (60W) through a single dual-filament capsule. Wear clean gloves when handling the new bulb — skin oils deposited on the glass create hot spots that dramatically shorten bulb life.
Step 1: Turn the ignition OFF and position the bike on level ground. Use a motorcycle stand or have someone hold the bike steady. The engine should be off and the headlight completely cool before beginning.
Step 2: Disconnect the battery's negative terminal for safety. Remove the rider's seat by loosening the center seat bolt (T-27 Torx) and sliding the seat upward and rearward. The battery is located under the seat on the Low Rider S.
Step 3: Disconnect the negative battery cable using a 10mm wrench. Set the cable aside where it cannot accidentally contact the battery terminal.
Step 4: Locate the headlight chrome bezel ring. The Low Rider S headlight shell is secured by a bezel ring with three screws visible around the perimeter — these are T-25 or T-27 Torx fasteners.
Step 5: Remove the lower screw first (this prevents the bezel and lens from dropping), then remove the two upper screws. Keep all three screws in a safe place. Support the bezel ring and lens as you remove the final upper screw.
Step 6: Carefully swing the bezel ring and headlight lens forward and set it on a clean, soft surface — lens facing up. Inspect the rubber gasket around the lens; replace if cracked or compressed.
Step 7: Locate the wire retaining clip inside the headlight shell. This is a single spring-loaded clip at the rear of the bulb base. Squeeze the clip's ends together and swing it upward to release the H4 bulb.
Step 8: The bulb will be loose — catch it gently, then disconnect the three-prong electrical connector from the rear of the bulb. Press the connector's locking latch and pull straight back.
Step 9: Remove and set aside the old H4 bulb. Put on clean cotton or nitrile gloves before handling the new bulb. If you accidentally touch the glass with bare fingers, wipe it thoroughly with isopropyl alcohol and let it dry before installing.
Step 10: Connect the new H4 bulb to the electrical connector. Ensure all three prongs are fully seated and the connector's latch clicks into place.
Step 11: Insert the bulb into the headlight shell, aligning the guide tabs on the bulb base with the notches in the shell. The H4 bulb has a specific orientation — the three electrical prongs should be positioned at approximately the 12 o'clock, 4 o'clock, and 8 o'clock positions when properly seated. If the bulb resists, rotate it slightly — do not force it.
Step 12: Reinstall the wire retaining clip over the bulb base and press it firmly down into the locked position. Verify the bulb is held securely and cannot wobble or shift.
Step 13: Clean the inside of the headlight shell and the lens thoroughly with compressed air and a microfiber cloth. Any dust, fingerprints, or debris inside will cast shadows with the new bulb.
Step 14: Reinstall the headlight lens and bezel ring into the shell, ensuring the rubber gasket seats evenly all the way around.
Step 15: Install the three Torx screws. Start all three by hand to confirm proper thread engagement, then tighten evenly in a star pattern. Tighten to approximately 15-20 in-lbs — snug but do not over-torque. Over-tightening can crack the lens or distort the bezel.
Step 16: Reconnect the battery negative terminal and tighten securely.
Step 17: Turn the ignition ON and test: - Verify low beam illuminates immediately - Toggle the high/low beam switch — verify high beam engages - Verify both beams produce clear, even light patterns
Step 18: Reinstall the rider's seat and secure the center bolt.
Step 19: Perform headlight beam alignment (see procedure below).
Front Turn Signals (1157NA — Dual Contact Bayonet)
The Low Rider S front turn signals are mounted on the handlebar clamp area. Each signal housing accepts a 1157NA amber bayonet bulb accessed through the front lens.
Step 1: Turn the ignition OFF.
Step 2: Locate the front turn signal housing. The lens is held by a combination of a rubber grommet friction fit and, on some model years, a small retention screw (3/32" hex). If a screw is present, remove it first. Otherwise, gently pull the lens straight out from the housing.
Step 3: With the lens removed, you will see the amber 1157NA bulb seated in the socket. Push the bulb gently inward and rotate counterclockwise approximately 1/4 turn to unlock it from the bayonet socket.
Step 4: Remove the old 1157NA bulb. Note the position of the offset alignment pins on the base — these ensure the bulb installs only in the correct orientation.
Step 5: Inspect the socket contacts for corrosion, green oxidation, or bent terminals. Clean any buildup with a small flathead screwdriver or contact cleaner and a soft brush. This step is important — many "bad bulb" diagnostics turn out to be dirty socket contacts.
Step 6: Install the new amber 1157NA bulb by aligning the offset pins with the socket slots, pressing in gently, and rotating clockwise approximately 1/4 turn until it stops and locks.
Step 7: Inspect the lens for cracks, cloudiness, or UV damage. Clean the lens with a damp microfiber cloth. Check the rubber grommet for brittleness or cracking — replace if necessary to maintain a weather seal.
Step 8: Reinstall the lens cover, pressing evenly around the perimeter until it seats fully. If a retention screw was removed, reinstall and snug it gently.
Step 9: Repeat Steps 2-8 for the opposite front turn signal.
Step 10: Turn the ignition ON and test: - Activate the left turn signal — verify amber flash on the left front - Activate the right turn signal — verify amber flash on the right front - Verify the flash rate is normal (approximately 60-120 flashes per minute) - If hyperflash is present with LED bulbs, install an LED-compatible flasher relay (HD P/N 69087-96A) or add inline load-equalizer resistors
Rear Turn Signals (1157NA)
The Low Rider S rear turn signals are mounted on the rear fender struts, consistent with the Softail platform. They use the same 1157NA amber bayonet bulb as the front signals.
Step 1: Turn the ignition OFF.
Step 2: Locate the rear turn signal housing on the fender side you are servicing. The lens is a screw-in unit — turn it counterclockwise to remove it from the housing body.
Step 3: Once the lens is off, reach into the housing and locate the bulb base. Push the bulb gently inward and rotate counterclockwise approximately 1/4 turn to unlock it (bayonet release).
Step 4: Remove the old 1157NA bulb.
Step 5: Inspect the socket contacts for corrosion, oxidation, or bent terminals. Clean with contact cleaner and a small brush if needed.
Step 6: Install the new amber 1157NA bulb by aligning the offset pins, pressing in gently, and rotating clockwise to lock.
Step 7: Inspect the rubber gasket inside the lens. If it is dried out, cracked, or missing, replace it to prevent water intrusion into the housing.
Step 8: Reinstall the lens by threading it clockwise into the housing. Hand-tighten only — do not use tools to overtighten the plastic lens threads. Snug plus a slight additional turn is sufficient.
Step 9: Repeat for the opposite rear turn signal.
Step 10: Turn the ignition ON and test both rear turn signals. Verify amber flash on each side and normal flash rate.
Tail / Brake / Running Light (1157 — Dual Filament)
The Low Rider S tail light is a round unit mounted on the left side of the rear fender strut. A single 1157 dual-filament bulb inside provides three functions: dim running/tail light (8.3W low filament), bright brake light (29W high filament), and license plate illumination via light spill from the tail housing.
Step 1: Turn the ignition OFF.
Step 2: Remove the rear/riding seat to gain access above the tail light area. The Low Rider S rider seat is held by a single T-27 Torx bolt at the rear center. Loosen and remove the bolt, then lift the seat straight up and off the bike.
Step 3: From above the tail light, or from the side depending on access, locate the tail light lens. Unscrew the lens by turning it counterclockwise. If it is stubborn from weather sealing, use a rubber gripper glove for grip — do not use pliers directly on the chrome or plastic.
Step 4: Remove the old 1157 bulb by pushing in gently and rotating counterclockwise (bayonet mount, approximately 1/4 turn).
Step 5: Inspect the socket contacts carefully. Look for green corrosion, bent contacts, or debris. This is the most common cause of tail light failure on Softail models — not the bulb itself. If contacts look dirty, clean them with contact cleaner and a small flathead screwdriver. Straighten any bent contacts gently with needle-nose pliers.
Step 6: Clean the inside of the tail light housing with compressed air. Check for moisture or debris; if the housing has internal condensation, dry it thoroughly before proceeding.
Step 7: Install the new 1157 bulb by aligning the offset pins with the socket slots, pressing in gently, and rotating clockwise to lock. The 1157 bulb can seat in two rotations 90° apart — one orientation makes the tail filament active and the other makes the brake filament active. If only one function works after installation, remove the bulb, rotate it 90°, and re-seat.
Step 8: Inspect the lens rubber gasket. Replace if it is cracked, compressed, or brittle.
Step 9: Reinstall the tail light lens by turning clockwise. Hand-tighten snug — do not over-torque.
Step 10: Reinstall the rider's seat and secure the T-27 Torx bolt to approximately 6-8 ft-lbs.
Step 11: Test all functions with the ignition ON: - Turn the ignition ON → tail light (low-intensity glow) should illuminate - Apply the front brake lever → tail light should brighten noticeably to brake intensity - Apply the rear brake pedal → same brake-light brightness - Release both brakes → light should return to the dim running-light level - Verify the brake warning indicator on the instrument cluster activates when either brake is applied
Headlight Beam Alignment
Alignment is required after any headlight bulb replacement, lens removal, bezel removal, or mounting hardware disturbance.
- Park the Low Rider S upright on level ground, exactly 25 feet from a flat wall or garage door. Use the side stand on level ground or have someone hold the motorcycle vertically upright.
- Load the bike as you normally ride it (saddlebags, rider weight). If alone, sit on the bike while measuring.
- Measure from the ground to the center of the H4 bulb (the center of the headlight opening). On the Low Rider S, this is typically about 27-29 inches, depending on suspension preload and rider weight.
- Using painter's tape or masking tape, draw a horizontal reference line on the wall at the measured center height. Draw a second horizontal line 2 inches below the center line.
- Mark the wall's vertical centerline aligned with the motorcycle's centerline. This verifies left-right beam alignment.
- With the low beam active, the top edge of the bright (cutoff) portion of the beam should hit at or slightly below the lower reference line (2 inches below center height).
- The beam hotspot should be centered on the motorcycle's vertical centerline.
- On the Low Rider S, adjust the beam using the adjustment screws accessible behind the headlight shell. There is typically a vertical adjustment screw (for up/down). Use the appropriate hex driver or Phillips screwdriver.
- Make small adjustments (1/4 turn at a time), then re-check the beam pattern on the wall.
- If equipped, tighten the adjustment locking nuts once the aim is satisfactory. Re-verify the beam after locking.
Tips, Warnings & Common Mistakes
Halogen Bulb Handling & Safety
| Topic | Details |
|---|---|
| Always wear gloves | Skin oils on halogen glass create hot spots that dramatically shorten bulb lifespan. Use clean cotton or nitrile gloves. Clean any contaminated bulb with isopropyl alcohol before installation. |
| Disconnect battery for headlight work | The Low Rider S headlight wiring can short if metal tools bridge the connector against the shell. Disconnect the negative terminal before working on the headlight housing. |
| Check both filaments on 1157 bulbs | The 1157 has two separate filaments (tail running light and brake). If one filament fails, the other may still function. Always verify both after replacement. |
| Inspect socket contacts before every replacement | Corroded or bent socket contacts account for more lighting failures than dead bulbs. Clean contacts with contact cleaner before installing any new bulb. |
| Replace turn signal bulbs in pairs | If one front or rear signal bulb fails, its mate is likely approaching end of life. Replace both left/right together for consistent flash brightness and timing. |
| Use dielectric grease | Apply to all electrical connectors before reassembly, especially on the Low Rider S rear harness which is exposed to road spray. |
LED Upgrade Considerations
| Consideration | Detail |
|---|---|
| Hyperflash with LED turn signals | LED bulbs draw less current than halogen, causing the standard Softail flasher relay to interpret it as a burned-out bulb. Fix: Install an LED-compatible flasher relay (HD P/N 69087-96A) or add load-equalizer resistors inline. |
| Headlight LED polarity matters | H4 LED conversion bulbs are polarity-sensitive. If the bulb doesn't light, disconnect it, flip the connector 180 degrees, and try again. |
| Color temperature consistency | Mixing 3200K halogen with 6000K LED bulbs across lighting positions creates an uneven visual appearance. Match all positions if converting the entire system to LED. |
| DOT/FMVSS 108 compliance | Ensure any LED upgrade bulbs are DOT certified for road-legal use in your jurisdiction. |
| Headlight beam pattern after LED conversion | LED H4 bulbs may produce a different cutoff pattern compared to halogen. Always re-align the headlight beam after LED headlight conversion and verify the sharp cutoff on a wall test. |
| Running light function with LED 1157 | When using LED 1157 replacement bulbs in the tail/brake, verify both the dim (running) and bright (brake) states are visible and properly differentiated in brightness. |
Wiring & Electrical Safety for the M8 114 Softail
| Tip | Detail |
|---|---|
| Check ground connections | The Low Rider S tail light grounds through a dedicated chassis ground wire. A corroded or loose ground point causes dim or intermittent tail/brake light. The ground point is typically located on the frame near the rear fender mount — clean it if symptoms appear. |
| M8 114 charging capacity | The Milwaukee-Eight 114 has a robust alternator (approximately 40A output). Even with full LED lighting upgrades, the Softail's electrical system has more than adequate capacity — no voltage regulator or stator upgrades are required. |
| Verify connector seating | After any bulb replacement, ensure all electrical connectors are fully seated with the locking latch engaged. A partially connected plug can cause intermittent flickering. |
Common Mistakes to Avoid
| Mistake | Consequence | Prevention |
|---|---|---|
| Touching halogen bulb glass with bare fingers | Premature hot-spot failure, often within weeks | Always wear clean cotton or nitrile gloves; clean accidental contact with isopropyl alcohol |
| Forcing the bayonet bulb mount | Broken socket, bent contacts, housing damage | Align offset pins visually; push-in and rotate gently — never apply excessive force |
| Over-tightening headlight bezel screws | Cracked lens, stripped headlight threads | Tighten to 15-20 in-lbs maximum — hand-snug plus light wrench finish |
| Ignoring hyperflash after LED signal upgrade | Annoying rapid flash, potential inspection failure | Install HD flasher relay 69087-96A or load-equalizer resistors before closing up |
| Not cleaning socket contacts before bulb install | Intermittent operation, repeat "bulb failures" | Visually inspect and clean socket contacts with contact cleaner every time |
| Installing 1157 tail bulb at wrong 90° rotation | Only running or only brake function works — not both | If one function is missing, rotate the bulb 90° and re-seat |
| Skipping headlight alignment after any lens/bulb removal | Blinded oncoming traffic or reduced rider night visibility | Always verify beam aim at 25 feet on level ground after headlight service |
| Reusing cracked or weathered rubber gaskets and grommets | Water intrusion, bulb and socket corrosion | Replace all rubber seals showing cracks, tears, brittleness, or permanent deformation |
| Testing tail/brake with only one brake input | One brake circuit may fail to activate the light | Test with both front lever and rear pedal after every tail/brake bulb replacement |
| Leaving tools, screws, or debris in headlight shell | Reflector damage, short circuit when powered on | Count all tools and screws before and after; use compressed air as a final check |
| Installing aftermarket non-DOT headlight bulbs | Failed vehicle inspection, potential traffic citation | Only use DOT/FMVSS 108-certified replacement bulbs |
Verification Notes for 2026 Model Year
The 2026 Harley-Davidson Low Rider S (FXLRS) continues the Softail platform with the Milwaukee-Eight 114 engine and retains the traditional halogen bulb lighting architecture across all exterior positions. Confirm the following against your owner's manual or a Harley-Davidson dealer:
| Item | Specification | Notes |
|---|---|---|
| Headlight | H4 12V halogen, dual-beam, 60/55W | Universal H4 bulb — HD P/N 68168-08 or any standard automotive H4 |
| Front turn signals | 1157NA amber, dual-contact bayonet | Replace individual bulbs — amber lens pairs with amber bulb for legal compliance |
| Rear turn signals | 1157NA amber, dual-contact bayonet | Cross-compatible with 3157NA bayonet bulbs |
| Tail / brake / running light | 1157 dual-filament, 29W/8.3W | Single bulb handles all three functions; must be oriented correctly for both filaments to engage |
| License plate illumination | No separate bulb — provided by tail light housing spill | N/A |
| Electrical system | 12V DC, ~40A alternator | Ample capacity for full LED upgrades with compatible flasher relay |
| Bulb availability | Universal automotive standard | Widely available at any auto parts store — no dealership visit required for replacements |
Because the Low Rider S uses standard, universally available halogen bulbs, it is strongly recommended to carry a spare H4 headlight bulb and a spare 1157/1157NA bulb in your riding toolkit or saddlebag. These cost just a few dollars each and can prevent a ride-ending failure on the road.
Note on LED upgrades: While the Low Rider S ships from the factory with halogen bulbs, many owners choose to upgrade to LED for improved brightness, longer lifespan, and lower electrical draw. The Softail M8 platform fully supports LED conversion with a compatible LED flasher relay (Harley-Davidson P/N 69087-96A) and quality LED bulbs designed for motorcycle-duty vibration resistance. Always verify beam aim and flash rate after any LED conversion.
To verify all specifications for your specific VIN, consult your 2026 Low Rider S owner's manual included with the motorcycle, or access it digitally through the Harley-Davidson mobile app.
This guide was prepared using Harley-Davidson OEM specifications and the known traditional halogen bulb architecture of the Low Rider S (FXLRS) Softail platform. The Low Rider S is one of the most owner-friendly motorcycles for lighting maintenance, using universal automotive-standard bulbs that are inexpensive and widely available. Always verify against your specific owner's manual before performing maintenance.
Parts for this job
Fits FXLRS, FXLR, FX — from our catalogue of 41,000+ aftermarket parts.
 Stock Style Tail Lamp Replacement Lens Clear$7.02
 Tail Lamp Stock Type Red Plastic Lens$12.80
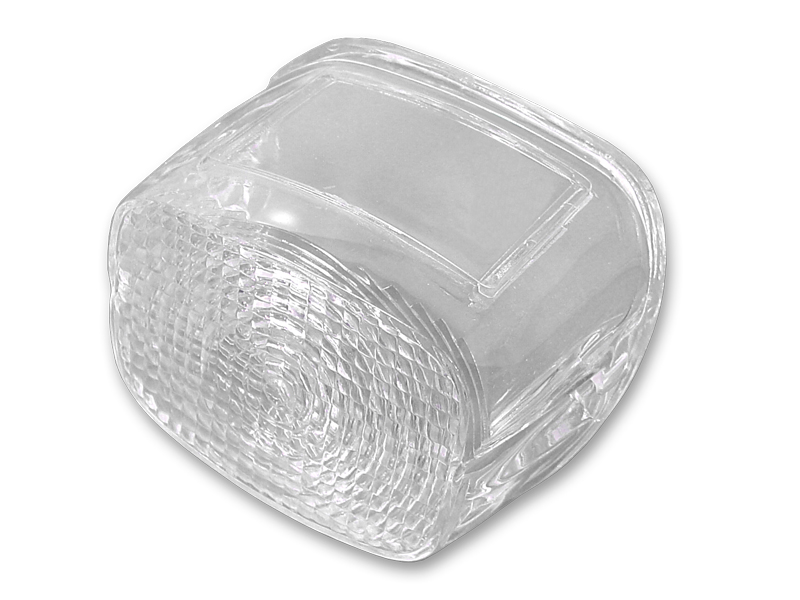 *UPDATE Tail Lamp Lens Stock Clear$12.94
 *UPDATE Tail Lamp Plastic Clear Lens$12.94
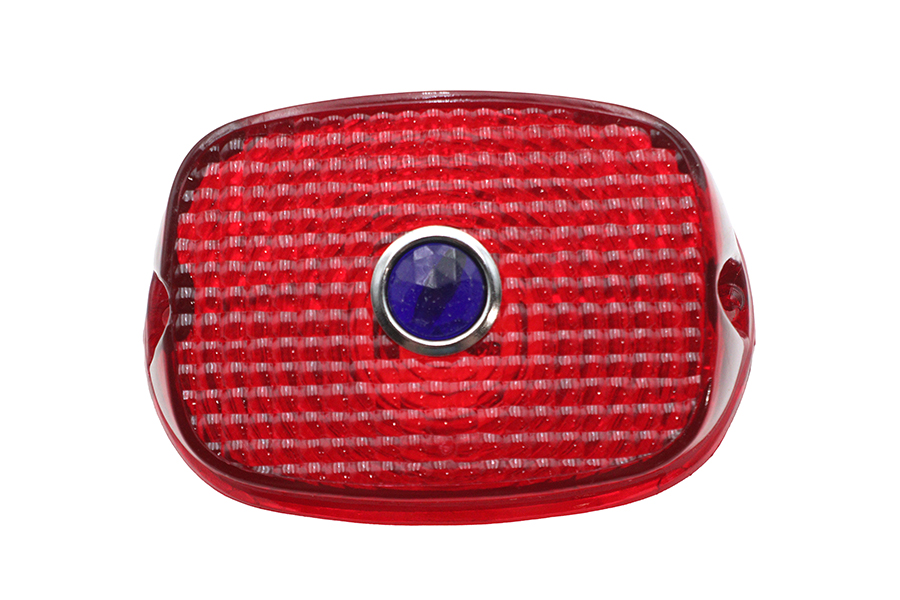 Tail Lamp Lens Red with Blue Dot$17.12
 Tail Lamp Blue Dot Red Plastic Lens$21.44
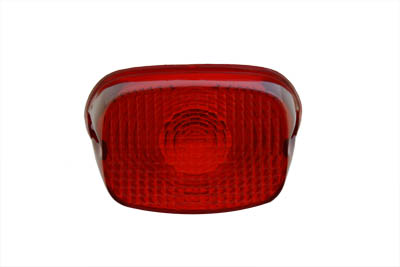 Tail Lamp Lens Stock Red$22.24
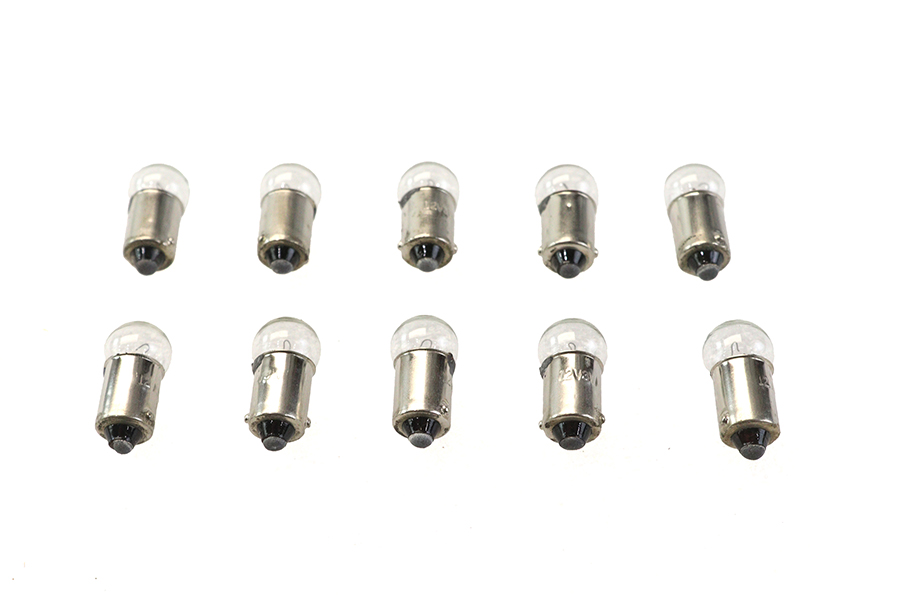 Mini 12 Volt Bulb For Turn Signal and Indicator$26.15
 Lens and Rim Kit For Stock Tail Lamp$32.51
 Replica Tail Lamp Lens Glass Red$48.24
 Replica 5-3/4" Round Chrome Headlamp$67.68
 Replica 5-3/4" Round Black Headlamp$73.48