How to Replace Light Bulbs on a 2026 Harley-Davidson Heritage Classic (FLHC — M8 114 / 117)
Light Bulb Replacement Guide: 2026 Harley-Davidson Heritage Classic (FLHC — Milwaukee-Eight 114 / 117)
This guide covers every exterior light bulb position on the 2026 Harley-Davidson Heritage Classic (FLHC), including the headlight assembly, front and rear turn signals, tail/brake light, and running lights. The Heritage Classic sits on the Softail platform with the Milwaukee-Eight 114 or 117 engine and features a combination of a factory LED Daymaker headlight and traditional replaceable incandescent bulbs for the turn signals and tail/brake assemblies. The detachable windshield (quick-detach) is addressed where relevant during headlight access procedures.
Quick Reference Bulb Table
| Position | Bulb Type | Wattage | OEM Part Number | LED Upgrade Option |
|---|---|---|---|---|
| Headlight (Low/High Beam) | H13 LED Daymaker (factory sealed LED — not replaceable) | — | Harley-Davidson 62900301 | Upgrade to aftermarket Daymaker-style units (e.g., J.W. Speaker 8700 Evolution) |
| Front Left Turn Signal | 1157NA (amber glass, dual filament) | 28.3W / 8.3W | Harley-Davidson 68166-99B (bulb) | Sylvania ZEVO 1157NA LED |
| Front Right Turn Signal | 1157NA (amber glass, dual filament) | 28.3W / 8.3W | Harley-Davidson 68166-99B (bulb) | Sylvania ZEVO 1157NA LED |
| Rear Left Turn Signal | 1157NA (amber glass, dual filament) | 28.3W / 8.3W | Harley-Davidson 68166-99B (bulb) | Sylvania ZEVO 1157NA LED |
| Rear Right Turn Signal | 1157NA (amber glass, dual filament) | 28.3W / 8.3W | Harley-Davidson 68166-99B (bulb) | Sylvania ZEVO 1157NA LED |
| Tail / Brake Light | 1157 (clear, dual filament) | 28.3W / 8.3W | Harley-Davidson 68165-99B (bulb) | Sylvania ZEVO 1157 LED |
| Running Lights (front/rear) | Integrated (uses dual-filament 1157/1157NA — running light is the low-filament function) | — | — | Same LED upgrades above include running-light function |
| License Plate Light | See note | — | — | Integrated with tail light housing on Heritage Classic |
Note on the Headlight: The 2026 Heritage Classic comes from the factory with an H13-base LED Daymaker sealed unit. This is not a replaceable halogen bulb — if the headlight fails, the entire sealed LED assembly must be swapped out. The turn signals and tail/brake light, however, use traditional dual-filament incandescent bulbs (1157 and 1157NA) that you can replace individually.
Note on the 1157 / 1157NA Bulbs: The 1157NA is an amber-glass version of the 1157. Both have dual filaments: high-filament for turn/brake and low-filament for running lights. Always use an amber 1157NA for turn signals — clear 1157 bulbs can be used only in housings with amber lenses. The rear tail/brake housing uses clear 1157 bulbs behind a red lens.
Difficulty & Time Estimate
- Difficulty Level: Easy to Intermediate (1 to 3 out of 5)
- Estimated Time:
- Front turn signal bulb: 5-10 minutes per side
- Rear turn signal bulb: 10-15 minutes per side
- Tail / brake bulb: 15-20 minutes
- Headlight assembly: 30-45 minutes
- Best Done: In a well-lit area with the bike on a stand or level surface, engine cool
Complete Tool List
| Tool | Size or Type | Purpose |
|---|---|---|
| Phillips screwdriver | #2 | Remove front turn signal bucket covers, tail light lens screws |
| Flathead screwdriver | Small | Gently prying retaining clips and bulb socket twists |
| Socket wrench | 5/16 in., 3/8 in. | Headlight mounting ring nuts, fender nuts for rear signals |
| Open-end wrench | 5/16 in., 9/16 in. | Headlight ring adjustment, rear signal bracket bolts |
| Torx socket / driver | T-25, T-27 | Tail light housing fasteners, headlight ring mounting screws |
| Ratchet extension | 3 in. to 6 in. | Rear turn signal access under fender |
| Needle-nose pliers | Standard | Handling small retaining clips on light housings |
| Clean microfiber cloth | Any | Wiping headlight lens and housing surfaces |
| Gloves | Nitrile | Clean handling of LED assemblies and bulbs |
| Dielectric grease | Tub or squeeze tube | Coat electrical connections to prevent corrosion |
| Contact cleaner spray | Electrical-grade | Clean corroded bulb socket contacts |
| Torque wrench | ft-lb and in-lb range | Re-torque headlight and housing fasteners to spec |
OEM Part Numbers & Aftermarket Alternatives
| Position | OEM Part | Aftermarket LED Alternative | Notes |
|---|---|---|---|
| Headlight Assembly (H13 LED Daymaker) | Harley-Davidson 62900301 | J.W. Speaker Evolite 8700 Evo, J.W. Speaker 8700 Evolution 2 | Match H13 connector and 7-inch round mounting pattern; ensure DOT compliance |
| Front Turn Signal Bulb | Harley-Davidson 68166-99B (1157NA) | Sylvania ZEVO 1157NA LED, AUXITO 1157NA LED | Amber glass required for amber housings |
| Rear Turn Signal Bulb | Harley-Davidson 68166-99B (1157NA) | Sylvania ZEVO 1157NA LED, Diode Dynamics 1157NA LED | Same as front — amber dual-filament |
| Tail / Brake Bulb | Harley-Davidson 68165-99B (1157) | Sylvania ZEVO 1157 LED, Diode Dynamics 1157 LED | Clear glass for red-lens housing |
| Headlight Mounting Screws | Harley-Davidson 48672-04 (3x) | Standard 1/4-20 × 3/4 in. bolts with nylon lock nut | Replace stripped or corrosion-damaged screws |
Note on LED Upgrades for the Heritage Classic: Unlike the Sportster S, the Heritage Classic's turn signals and tail/brake light use replaceable incandescent bulbs. You can upgrade to LED 1157 and 1157NA bulbs without modifying the housing. However, because the Heritage Classic's electrical system monitors load, switching to low-draw LEDs may trigger hyperflashing (rapid turn signal blink). If this occurs, check whether your 2026 model requires a load equalizer or a Module-to-Module (M-to-M) adapter to correct the flash rate. Most 2026 Softail models manage this electronically, but verify against your owner's manual.
Step-by-Step Instructions
Headlight (H13 LED Daymaker Sealed Assembly)
The Heritage Classic uses a 7-inch LED Daymaker headlight from the factory. The headlight is accessible from the front after the detachable windshield is removed. No bulb swap is possible — the entire LED headlight unit is replaced as one assembly.
Step 1: Turn the ignition OFF.
Step 2: Remove the detachable windshield. Release the quick-release knobs or clamps at the base of the windshield frame and lift the windshield straight up and away from the bike. Set the windshield aside on a soft surface to avoid scratching.
Step 3: Disconnect the battery's negative terminal for safety. The battery is located under the seat. Remove the seat by loosening the single mounting bolt (typically T-40 Torx or 5/16 in. hex, depending on seat style) and lift the seat off. Disconnect the negative cable first. Reconnect the seat temporarily or set it safely aside.
Step 4: Locate the headlight mounting ring. Three screws (or three nuts on some variants) secure the outer chrome or black retaining ring to the headlight housing shell. Use a T-25 Torx driver or 5/16 in. socket to loosen and remove these fasteners.
Step 5: Carefully remove the retaining ring. Behind it, you will see the headlight assembly held by additional screws or a tension ring. Loosen these to release the headlight.
Step 6: Gently tilt the headlight forward and disconnect the H13 electrical connector from the rear of the sealed LED unit. The connector has three pins and may have a locking tab — press and release before pulling.
Step 7: Inspect the headlight bucket and shroud inside for any debris, moisture, or corrosion. Clean with contact cleaner if necessary and dry thoroughly.
Step 8: Transfer any included mounting brackets, rubber grommets, or heat shield spacers from the old headlight to the replacement Daymaker unit.
Step 9: Position the new H13 LED Daymaker assembly into the bucket and connect the H13 connector to the bike's wiring harness. Ensure the connector clicks into place.
Step 10: Align the headlight assembly and reinstall the retaining ring with its fasteners. Tighten evenly in a crossing pattern to avoid distorting the lens.
Step 11: Reconnect the battery negative terminal.
Step 12: Reinstall the rider's seat and secure the mounting bolt to the manufacturer's torque specification (typically 8-12 ft-lb for seat hardware — confirm in your owner's manual).
Step 13: Test the headlight: turn ignition ON and verify low beam. Toggle the high beam switch and verify functionality.
Step 14: Check beam alignment (see the Headlight Alignment section in Tips below). Adjust the vertical and horizontal aiming screws on the headlight bucket bracket as needed.
Step 15: If a detachable windshield was equipped, reinstall it after headlight replacement by sliding the mounting posts into the nacelle clamps and tightening the quick-release knobs.
Front Turn Signals (1157NA Bulbs)
The Heritage Classic front turn signals are mounted to the fork brackets or nacelle area, depending on trim level. Each uses a standard 1157NA dual-filament amber bulb that twists into a socket.
Step 1: Turn the ignition OFF.
Step 2: Access the front turn signal housing. For Heritage Classic front signals, the lens cover is typically held by two or three Phillips screws on the face or rear of the signal bucket. Remove these screws with a #2 Phillips screwdriver.
Step 3: Gently pull the lens/bucket cover open or detach it from the housing. Be careful — the housing may be sealed with a rubber gasket. Remove the gasket carefully and set aside.
Step 4: Locate the 1157NA bulb. Push the bulb gently into the socket and turn it counter-clockwise (usually about a quarter-turn) to unlock and release.
Step 5: Pull the old bulb straight out. Dispose of it safely.
Step 6: If you are upgrading to LED, compare the new LED 1157NA bulb to the incandescent original to ensure the pin alignment and bulb body length are compatible with the socket depth.
Step 7: Insert the new 1157NA bulb into the socket, align the pins, and twist clockwise to lock. Do not overtighten — the glass is fragile.
Step 8: Inspect the housing gasket and socket contacts. Clean any corrosion from the contacts with electrical contact cleaner, apply a small dab of dielectric grease to the socket base, and reseat the gasket.
Step 9: Reinstall the lens cover and secure with the Phillips screws. Tighten snugly but do not over-torque — the plastic threads strip easily.
Step 10: Repeat for the opposite side.
Step 11: Test: turn ignition ON and activate each front turn signal. Verify amber flash at the front. If the flash rate is abnormally fast (hyperflash), see the LED Load Warning in the Tips section below.
Rear Turn Signals (1157NA Bulbs)
The Heritage Classic rear turn signals are mounted to the rear fender strut brackets. They also use 1157NA bulbs and follow a similar replacement procedure.
Step 1: Turn the ignition OFF.
Step 2: Access the rear turn signal. From the rear of the bike, locate the retaining clip or screw securing the signal housing to the fender bracket. Some Heritage Classic variants use a single retaining nut behind a chrome cap — pry the cap off gently with a flathead screwdriver, then remove the nut with a 3/8 in. socket.
Step 3: Pull the entire turn signal assembly outward from the fender bracket about 2 to 3 inches to expose the rear access plug.
Step 4: Remove the rear access plug (usually a rubber boot or plastic cap) to expose the bulb socket.
Step 5: Twist the bulb socket counter-clockwise and pull it out of the housing.
Step 6: Push the old 1157NA bulb into the socket, turn counter-clockwise, and remove.
Step 7: Insert the new 1157NA bulb, twist clockwise to lock, and verify the bulb sits flush and secure.
Step 8: Reinsert the socket into the housing and twist clockwise to lock. Press the rubber boot or plastic cap back into place.
Step 9: Slide the turn signal assembly back onto the fender bracket and reinstall the retaining nut or clip. Torque snugly — the fender strut threads are thin.
Step 10: Repeat for the opposite side.
Step 11: Test the rear turn signals: activate left and right and verify amber flash. If hyperflashing occurs with LED bulbs, see the LED Load Warning in the Tips section below.
Tail Light / Brake Light (1157 Bulb)
The Heritage Classic rear tail light uses a 1157 dual-filament bulb that serves both the running light (low filament) and brake light (high filament) functions. The red rear lens is fastened with two Phillips screws.
Step 1: Turn the ignition OFF.
Step 2: Locate the two Phillips screws on the face of the red tail light lens. Remove both screws with a #2 Phillips screwdriver. Set them in a safe place.
Step 3: Gently lift the red lens assembly straight up and away from the tail light housing. A rubber gasket seals the lens — it may stick slightly. Pry gently with a flathead screwdriver or plastic pry tool if needed.
Step 4: Inspect the interior of the tail light housing and the reflector for moisture, debris, or corrosion. Clean as needed.
Step 5: Locate the bulb socket for the 1157 bulb. Push into the socket and twist counter-clockwise to remove.
Step 6: Remove the old 1157 bulb the same way — push and twist counter-clockwise.
Step 7: Install the new 1157 bulb: align the offset pins (they are staggered to ensure correct orientation), press into the socket, and twist clockwise to lock.
Step 8: If upgrading to a ZEVO 1157 LED, verify that the LED heat sink clears the tail light housing and the lens sits flat on the housing. Some LED bulbs have large heat sinks that may require you to leave the lens slightly offset — if so, use a compatible low-profile LED instead.
Step 9: Inspect the rubber gasket on the lens. Replace if cracked or brittle, or apply a thin bead of silicone sealant (clear, automotive-grade) to restore the waterproof seal.
Step 10: Reinstall the red lens onto the housing and secure with the two Phillips screws. Tighten evenly to avoid cracking the lens.
Step 11: Test all tail light functions: - Ignition ON: the tail light should illuminate (dim mode — low filament) - Apply the front brake lever: the tail light should brighten (bright mode — high filament) - Apply the rear brake pedal: same bright illumination - Activate left turn signal: verify the appropriate side of the rear signal flashes (if shared, the 1157 may serve combined tail/brake/turn in some configurations) - If equipped with a separate rear running-light circuit, verify it illuminates with lights ON
Step 12: Verify no warning or lamp-out indicators appear on the Heritage Classic dashboard display.
Tips, Warnings & Common Mistakes
Headlight Alignment After LED Assembly Replacement
After replacing the H13 LED Daymaker headlight assembly, beam alignment is essential:
- Park the Heritage Classic upright on level ground, 25 feet from a flat wall or garage door. If you don't have a center stand, have a second person steady the bike or lean it against a wall with a block under the bottom triple clamp.
- Measure from the ground to the center of the LED headlight lens.
- Draw a horizontal reference line on the wall at the measured height. Draw a second parallel line 2 inches below it.
- With low beam active, the LED bright zone's top edge (the sharp cutoff line) should fall at or below the lower reference line.
- Adjust the vertical and horizontal aiming screws located on the headlight bucket bracket. The Heritage Classic Daymaker has a distinct flat cutoff — use it as your guide.
- Tighten the aiming screws and re-verify alignment.
LED Load Warning — Hyperflashing
If you replace the 1157NA or 1157 incandescent bulbs with LED equivalents, you may experience hyperflashing (the turn signal blinks at roughly twice the normal rate) because the LED draws significantly less current than an incandescent bulb, and the bike's flasher module interprets the lower load as a burnt-out bulb.
| Symptom | Cause | Fix |
|---|---|---|
| Rapid turn signal blink (hyperflash) | Lower current draw of LED bulbs detected by flasher module | Most 2026 Softail models self-regulate — verify in owner's manual. If hyperflash persists, install load-equalizer resistors or an M-to-M (Module-to-Module) turn signal adapter |
| Dashboard lamp-out warning | BCM detects open/low-load circuit | Install load equalizers rated for 3W-6W per circuit, or confirm with a dealer that your 2026 FLHC is equipped with load-compensating turn signal module |
Diagnostic Tips
- Turn signal not flashing on one side: Before replacing the bulb, check the socket contacts for green corrosion. Clean with electrical contact cleaner, apply dielectric grease, and retest. A corroded socket causes more failures than bad bulbs.
- Headlight does not illuminate at all: Verify the H13 connector is fully seated. Disconnect and reconnect it firmly. If the problem persists, check the headlight fuse (typically a 15A or 20A fuse in the main fuse box under the seat).
- Tail light dim but not bright on brake: The high-filament contact in the socket may be corroded. Clean the socket contacts with contact cleaner and a small brass brush.
- Moisture inside the tail light housing: This is common on Heritage Classics after heavy rain or car washes. Remove the lens, dry the housing thoroughly, replace the rubber gasket, and reseal with automotive silicone. Check the drain hole at the bottom of the fender strut for blockage.
Traditional Bulbs vs. LED Upgrades
| Feature | Traditional Incandescent | Heritage Classic (Aftermarket LED Upgrade) |
|---|---|---|
| Replaceable bulbs | Yes | Yes (LED 1157 / 1157NA replacements) |
| Cost per repair | $5-10 per bulb | $10-25 per LED bulb |
| Lifespan | 1,000-2,000 hours | 25,000-50,000 hours |
| Brightness | Standard | 2x-3x brighter (LED) |
| Replacement difficulty | Very easy — twist-in/twist-out | Same — plug-and-play for 1157 types |
| Power draw | 28.3W high / 8.3W low | 1.5W-3.5W per LED bulb |
| Color temperature | 2800K warm yellow | 5500K-6000K daylight white (amber NA for signals) |
| Potential issues | Filament burnout over time | Hyperflashing, heat sink clearance in tight housings |
Key Takeaway: The Heritage Classic is rider-friendly for bulb replacement. The 1157/1157NA bulbs are standard, inexpensive, and twist out of their sockets in seconds. Upgrading to LED bulbs is straightforward for the turn signals and rear tail/brake — you do not need to open any housings beyond the normal bulb access procedure.
Safety Reminders
- Never work on the headlight with the battery connected. The H13 connector carries high current and an accidental short can blow fuses or damage the BCM (body control module).
- Never touch the glass of a halogen bulb with bare fingers. (Not applicable to the factory LED headlight, but if you ever replace with a halogen H13, handle only by the metal base.)
- Always use amber 1157NA bulbs in amber housings. Using clear 1157 bulbs in amber housings will produce insufficient light output and may fail state DOT inspections.
- Use DOT-compliant LED replacements only. Non-compliant assemblies may fail inspection or blind oncoming traffic.
Common Mistakes to Avoid
| Mistake | Consequence | Prevention |
|---|---|---|
| Attempting to replace a bulb in the factory LED Daymaker headlight | Impossible — it's a sealed unit; you may damage the headlight or void warranty | Replace the entire H13 LED assembly if the headlight fails |
| Forcing the 1157 bulb into the socket at the wrong angle | Bent socket pins, damaged electrical contact | The 1157 bulb has offset pins — align them correctly before twisting |
| Overtightening the headlight retaining ring screws | Warped headlight bucket, cracked outer ring, stripped threads | Tighten evenly in a crossing pattern to 30-40 in-lb maximum |
| Skipping the rubber gasket on the tail light lens | Water intrusion, corrosion, premature bulb failure | Inspect and replace gaskets; use clear silicone if the gasket is degraded |
| Buying clear 1157 for amber front turn signal housings | Dim signal, failed inspection, reduced visibility | Always use 1157NA amber glass for turn signal positions |
| Not checking for hyperflashing after LED swap | Rapid blinking may confuse other drivers, may trigger dashboard warnings | Test thoroughly after LED installation; install load equalizers if needed |
| Forgetting to reconnect the battery after headlight work | Bike won't start; BCM may log error codes | Follow a checklist: lights done → battery reconnected → seat installed → test all functions |
| Pinching the windshield quick-release clamps during headlight removal | Damaged windshield mounts, cracked clamps | Remove the detachable windshield fully before accessing headlight hardware |
| Leaving dielectric grease off reconnected bulb sockets | Corrosion buildup, intermittent failures | Apply a small dab of dielectric grease to every bulb socket contact before reinstalling |
| Incorrect headlight beam aim after LED replacement | Blinding oncoming traffic or severely reduced visibility | Always verify beam aim at 25 feet on level ground after any headlight assembly change |
Verification Notes for 2026 Model Year
The 2026 Heritage Classic (FLHC) continues the Softail platform with Milwaukee-Eight 114 or 117 engine options. Confirm the following against your owner's manual or a Harley-Davidson dealer:
| Item | Specification | Notes |
|---|---|---|
| Headlight | H13 LED Daymaker sealed assembly | Replace entire unit; H-D part 62900301 or J.W. Speaker 8700 Evo equivalent |
| Front turn signal bulbs | 1157NA (amber, dual filament) | Standard automotive bulb — widely available at auto parts stores |
| Rear turn signal bulbs | 1157NA (amber, dual filament) | Same as front — amber, dual-filament |
| Tail / brake bulb | 1157 (clear, dual filament) | Dual filament: low power for running light, high power for brake |
| Detachable windshield | Quick-release mounting | Must be removed before headlight assembly access |
| Turn signal module | BCM-managed (verify) | 2026 Softail models may compensate for LED load — check owner's manual |
| Fusing | Under-seat fuse block | Headlight typically 15A or 20A fuse; check fuse panel diagram in manual |
For the most up-to-date specifications, consult the 2026 Harley-Davidson Heritage Classic (FLHC) owner's manual included with the motorcycle, or access it through the Harley-Davidson mobile app.
This guide was prepared using Harley-Davidson OEM specifications and the known lighting architecture of the Heritage Classic (FLHC) Softail platform with Milwaukee-Eight 114/117 engines. The factory LED Daymaker headlight is a sealed H13 unit — all other exterior lights use standard 1157/1157NA bulbs. Always verify against your specific owner's manual before performing maintenance.
Parts for this job
Fits FLHC, FLH, FL — from our catalogue of 41,000+ aftermarket parts.
 Stock Style Tail Lamp Replacement Lens Clear$7.02
 Tail Lamp Lens Plastic Clear Top$10.64
 12 Volt Bulb$12.02
 Spring Fork Spotlamp Bulb 12 Volt$12.02
 Tail Lamp Stock Type Red Plastic Lens$12.80
 Spring Fork Spotlamp Bulb 6 Volt$12.80
 Tail Lamp Lens Plastic Red$12.80
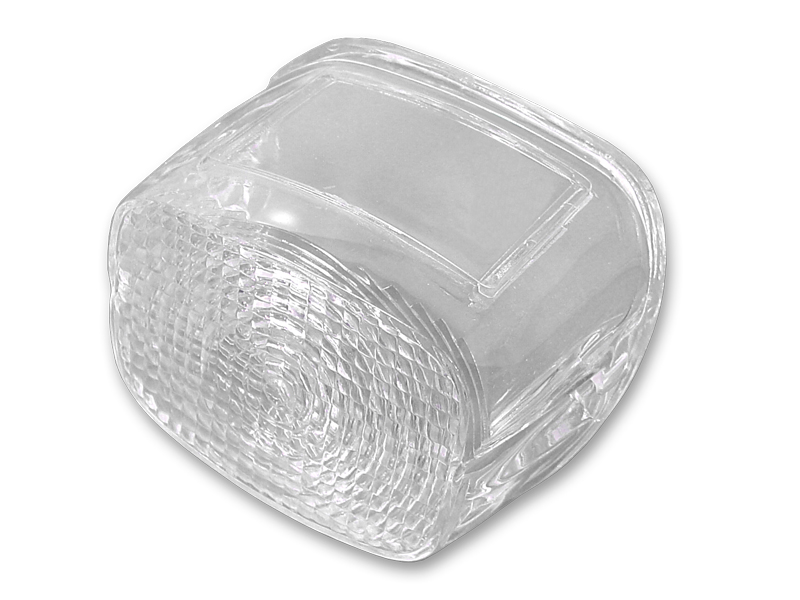 *UPDATE Tail Lamp Lens Stock Clear$12.94
 *UPDATE Tail Lamp Plastic Clear Lens$12.94
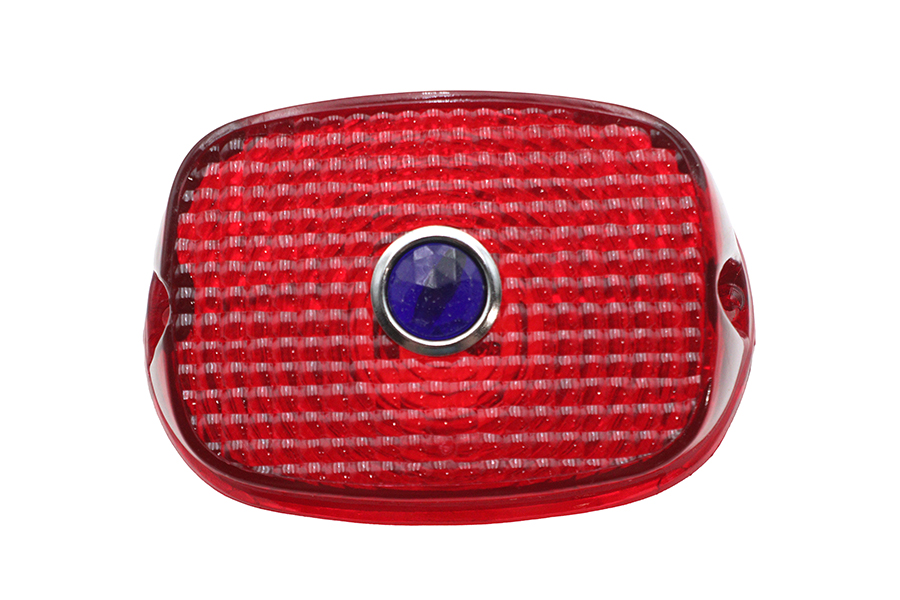 Tail Lamp Lens Red with Blue Dot$17.12
 6 Volt Bulb$19.31
 Tail Lamp Blue Dot Red Plastic Lens$21.44