 HarleyMotorcycleParts
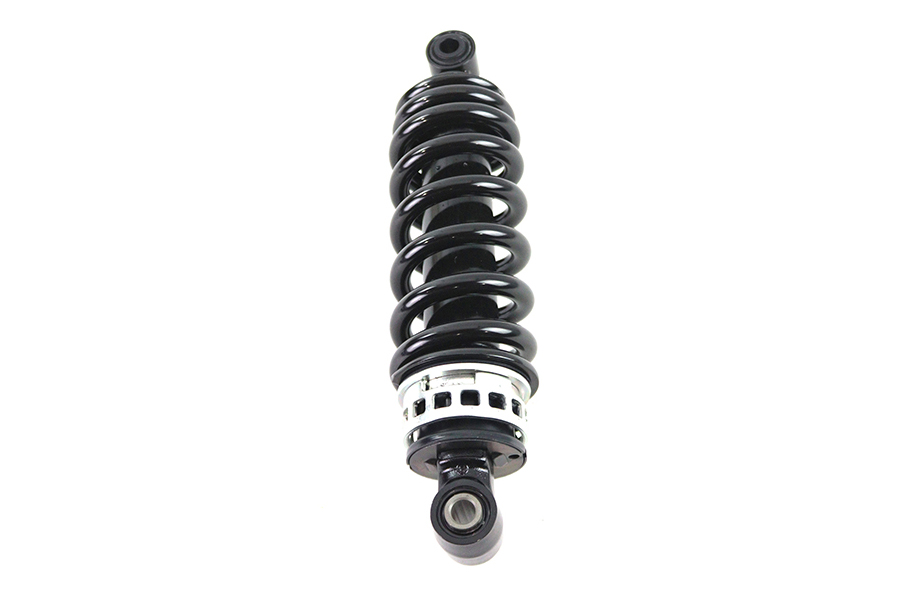
Low Rider FXLR Rear Shock: A Monoshock Picked for How Many Ride
Mostly ridden solo, then a passenger gets on. A shock chosen for one rider is not the shock for two.
Here is a common surprise. A Low Rider set up beautifully for one person becomes a different, sagging motorcycle the day a passenger climbs on, and owners blame the shock for failing. It did not fail. Most of these staggered-gauge cruisers live a solo life, so that is what the shock is set for. Decide honestly how you ride before you replace anything.
Tools
- Lift or rear stand
- SAE and Torx sockets
- Torque wrench
- Tape measure
- Helper for measuring
- Tool suited to your adjuster
- Service manual
Solo or sometimes two-up?
Think back over a year of riding and estimate how many miles carried someone behind you. None? Then a spring matched to your weight is the whole answer, and you can ignore passenger ratings altogether. A few weekends? Then adjustment range matters. Frequently? Then spring range matters more than anything printed on the box.
A single rear unit takes every pound you add. There is no second shock to share it, which is why two-up riding shows up so plainly on a low seat bike with not much travel to spare.
Be realistic about how often you will actually change the settings too. If the adjuster on your bike requires a tool and five minutes, you may not bother for a short trip. If it is quick, you will. Look at yours and be honest.
Confirm it is the right bike
FXLR and FXDL both answer to Low Rider. The first has no visible shocks at the sides, and the second shows its pair openly. If a seller has not asked for your code, tell them, and make them confirm it.
Also separate FXLR from FXLRS. The S carries a factory shock of its own, and what you read about that model may not transfer to yours.
Before you decide the old unit is finished, inspect it where it sits. Oil on the body or shaft says it has failed, plain and simple. A clean shock that merely sags under two people may be fine, and in that case a change of setting costs you nothing to try. Riding the same road solo with sag set correctly will tell you plenty about its health, as a tired shock keeps bouncing after a dip even with the right preload.
Reaching the shock
Secure the bike upright with the rear supported on a lift or stand. Remove the seat. On many of these bikes, you next need to deal with the battery tray area and side items, in the order your manual lists. Follow it precisely and keep each group of fasteners together on a labelled tray.
With access gained, take a moment over the adjuster. Note which type yours has, and its current setting. Lowering kits exist for this chassis, but only fit certain adjuster types, and with a low seat already fitted you should have a good reason for wanting one.
Removal and inspection
Take out the mounting bolts as the manual directs, and keep the rear held up as they come free. Move the shock out by the route shown. Do not lever it past wiring. If its spring is staying with it, you are fine. If you were hoping to change the spring on the kitchen table, stop: a compressed spring needs a proper compressor and someone who knows how to use it.
Look over the two eyes and their bushings. Look at the mounting points on the frame and on the swingarm, where wear is easy to miss in the shadows. Replace worn or cracked pieces now, and throw out any bolt with a damaged thread.
In it goes
Slide in the new unit and fit its fasteners by hand before reaching for any wrench. Final tightening uses the shop-manual numbers for your year. There are no shortcuts on suspension fasteners.
Put back what you removed, in reverse, checking every connector and clip against your photos. Reseat the seat and pull on it to confirm that it is held.
Two settings on one card
Measure sag with your helper while you sit on the bike in normal gear. Set preload to bring it within the range given by your manual or by the maker of the shock. Note what setting gave you that figure.
If a passenger ever rides along, measure again with both of you aboard. Note what it takes to bring that second figure back into range, and keep both numbers on a card under the seat. Remember, adding preload puts the bike back in the right part of its travel but does not make the spring any firmer.
If that second figure cannot be reached at all, then the spring cannot support two of you, and a passenger should wait. Finish with a short solo run, a look over the fasteners, and a check of your side stand on level ground.
Mistakes that cost money
- Setting up for one rider, then adding a passenger with no change.
- Calling a sagging rear a failed shock before measuring anything.
- Mixing up FXLR, FXLRS and the Dyna FXDL when ordering.
- Fitting a lowering kit without checking the adjuster type.
- Keeping settings in your head instead of on a card.
When to stop
If the rear bottoms out with a passenger aboard after you have set preload for two, do not carry that passenger again until the spring or shock suits the load.
Parts for this job
Check fitment for your own model and year before ordering — add your bike and we will flag what fits.
Other Harley how-to guides
This guide covers procedure and judgement. Torque figures, fluid capacities, gaps and tension settings are specific to your model and year and must come from the factory service manual for your motorcycle — we deliberately do not print numbers we cannot stand behind for your bike. Independent aftermarket retailer, not affiliated with Harley-Davidson, Inc.