Battery Guide: 2026 Harley-Davidson Street Bob FXBBS
Battery Guide: 2026 Harley-Davidson Street Bob FXBBS
The Street Bob is a stripped-down Softail, and that works in your favor here. There's no fairing to work around, no saddlebags to pull, no tour-pack. The battery sits in the frame's center section and comes out from the right side once the seat is off. If you can turn a 10mm nut and a Torx bit, this is a half-hour job in your own garage.
Quick Reference Table
| Spec | Value | Source |
|---|---|---|
| Battery Type | AGM (Absorbed Glass Mat), sealed, 12V | Industry standard for M8 Softail platform |
| Harley OEM Part Number | Verify against your owner's manual or dealer | Not in our catalog — do not guess |
| Group Size | Verify against your owner's manual or dealer (Softail platform commonly uses a 14L/20HL-class case — confirm before ordering) | Battery Council International sizing |
| Cold Cranking Amps (CCA) | Verify against your owner's manual or dealer | Harley-Davidson service manual |
| Reserve Capacity | Verify against your owner's manual or dealer | Battery manufacturer data sheet |
| Nominal Voltage | 12V | Electrical system spec |
| Fully Charged Resting Voltage | 12.8V - 13.0V (AGM) | AGM chemistry standard |
| Discharged / Replace Threshold | Below 12.4V resting = discharged; below 12.0V = deeply discharged | AGM chemistry standard |
| Charging System Output | 13.8V - 14.8V at 2,000-3,000 RPM | General M8 charging spec — confirm in your manual |
| Dimensions (LxWxH) | Verify against your owner's manual or measure the old battery | Case must match tray exactly |
| Weight (approx) | 11-14 lbs depending on case size | Manufacturer data |
| Terminal Type | Threaded post with bolt-through cable lug | Factory hardware |
| Terminal Position | Confirm on your bike before disconnecting — photograph it | Installation practice |
| Hold-Down Method | Strap over the top of the case, anchored to the tray | Factory installation |
| Replacement Interval | 3-5 years, shorter in Florida/Southwest heat | Maintenance schedule |
| Maintenance Type | Sealed AGM — never add water, never open the case | AGM chemistry |
Difficulty & Time Estimate
- Difficulty Level: Beginner (1 out of 5) — hand tools only, no special service equipment
- Estimated Time: 20-30 minutes if you've done it before, 40-50 minutes your first time
- Tools at hand: Everything you need fits in a basic socket set. The only item people usually don't own is a multimeter, and you want one — replacing a good battery because the stator is dead is an expensive mistake.
- Seasonal Note: Work above 40°F if you can. Cold hands drop nuts into the primary area, and cold AGM batteries read lower voltage than they actually are, which can fool your testing.
- Radio/ECU Note: The Street Bob has no factory audio head unit to re-code. You may lose trip odometer data and clock settings. Nothing needs a dealer reset.
Tools Required
| Tool | Purpose |
|---|---|
| Torx driver set (T27/T40 range) | Seat mounting fastener — check which size your bike uses before you start |
| 10mm socket and ratchet | Battery terminal bolts and hold-down hardware |
| 10mm combination wrench | Backup for tight terminal access where the ratchet won't swing |
| 6" extension | Reaching the hold-down anchor down in the tray |
| Digital multimeter | Resting voltage and charging system output — non-negotiable for diagnosis |
| Battery terminal brush or small wire brush | Cleaning corrosion off cable lugs |
| Baking soda and water solution | Neutralizing acid residue on the tray |
| Shop rags | Drying the tray, wiping terminals |
| Safety glasses | Battery acid and sparks — wear them |
| Nitrile gloves | Keeps acid residue off your hands |
| Dielectric grease | Post-install corrosion protection on terminals |
| Torque wrench (in-lb range) | Terminal bolts are low-torque; overtightening cracks the case |
| Smart AGM battery tender | Charging the new battery and maintaining it afterward |
| Flashlight or headlamp | The tray sits in shadow even in a bright garage |
Battery Location & Access
On the 2026 Street Bob, the battery lives in the center of the frame, below and slightly behind the rider's seat, in the triangular void the Softail frame creates ahead of the rear shock. This is the same general location across the M8 Softail line.
Here's the sequence of what has to come off:
- The rider's seat. A single fastener at the rear of the seat — usually a Torx screw — holds it down. Remove it, then slide the seat rearward to release the tongue from the tank bracket and lift it off. Set it upside down on a towel so you don't scratch the cover.
- Nothing else, in most cases. With the seat off, the top of the battery and both terminals are exposed on a stock Street Bob. This is the main advantage of working on a bare-bones Softail versus a bagger.
- If you run a sissy bar, luggage rack, or aftermarket seat pan, those come off first. Support any load-bearing hardware before you pull its fasteners.
- Check for a side cover. Some Softail configurations use a small right-side cover that shrouds the electrical caddy. If yours has one, it pulls off its rubber grommets with a firm straight tug — don't pry at the edge or you'll crack it.
The main fuse and fuse block sit in the same area. Don't confuse the fuse block for the battery — they're neighbors. Trace the heavy-gauge cables; they go to the battery.
Access tip: Put a folded shop towel over the frame rail beside the battery. When a terminal bolt drops — and one will — the towel catches it instead of letting it disappear into the swingarm area.
Step-by-Step Replacement
Step 1: Park, Cool, and Set Up
Put the bike on level ground with the kickstand fully extended, or better yet on a lift with the frame strapped. Let the engine cool — the exhaust runs close to this area and you'll be reaching over it. Kill the ignition and pull the key. Work where there's air movement and no pilot lights, grinders, or cigarettes nearby. AGM batteries vent hydrogen under stress, and hydrogen finds sparks.
Step 2: Put On Your Safety Gear
Safety glasses and nitrile gloves. Battery acid doesn't announce itself — a sealed AGM that's been overcharged can weep acid around the seams, and you won't see it until it's on your skin.
Step 3: Remove the Seat
Back out the seat fastener with the correct Torx bit. Slide the seat rearward, then lift. Put the fastener somewhere it can't roll away — a magnetic tray or your pocket.
⚠️ Warning: Don't set a loose seat against the exhaust or the tank. Scratched chrome costs more than the battery.
Step 4: Photograph the Installation
Before you touch a single nut, take two or three photos with your phone: one straight down on the battery showing which cable is on which post, one of the hold-down strap routing, and one of the vent tube if your battery has one. Ten seconds now saves you a guessing game in twenty minutes.
Step 5: Disconnect the Negative Cable First
Loosen the 10mm bolt on the negative (-) terminal and lift the cable lug off the post. Tuck it well clear of the battery — a zip tie or a rag holds it back.
⚠️ Why negative first: The negative post is bonded to the frame and engine. While the negative cable is attached, the entire motorcycle is a live path back to that post. If your wrench touches the positive post and brushes the frame at the same time, you've shorted the battery across a steel tool — that means instant heat, sparks, a welded wrench, and a real chance of rupturing the case. Pull the negative first and the frame is dead. Nothing you touch with the wrench can complete a circuit.
Step 6: Disconnect the Positive Cable
Loosen the 10mm bolt on the positive (+) terminal, lift the lug off, and position it away from both the battery and the negative cable. If there's a rubber boot over the positive post, fold it back out of the way rather than pulling it off — it's easy to lose and it's there for a reason.
Step 7: Release the Hold-Down and Vent
Unhook or unbolt the hold-down strap over the battery and swing it clear. If your battery has a vent tube, disconnect it at the battery end and note where the other end routes — the new battery needs the same path.
💡 Tip: If your strap is stretched, frayed, or rusted at the anchor, replace it now while the battery is out. A loose battery vibrates against the tray and destroys itself from the inside.
Step 8: Lift the Old Battery Out
Grab the battery by its case or its factory carry strap and lift it straight up. Keep it level. A tilted battery can weep from the vent even on a sealed AGM. Set it on concrete or a plastic tray — not on carpet, not on a wooden bench top you care about.
Step 9: Clean and Inspect the Tray
Look the tray over with your flashlight. You're checking for white or green crust, cracks in the tray, rusted anchor points, blocked drain holes, and chafed insulation where cables pass over frame edges. Scrub any corrosion with baking soda and water, rinse lightly, and dry it completely before the new battery goes in. A wet tray under a new battery is a slow parasitic drain.
Now is also the moment to inspect the battery pads and isolation studs. If the rubber pads are flattened, cracked, or oil-soaked, they're no longer isolating vibration — replace them. Same for the ISO studs.
Step 10: Clean the Cable Ends
Wire-brush both cable lugs until you see clean metal. Corrosion between the lug and the post reads as a weak battery even when the battery is fine. Check the cables themselves: green fuzz creeping up under the insulation means the copper is corroding internally and the cable needs replacing, not cleaning.
Step 11: Set the New Battery In
Confirm before you drop it in that the new battery's case size matches the old one and the terminals land on the same sides. Do not install a battery that doesn't fit the tray exactly — a battery with a half-inch of slop will crack its own posts inside a season.
Lower it in flat and level. Reconnect the vent tube first if your battery uses one, routing it exactly as the original ran, with no kinks and the outlet pointed away from painted surfaces and drivetrain components.
Step 12: Secure the Hold-Down
Refit the strap over the top of the case and snug the anchor hardware. The battery should not move when you push it firmly by hand from any direction.
⚠️ Warning: Do not crank the hold-down down hard. AGM cases are thin-walled plastic and crush before you feel serious resistance. Snug plus a fraction — that's it. Torque specs for the hold-down: verify against your owner's manual or dealer.
Step 13: Connect the Positive Cable First
Positive goes on first, for the mirror image of the reason negative came off first. Seat the lug flat on the post, thread the 10mm bolt by hand to make sure you haven't cross-threaded it, then tighten. These are low-torque fasteners — the exact figure for your model year should be verified against your owner's manual or dealer, but the working rule is snug enough that you cannot rotate the lug by hand, and no more. Fold the rubber boot back over the post.
Step 14: Connect the Negative Cable Last
Negative goes on last. At this moment the frame goes live again, so your wrench is only ever touching one circuit at a time — no short path exists. Hand-thread the bolt, then tighten to the same snug standard. Tug both cables firmly; neither should move.
Wipe a thin film of dielectric grease over both terminals and lug faces. Refit the seat and its fastener. Turn the ignition on and confirm the dash lights come up, then start the bike. With the engine running at 2,000-3,000 RPM, put your multimeter across the battery posts: you want roughly 13.8V to 14.8V. If you see under 13.0V, the battery isn't the problem — the charging system is, and you just installed a new battery that's about to die the same way the old one did.
Charging & Maintenance
An AGM battery on a modern Harley doesn't die of old age nearly as often as it dies of neglect. Here's what actually matters.
Charge it before first use. Most AGM batteries ship partially charged even when sold as "factory activated." Put the new battery on a smart charger set to AGM mode and let it come to full before you ride. Starting the season on an 80% battery costs you a year of its life.
Use a smart charger, not a trickle charger. This is the single most important rule. A smart charger — a Battery Tender, a NOCO Genius, an Optimate, anything with a microprocessor — monitors voltage and cycles between bulk, absorption, and float. An old-school constant-current trickle charger just keeps pushing amps forever, and forever is how AGM batteries get cooked. If the charger doesn't have an AGM setting, don't use it on an AGM battery.
Charge rate. Slow is better. A 1-2 amp charger is right for a motorcycle battery. Do not use an automotive charger on a 10A setting and do not use an "engine start" boost mode. High current in an AGM generates heat inside a sealed case that has no way to vent it.
Ride it or tend it. Short trips are worse than no trips. A five-minute ride to the gas station pulls more out of the battery cranking than the charging system puts back, and repeating that all month walks the battery down. If the bike sits more than two weeks at a stretch, put it on a tender.
What kills an AGM battery:
| Killer | What's Happening |
|---|---|
| Chronic undercharging | Sulfate crystals harden on the plates and permanently reduce capacity. This is the #1 killer. |
| Overcharging / wrong charger | Drives out electrolyte through the pressure vents. AGM can't be refilled, so that capacity is gone forever. |
| Heat | Florida summers, garage heat, and exhaust proximity all accelerate internal degradation. Heat is why southern batteries die years earlier than northern ones. |
| Deep discharge | Every time you run it flat, you lose capacity. A few full discharges will finish a battery that had years left. |
| Vibration | A loose hold-down lets internal plates and welds fatigue. Kills a battery from the inside with no outward warning. |
| Parasitic draw | Alarms, USB chargers, accessory lighting, and aftermarket electronics pull current with the key off. |
| Corroded connections | Resistance at the terminal means the charging system never fully replenishes the battery. |
Watch your parasitic draw. If you've added an alarm, GPS, heated gear controller, or auxiliary lighting, you've added a load that never turns off. To check it: pull the negative cable, put your multimeter in DC amps mode in series between the cable and the post, and read. A small draw in the low milliamps is normal for the ECU. Anything substantially higher will flatten your battery over a week of sitting.
Winter Storage
Even in Florida the bike sits sometimes, and everywhere else, winter is when batteries go to die. Do this:
- Charge to full before storage. A fully charged AGM resists freezing and sulfation. A half-charged one sulfates immediately and can freeze at moderately cold temperatures — and a frozen battery is scrap.
- Clean the terminals and case top. Dirt and moisture on the case top create a conductive film that slowly discharges the battery across its own surface.
- Leave it on a smart maintainer. A modern maintainer can stay connected all winter. It floats, it monitors, and it doesn't cook. This is the best option if you have an outlet near the bike.
- No outlet? Pull the battery and bring it inside. Store it on a shelf, off concrete, somewhere cool and dry — not next to a furnace. Put it on the charger for a few hours once a month.
- Check it monthly regardless. Resting voltage should stay above 12.6V. If it's drifting down on a maintainer, either the maintainer has failed or the battery is on its way out.
- Mind the parasitic draw. If you're leaving the battery in the bike without a maintainer, disconnect the negative cable. Otherwise the ECU and accessories will flatten it by spring.
- Don't store it dead "just for a few months." A discharged AGM sitting all winter will usually be unrecoverable by April.
Testing a Suspect Battery
Before you spend money, find out whether the battery is actually the problem. Half the "dead batteries" on a service counter are healthy batteries connected to a bad stator or a dirty ground.
Step 1 — Resting voltage. Let the bike sit with the ignition off for at least an hour, ideally overnight. Put your multimeter across the posts.
| Resting Voltage | State of Charge | What It Means |
|---|---|---|
| 12.8V - 13.0V | 100% | Healthy, fully charged AGM |
| 12.6V | ~75-100% | Fine — ride it |
| 12.4V | ~50-75% | Undercharged. Charge it and find out why. |
| 12.0V - 12.2V | ~25-50% | Significantly discharged. Sulfation is starting. |
| Below 12.0V | Near 0% | Deeply discharged. May recover on a smart charger; often won't. |
| Below 10.5V | Failed | Likely a shorted cell. Replace it. |
Step 2 — Charge, then retest. Put it on the AGM charger until the charger says full, disconnect, and let it rest for at least two hours. Retest. A good battery holds 12.7V or better. A battery that reads full off the charger but sags to 12.2V in a few hours isn't holding a charge — that's a failing battery regardless of what the charger's green light said.
Step 3 — Load test. This is the real test, because voltage alone lies. A battery can show 12.7V and still collapse the instant it's asked for cranking current. Use a carbon-pile load tester or a modern electronic tester, or watch the voltage on your multimeter while a helper hits the starter.
| Cranking Voltage | Verdict |
|---|---|
| Stays above 9.6V | Battery is good |
| Drops to 9.0V - 9.6V | Marginal — will fail on the first cold morning |
| Drops below 9.0V | Failed. Replace it. |
| Drops below 7V or bike clicks | Dead cell or a catastrophically bad connection |
Step 4 — Rule out the charging system. Engine running, 2,000-3,000 RPM, meter across the posts. You want 13.8V-14.8V. Below 13.0V means the stator or regulator isn't charging — replacing the battery won't fix it. Above 15.0V means the regulator is overcharging, which will boil a brand-new AGM battery in short order. Fix that before you install anything new.
Step 5 — Check the grounds. Set your meter to DC volts, put one probe on the battery negative post and the other on bare engine case metal, and crank. You want to see essentially nothing — a few hundredths of a volt at most. A significant reading there means you have resistance in the ground path, and that mimics every symptom of a dead battery.
Replacement Parts We Stock
These are V-Twin Manufacturing part numbers from our own catalog, confirmed to fit FXBBS, FXBB, FXB, and FX applications. Prices are current as listed.
| Part Number | Description | Price | Category |
|---|---|---|---|
| 28-0539 | Battery Pad Set | $8.67 | Trays & Carriers |
| 28-0749 | Battery Tray ISO Stud Set | $8.87 | Trays & Carriers |
| 28-0547 | Battery Tray ISO Stud | $10.02 | Trays & Carriers |
| 32-1024 | Brass Battery Terminal Adapter Kit | $10.67 | Cables |
| 37-8933 | Zinc Battery Vent Clamp | $10.67 | Cables |
| 28-0619 | Battery Tray ISO Stud | $12.27 | Trays & Carriers |
| 42-0515 | Stainless Steel Battery Strap | $14.27 | Straps |
| 36-0125 | *UPDATE 35" Stainless Steel Speedometer Cable | $14.42 | Cables |
| 28-0549 | Battery Tray ISO Stud Set | $15.42 | Trays & Carriers |
| 36-2410 | 46.5" Black Speedometer Cable | $17.25 | Cables |
| 31-4186 | Chrome Battery Tray Carrier Bracket | $17.87 | Trays & Carriers |
| 32-0313 | Black Ground 10-1/4" Battery Cable | $17.98 | Cables |
| 31-0149 | Chrome Speedometer Cable Guide | $18.02 | Cables |
| 28-0546 | Battery Tray ISO Stud | $18.64 | Trays & Carriers |
What to order alongside a battery: The pad set (28-0539) and the ISO studs are the parts most often worn out and most often ignored. If your old battery died early and the tray shows vibration wear, replace the isolation hardware — otherwise the new battery gets shaken apart the same way. The stainless strap (42-0515) is worth having if the original is rusted. The brass terminal adapter kit (32-1024) solves the common problem of a replacement battery whose post style doesn't match your cable lugs.
Note on battery part numbers: We do not list the battery itself above. For the correct Harley OEM battery part number and group size for your specific 2026 FXBBS, verify against your owner's manual or dealer before ordering.
Tips, Warnings & Common Mistakes
Tips worth the ink:
- Photograph everything before you disconnect it. Every time.
- Buy the freshest battery you can. Batteries have a date code, and one that sat on a distributor's shelf for eighteen months is already partway through its life.
- Keep a set of spare terminal bolts in the toolbox. They're cheap, they strip, and finding one at 9 PM on a Sunday is not fun.
- If your bike has been hard to start "only when it's cold," that's the classic early symptom of a battery with months left, not years.
- Label the old battery with the date you pulled it and why. If you're back here in eighteen months, you have a charging system problem, not a battery problem.
Common mistakes and what they cost you:
| Mistake | Consequence |
|---|---|
| Disconnecting positive first | Wrench touches positive and frame simultaneously — short circuit, sparks, welded tool, possible battery rupture |
| Reconnecting negative first | Same short-circuit risk in reverse, plus arcing on the final connection |
| Using a trickle charger instead of a smart charger | Overcharge, electrolyte loss, battery destroyed in weeks |
| Overtightening terminal bolts | Cracked post, cracked case, acid leak, and a battery that's scrap out of the box |
| Overtightening the hold-down | Crushed case, internal plate damage, no warranty coverage |
| Loose hold-down | Vibration destroys internal connections. Fails with no warning, usually far from home. |
| Installing a battery that doesn't fit the tray | Movement, cracked posts, chafed cables, early failure |
| Skipping the charging system test | New battery dies the same way the old one did, on your dime |
| Not cleaning the cable lugs | Resistance at the terminal mimics a bad battery and prevents full charging |
| Leaving the tray wet after cleaning | Slow surface discharge and accelerated corrosion |
| Ignoring the vent tube routing | Acid vapor onto paint, frame, or drivetrain |
| Reusing flattened isolation pads | Vibration transmitted straight into the case — the battery dies early again |
| Jump-starting to "test" a suspect battery | Masks the real fault and can spike the regulator |
| Storing the bike with a half-charged battery | Sulfation, or a frozen and cracked case in cold climates |
Serious warnings:
⚠️ Never smoke, weld, grind, or run an open flame near a charging or recently charged battery. Hydrogen gas ignites at very low concentrations.
⚠️ Battery acid causes permanent eye damage. Safety glasses, every time, no exceptions.
⚠️ Never bridge the two terminals with a tool. A 12V motorcycle battery can deliver hundreds of amps into a dead short and will heat steel to glowing in seconds.
⚠️ If a battery case is swollen, cracked, hot to the touch, or weeping, stop. Don't charge it, don't install it, don't try to test it. Bag it and take it for recycling.
Disposal & Recycling
Lead-acid batteries are the most recycled consumer product in the United States — roughly 99% of the lead comes back into circulation. Don't put yours in the trash. It's illegal in most states and it's genuinely bad practice.
Core charge: Most retailers, including dealers and parts stores, charge a core deposit when you buy a new battery — typically in the $10-$20 range, though it varies by state and seller. Bring the old battery back and you get that money returned. Bring it back in the box the new one came in and nobody has to hunt for a container.
Who takes them, free:
- Harley-Davidson dealerships — accept cores, usually whether or not you bought the battery there.
- Auto parts chains (AutoZone, O'Reilly, Advance, NAPA) — all take motorcycle batteries for recycling, most offer a small gift card even without a purchase.
- Independent motorcycle shops — nearly all of them have a core barrel.
- Municipal household hazardous waste facilities — free drop-off in most counties.
- Scrap metal yards — will typically pay you a few dollars by weight.
Handling a dead battery for transport: Keep it upright. Put it in the new battery's box or a plastic tub. Don't let the terminals contact each other or any metal in your truck bed — tape over them if the box doesn't isolate them. Even a battery you think is fully dead can have enough left to spark.
If it leaked: Neutralize spilled acid with baking soda until it stops fizzing, then wipe up with disposable rags and bag them separately. Don't rinse acid into a storm drain.
Verification Notes
This guide covers the procedure, which is consistent across the M8 Softail platform. The exact numbers for your specific bike must come from your own documentation. Confirm each of these before ordering parts or applying torque:
| Item to Verify | Where to Confirm | Why It Matters |
|---|---|---|
| Harley OEM battery part number | Owner's manual, parts catalog, or dealer | Ordering the wrong group size means a battery that doesn't fit the tray |
| Battery group size and case dimensions | Owner's manual, or measure the old battery | Case must fill the tray with no slop |
| Rated CCA | Owner's manual or service manual | Undersized CCA means cold-morning no-starts |
| Reserve capacity rating | Battery data sheet | Determines how long accessories run with the engine off |
| Terminal polarity and orientation | Photograph your own bike before disconnecting | Cables must reach without stretching or routing across the case |
| Terminal bolt torque spec | Service manual | Too loose causes resistance; too tight cracks posts |
| Hold-down hardware torque spec | Service manual | Overtightening crushes AGM cases |
| Seat fastener Torx size | Your own bike | Wrong bit rounds the fastener head |
| Charging system output range | Service manual | Your baseline for judging a stator or regulator fault |
| Main fuse rating and location | Owner's manual fuse diagram | Needed for diagnosis before you blame the battery |
| Vent tube requirement and routing | Battery manufacturer instructions | Sealed AGMs vary; some need it, some don't |
| Parasitic draw specification | Service manual | You can't judge your accessory load without the factory baseline |
| Part fitment for your exact VIN | V-Twin catalog listing or our parts desk | Fitment lists cover model families; your build may vary |
When the manual and this guide disagree, the manual wins. When the manual and the battery manufacturer's instructions disagree on charging, the battery manufacturer wins — they know their chemistry.
Parts for this job
Fits FXBBS, FXBB, FXB, FX — from our catalogue of 41,000+ aftermarket parts.
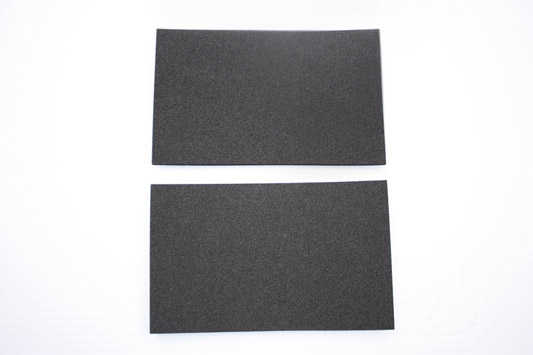 Battery Pad Set$10.40
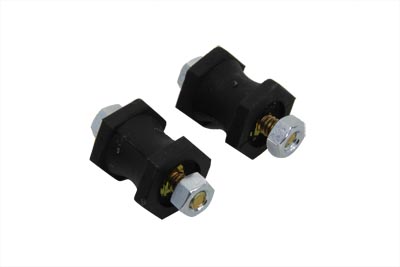 Battery Tray ISO Stud Set$10.64
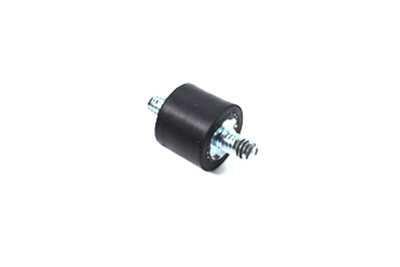 Battery Tray ISO Stud$12.02
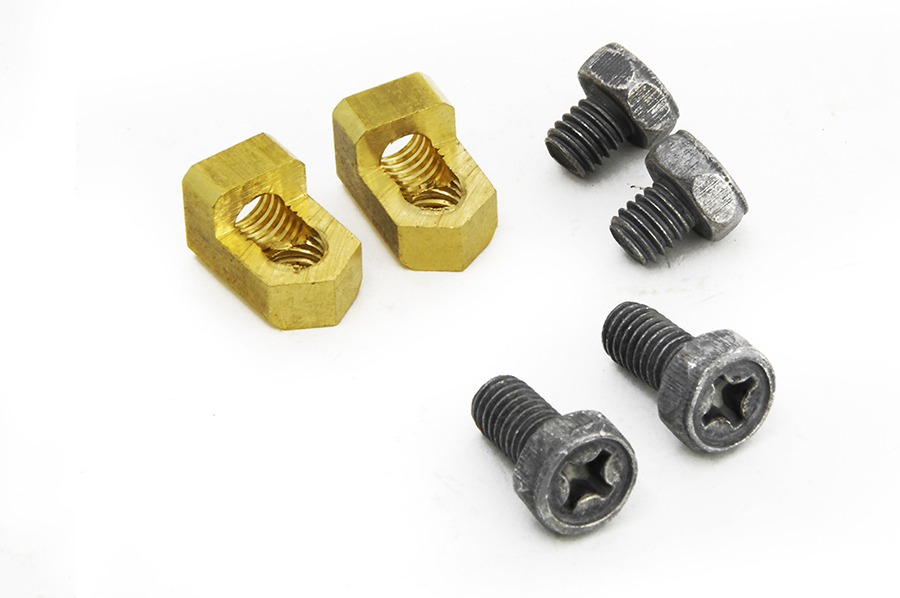 Brass Battery Terminal Adapter Kit$12.80
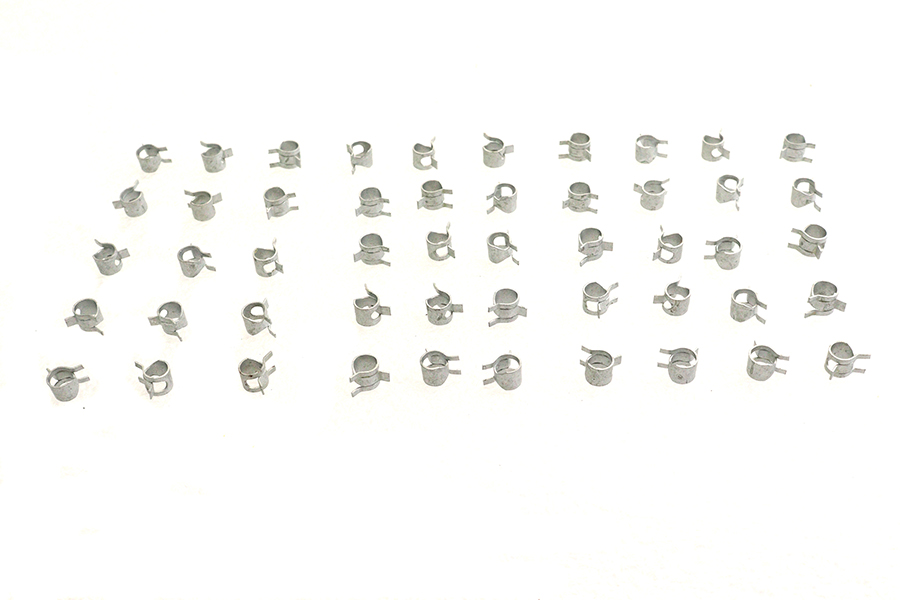 Zinc Battery Vent Clamp$12.80
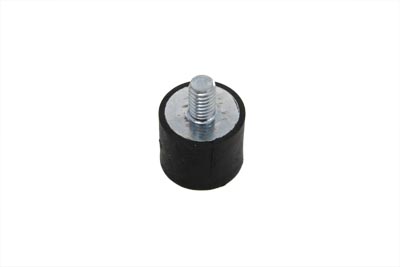 Battery Tray ISO Stud$14.72
 Stainless Steel Battery Strap$17.12
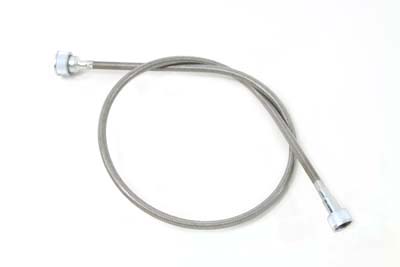 *UPDATE 35" Stainless Steel Speedometer Cable$17.30
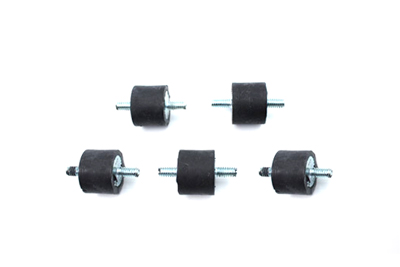 Battery Tray ISO Stud Set$18.50
 46.5" Black Speedometer Cable$20.70
 Chrome Battery Tray Carrier Bracket$21.44
 Black Ground 10-1/4" Battery Cable$21.58