Battery Guide: 2026 Harley-Davidson Sport Glide FLSB
Battery Guide: 2026 Harley-Davidson Sport Glide FLSB
The Sport Glide is a Softail with saddlebags and a detachable fairing, and like every modern Softail it runs a sealed AGM battery. There is no water to top up and no maintenance to perform on the battery itself — the job is keeping it charged, keeping the terminals clean, and knowing when it is done. This guide covers replacement, charging, storage, and testing.
Quick Reference Table
| Spec | Value | Source |
|---|---|---|
| Battery Type | AGM (Absorbed Glass Mat), sealed, 12V | Standard fitment on modern Softail models |
| OEM Part Number | Verify against your owner's manual or dealer | Not confirmed for this model year |
| Group Size | Verify against your owner's manual or dealer | Confirm before ordering — Softail trays are size-specific |
| Cold Cranking Amps (CCA) | Verify against your owner's manual or dealer | Match or exceed the factory rating |
| Nominal Voltage | 12V | Electrical system standard |
| Fully Charged Resting Voltage | 12.8V - 13.0V (AGM) | AGM charging characteristics |
| Considered Discharged | 12.4V or below | AGM charging characteristics |
| Dimensions (LxWxH) | Verify against your owner's manual or dealer | Measure the old battery before buying |
| Weight (approx) | Verify against your owner's manual or dealer | Expect a two-handed lift |
| Terminal Type | Threaded post with bolt | Confirm bolt size against your hardware |
| Terminal Position | Verify against your owner's manual or dealer | Photograph your own battery before removal |
| Hold-Down Method | Strap or bracket over the battery | Confirm against your machine |
| Replacement Interval | 3-5 years, shorter in high heat | General AGM service life |
| Electrolyte Service | None — sealed, do not attempt to open | AGM design |
Difficulty & Time Estimate
- Difficulty Level: Beginner (1 out of 5). If you can remove a seat and turn a wrench, you can do this.
- Estimated Time: 20-30 minutes for someone who has done it before, 40-50 minutes the first time.
- Tools at hand: Everything you need fits in a small tray — a seat fastener tool, a wrench for the terminal bolts, a multimeter, and a wire brush. Lay the tools out before you start so you are not walking away from a bike with a live positive cable hanging loose.
- Seasonal note: Work above 40°F if you can. Cold hands drop small bolts into places you do not want them.
- Confirm your fastener sizes on your own bike before you begin — do not assume a size from another model.
Tools Required
| Tool | Purpose |
|---|---|
| Safety glasses | Battery acid and sparks — non-negotiable |
| Nitrile or mechanic's gloves | Keeps corrosion and grease off your hands |
| Seat fastener tool (Allen or Torx — confirm size on your bike) | Removes the seat to expose the battery area |
| Socket set with extension | Terminal bolts and hold-down hardware |
| Combination wrench set | Backup where a socket will not clear |
| Digital multimeter | Resting voltage and charging system output |
| Battery terminal brush or small wire brush | Cleans posts and cable ends |
| Baking soda and water solution | Neutralizes corrosion in the tray |
| Shop rags | Drying the tray, wiping cable ends |
| Dielectric grease or terminal protectant | Slows future corrosion |
| Torque wrench (inch-pound range) | Terminal bolts are small and easy to snap |
| Smart AGM battery charger / tender | Charging the new battery and keeping it healthy |
| Flashlight or headlamp | The battery box is a dark hole |
| Phone camera | Photograph cable routing before you touch anything |
Battery Location & Access
On the Sport Glide, the battery lives in the center of the frame beneath the rider's seat, in the same general location as the rest of the Softail family. It is not behind a side cover the way a touring bike's battery is — the seat is the door.
What has to come off first:
- The seat. This is the only major item. It is held by a fastener at the rear, then slides back off its front tongue. Confirm the fastener type and size on your own machine before reaching for a tool.
- Any luggage or accessory that blocks the seat's rearward travel. The Sport Glide's saddlebags do not normally interfere, but a sissy bar, a passenger backrest, or a luggage rack may need to come off or be loosened.
- The battery cover or strap, if fitted. Once the seat is off, you will see the battery top, the hold-down, and the cables.
Work with the bike upright on level ground. A Softail on the kickstand leans far enough that a heavy battery wants to come out at an angle and catch on the tray lip. If you have a lift or a stand, use it.
Before you remove anything electrical: modern bikes lose stored settings when power is cut. Note your clock, trip meters, and any radio or infotainment presets so you are not hunting for them afterward.
Step-by-Step Replacement
Step 1: Safety Preparation
Safety glasses and gloves on. Park on level ground, transmission in gear, ignition off and key out. Work in a ventilated space away from open flame, cigarettes, grinders, or anything else that sparks. Batteries vent hydrogen, and hydrogen does not need much of an excuse.
Step 2: Remove the Seat
Remove the seat fastener and set it somewhere it cannot roll away — a magnetic tray is worth the five dollars. Slide the seat rearward off its front tongue and lift it clear. Set it upside down on a towel so you do not scuff the cover.
Step 3: Photograph Everything
Before a single bolt moves, take two or three photos of the battery from different angles. You want the cable routing, which terminal each cable lands on, the order of any accessory leads stacked on the posts, and how the hold-down sits. This photo is the single most useful thing you will do today. Do not rely on cable color alone — an accessory install may have changed it.
Step 4: Disconnect the Negative Cable First
Loosen and remove the bolt from the negative (-) terminal, lift the cable clear, and tuck it where it cannot spring back onto the post.
Why negative first: the negative terminal is tied to the frame, so the whole bike is already at negative potential. With the negative lead off, a wrench that slips off the positive post and touches metal does nothing. If you pull the positive first, that same slip puts a wrench across the battery — a dead short, a welded tool, and a possible burst case. Negative off first, every time.
Step 5: Disconnect the Positive Cable
Remove the bolt from the positive (+) terminal and lift the cable clear. Keep it well away from the negative cable and from the frame. If the positive terminal has a rubber boot, fold it back over the cable end so it cannot make contact.
Tip: If accessory leads are stacked on the post, note the order as you pull them. They go back in the same order.
Step 6: Release the Hold-Down
Remove the strap, bracket, or hardware holding the battery down. Set the hardware with the seat bolt — losing it means the battery moves around, and a battery that moves chafes cables.
Step 7: Lift the Battery Out
Lift straight up and out. Do not lever it out by the terminals or the cables — grab the case or the factory lift strap if it has one. Keep it level. Set it on a stable, acid-resistant surface, not on a painted fender or a concrete step where it can tip.
Warning: Do not lay a battery on its side to make it fit out of the box. AGM batteries are sealed, but a damaged or swollen case can still weep.
Step 8: Clean and Inspect the Tray
Look for white or green corrosion, cracks, pooled moisture, or a chafed cable running through the tray. Scrub any corrosion with baking soda and water, then dry it completely. Make sure any drain path is clear. A tray full of crust is a sign the old battery was leaking or overcharging — worth chasing down before the new one sits in it.
Step 9: Inspect the Cables
Squeeze the cable insulation near the terminal ends. If it is stiff, cracked, or green under the jacket, the cable is corroding internally and will cause hard starting no matter how good the new battery is. Wire-brush both cable ends until they are bright metal.
Step 10: Confirm and Charge the New Battery
Check that the new battery matches the old one in physical size, terminal position, and rating before it goes anywhere near the tray. Most AGM batteries arrive partially discharged — put it on a smart AGM charger and bring it to a full state of charge before installing. Installing a battery at 12.3V and asking the charging system to fill it is how a new battery gets a short life.
Step 11: Set the New Battery In
Lower it straight down into the tray with the terminals oriented exactly as the old one was — check your photo. It should sit flat with no rocking. If you have to force it, you have the wrong battery.
Step 12: Secure the Hold-Down
Reinstall the strap or bracket and snug it. The battery should not move when you push it by hand. Do not crank on it — overtightening a hold-down cracks a battery case. Snug, not gorilla-tight.
Step 13: Connect the Positive Cable First
Positive goes on first, for the same reason negative came off first — the frame is not live yet, so a slipped wrench is harmless. Reinstall any accessory leads in their original order, then tighten the terminal bolt. Terminal bolts are small and thread into soft lead posts — tighten to a firm stop, and if you do not have a confirmed torque figure for your machine, verify against your owner's manual or dealer rather than guessing. A stripped post means a new battery.
Step 14: Connect the Negative Cable Last, Then Reassemble
Negative goes on last. You may see a small spark as it seats — that is normal inrush to the bike's electronics. Tighten it the same way. Apply a thin film of dielectric grease or terminal protectant over both connections, tug each cable to confirm it will not move, then reinstall the seat and confirm it is latched. Turn the key: check that the lights, horn, and starter all behave, then reset the clock.
Charging & Maintenance
An AGM battery does not need water, but it absolutely needs charge. Sulfation — hard lead sulfate crystals forming on the plates — starts the moment the battery sits partially discharged, and it is permanent.
Use a smart charger with an AGM setting. Modern tenders monitor voltage and taper the current, then hold a float. That is what you want.
Do not use an old-school manual trickle charger or a car-sized boost charger. A high fixed-current charger will push an AGM battery past its gassing voltage, drive out moisture it can never replace, and cook it. AGM batteries are sealed — whatever gets vented is gone for good.
What actually kills an AGM battery:
- Sitting discharged. A bike parked six weeks with no tender is the number one killer. Parasitic draw from the ECM, alarm, and clock drains it steadily.
- Heat. Chemical self-discharge roughly doubles with every 15-18°F rise. A Florida garage is harder on a battery than a Michigan one.
- Chronic short rides. Starting the engine takes a big bite; a ten-minute ride does not put it back.
- Overcharging. A failed voltage regulator boiling the battery at 15V+ will destroy it in days. Check charging output with a multimeter after any battery replacement.
- Vibration. A loose hold-down lets the plates shake apart internally.
Charging system check: With the engine warmed up and running, put your multimeter across the battery terminals. You are looking for a voltage clearly above resting — typically somewhere in the 13.5-14.8V range at cruising RPM. If it reads at or below resting voltage, the bike is running off the battery and the charging system needs attention. If it climbs past 15V, stop riding and fix the regulator before it eats the new battery. Verify the exact expected range against your service manual.
Winter Storage
If the bike is going to sit, do this and the battery will be ready in spring:
- Ride it or charge it to full before storage. Never store a partially discharged battery.
- Leave it on a smart tender for the whole layup. This is the easiest and best option — a modern tender is designed for months of unattended float.
- If you cannot run a tender, disconnect the negative cable to kill parasitic draw, and put the battery on a charger once a month. Expect to reset the clock when you reconnect.
- Store it off the cold floor. Cold does not kill a charged battery, but a discharged one can freeze and split its case. A shelf in a dry space is fine.
- Check voltage monthly. If it has dropped below 12.4V, charge it immediately.
- Clean the terminals before storage, not after. Corrosion grows all winter if you leave it.
Testing a Suspect Battery
Test in this order. Do not replace a battery because the bike cranks slow — that can just as easily be a bad ground, a corroded cable, or a failing starter.
1. Resting voltage. Let the bike sit at least two hours after riding or charging — a surface charge will lie to you. Put the multimeter across the terminals:
| Reading | State | What It Means |
|---|---|---|
| 12.8V - 13.0V | 100% | Healthy AGM at full charge |
| 12.6V | ~75% | Slightly down; charge it |
| 12.4V | ~50% | Discharged; charge now, sulfation is starting |
| 12.0V | ~25% | Deeply discharged; likely damaged |
| Below 11.8V | Dead | Probably unrecoverable |
| Below 10.5V | Failed cell | Replace it |
2. Cranking voltage. Watch the meter while a helper hits the starter. Voltage will dip — that is normal. A healthy battery holds roughly 9.6V or above during a sustained crank at moderate temperature. If it collapses below that while the resting voltage was good, the battery has lost capacity even though it reads fine sitting still.
3. Load test. A dedicated load tester or a shop's conductance tester is the definitive answer. It applies a real load and reports actual available cranking amps against the rated figure. A battery delivering well under its rating is finished, regardless of what the resting voltage says. Most dealers and parts stores will run this test free.
4. Rule out the rest. Before you buy anything: clean and tighten both terminals, check the main ground strap to the frame and engine, and measure charging output at the terminals with the engine running. A loose ground mimics a dead battery perfectly.
Replacement Parts We Stock
These are V-Twin Manufacturing parts from our catalog listed as fitting FLSB, FLS, SP, and GL applications. Confirm fitment for your specific machine before ordering.
| Part Number | Description | Price | Category |
|---|---|---|---|
| 48-2316 | Battery Label | $4.50 | Battery |
| 48-2316 | Battery Label | $4.50 | Batteries |
| 53-0566 | *UPDATE Battery Top Plug Set | $7.15 | Battery |
| 53-0566 | *UPDATE Battery Top Plug Set | $7.15 | Batteries |
| 12-0538 | Parkerized 6 Volt Battery Rod Wing Nuts | $7.92 | Straps |
| 12-0538 | Parkerized 6 Volt Battery Rod Wing Nuts | $7.92 | Battery |
| 28-0749 | Battery Tray ISO Stud Set | $8.87 | Trays & Carriers |
| 37-0589 | Zinc Speedometer Cable Clamps | $8.87 | Cables |
| 37-9025 | Speedometer Cable Clamp | $8.87 | Cables |
| 53-0579 | Battery Top Set | $8.87 | Battery |
| 53-0579 | Battery Top Set | $8.87 | Batteries |
| 28-0547 | Battery Tray ISO Stud | $10.02 | Trays & Carriers |
| 12-0538 | Battery Box Wing Nut Set | $10.08 | Straps |
| 12-0538 | Battery Box Wing Nut Set | $10.08 | Battery |
Note that part number 12-0538 and several others appear under more than one catalog category and, in the case of 12-0538, under more than one description and price. Order by the description and price that matches what you actually need, and call if the listing is ambiguous. We do not list a Harley OEM battery part number for this model — verify that against your owner's manual or dealer.
Tips, Warnings & Common Mistakes
Tips that save you a second trip:
- Take the old battery with you to the counter. Physical size and terminal position settle the question faster than any catalog.
- Charge the new battery fully before installing it, not after.
- Clean the cable ends, not just the posts. The corrosion that matters is usually inside the ring terminal.
- Keep a tender plugged in near where you park. The battery that lives on a tender is the one that lasts five years.
- Write the install date on the battery with a paint pen. In three years you will not remember.
Warnings:
- Never let a tool bridge both terminals. The current available from a fully charged AGM battery will glow a wrench red.
- Do not attempt to open, drill, or add water to a sealed AGM battery.
- Do not jump-start from a running car. A car alternator can push far more current than a motorcycle battery and its charging circuit are built for.
- If the case is swollen, cracked, or weeping, handle it with gloves and get it to a recycler. Do not charge it.
Common mistakes and what they cost you:
| Mistake | Consequence |
|---|---|
| Disconnecting positive first | Wrench shorts to frame; sparks, welded tool, possible battery rupture |
| Reconnecting negative before positive | Same short risk, plus arcing at the final connection |
| Installing a battery straight out of the box without charging | Battery never reaches full charge; capacity lost permanently within months |
| Using a car charger or manual trickle charger on AGM | Overcharge dries the mats out; battery ruined and cannot be recovered |
| Overtightening the terminal bolts | Stripped lead posts — the new battery is scrap |
| Overtightening the hold-down | Cracked case, acid seepage into the tray |
| Leaving the hold-down loose | Vibration destroys plates internally; battery fails early with no warning |
| Reversing the cables | Blown fuses, fried ECM or regulator — an expensive five-second error |
| Ignoring corroded cables | New battery, same hard starting; you chase the wrong part twice |
| Storing the bike without a tender | Deep discharge and sulfation over one winter; often a dead battery by spring |
| Skipping the charging system check | A bad regulator kills the new battery in days |
| Not noting accessory lead order on the posts | Accessories dead or wired to a switched circuit they should not be on |
Disposal & Recycling
Lead-acid batteries, AGM included, are fully recyclable and are hazardous waste. Do not put one in household trash, and do not leave it sitting in the garage.
Core charge: Most retailers, ours included, add a core charge to the price of a new battery and refund it when you bring the old one back. Bring the old battery with you or return it promptly — the refund is real money.
Who takes them:
- The dealer or parts store you bought the new battery from — they are set up for it and the core refund happens on the spot.
- Auto parts chains, which accept lead-acid batteries whether or not you bought from them.
- Municipal household hazardous waste collection sites.
- Scrap metal yards, which will often pay a small amount for the lead.
Transport it upright in a plastic tub or on a tray, with the terminals covered or taped so nothing can bridge them. Even a battery you have written off can hold enough charge to start a fire in the bed of a truck.
Verification Notes
The figures below are model-specific and should be confirmed against your own owner's manual, service manual, or dealer before you buy parts or apply a wrench. We would rather you check than trust a number that was right for a different bike.
| Item | Why It Must Be Verified |
|---|---|
| Harley OEM battery part number | Not confirmed for the 2026 FLSB — get it from your manual or dealer |
| Battery group size | Softail trays are size-specific; the wrong size will not secure properly |
| CCA rating | Match or exceed factory spec; verify the factory figure before buying |
| Battery dimensions (L x W x H) | Measure the removed battery; do not order on a published figure alone |
| Battery weight | Affects how you plan the lift |
| Terminal polarity and orientation | Photograph your own battery; do not assume left/right from another model |
| Terminal bolt size and torque | Small threads in soft lead — use the manual's figure, not a guess |
| Hold-down hardware type and torque | Overtightening cracks cases; confirm the correct spec |
| Seat fastener type and size | Confirm on your machine before reaching for a tool |
| Main fuse rating and location | Needed when troubleshooting a no-crank condition |
| Charging system output range | Confirm the expected voltage range for your model before condemning a regulator |
| Maximum AGM charging voltage | Set your charger to the manufacturer's AGM profile for the battery you bought |
| V-Twin part fitment for your VIN | Catalog fitment covers FLSB, FLS, SP and GL broadly — confirm before ordering |
Parts for this job
Fits FLSB, FLS, FL — from our catalogue of 41,000+ aftermarket parts.
 Battery Label$5.40
 *UPDATE Battery Top Plug Set$8.58
 Parkerized 6 Volt Battery Rod Wing Nuts$9.50
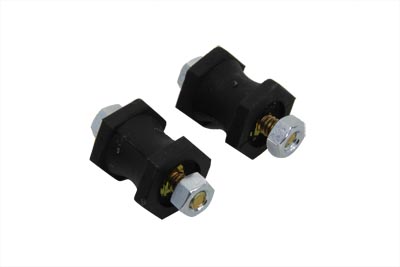 Battery Tray ISO Stud Set$10.64
 Zinc Speedometer Cable Clamps$10.64
 Speedometer Cable Clamp$10.64
 Battery Top Set$10.64
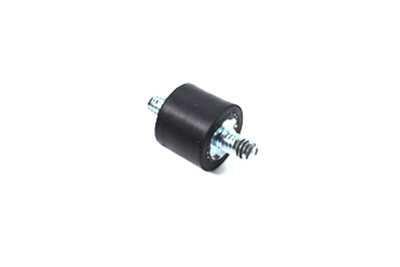 Battery Tray ISO Stud$12.02Battery Box Wing Nut Set$12.10
 Bright Chrome Battery Carrier Bracket$12.80
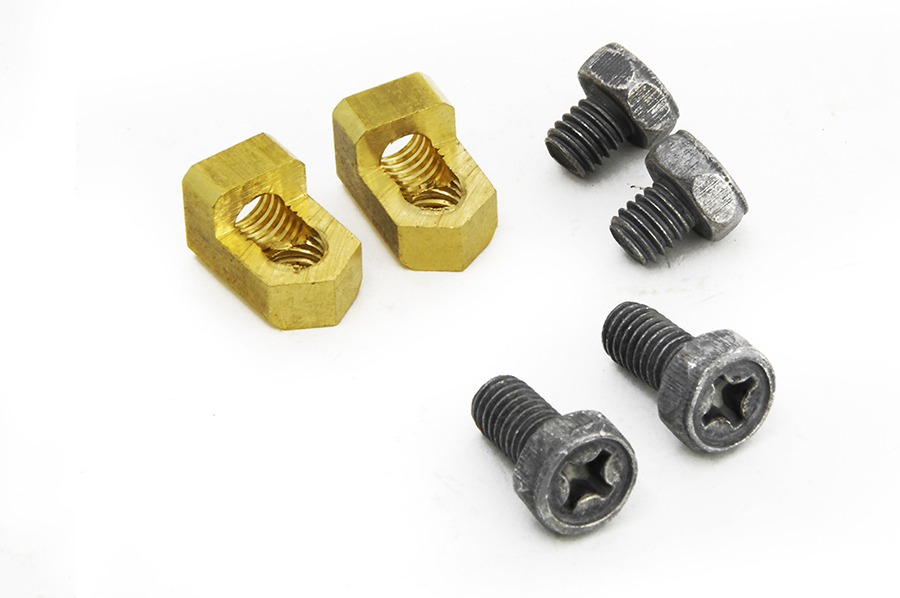 Brass Battery Terminal Adapter Kit$12.80
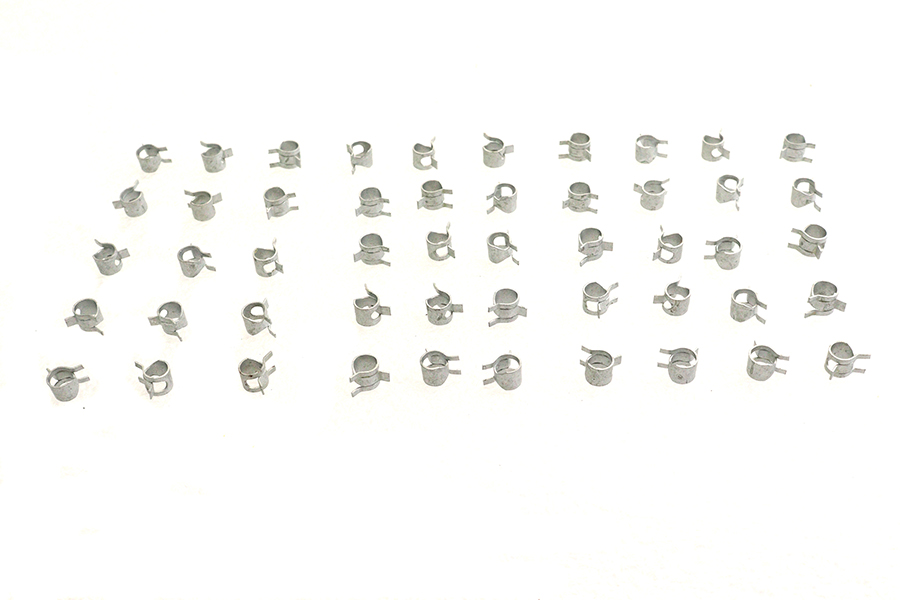 Zinc Battery Vent Clamp$12.80