Battery Guide: 2026 Harley-Davidson Road Glide Limited FLTRK
Battery Guide: 2026 Harley-Davidson Road Glide Limited FLTRK
The Road Glide Limited is the heavy end of the touring line — full fairing, Tour-Pak, heated grips on many builds, audio, and enough accessory load to punish a tired battery long before it leaves you stranded. The battery on this bike works harder than it does on a stripped-down Softail, and it tells you when it's unhappy: slow crank on a cold morning, infotainment rebooting during start, a dash that flickers when the starter engages.
This guide covers pulling the old one and putting a good one back in, plus how to keep it alive.
Quick Reference Table
| Spec | Value | Source |
|---|---|---|
| Battery Type | AGM (Absorbed Glass Mat), sealed, 12V | Harley-Davidson touring platform standard |
| OEM Part Number | Verify against your owner's manual or dealer | Not in our catalog — do not guess |
| Group Size | Verify against your owner's manual or dealer (touring models commonly use a 20-series case) | BCI group sizing |
| Cold Cranking Amps (CCA) | Verify against your owner's manual or dealer | Model-year specific |
| Reserve Capacity | Verify against your owner's manual or dealer | Model-year specific |
| Nominal Voltage | 12V | Electrical system |
| Fully Charged Resting Voltage | 12.8V – 13.0V (AGM) | AGM charging standard |
| Considered Discharged | Below 12.4V | AGM charging standard |
| Dimensions (LxWxH) | Verify against your owner's manual or dealer — measure the tray before ordering | Fitment |
| Weight (approx) | 13–15 lbs typical for a touring AGM | General AGM data |
| Terminal Type | Threaded post with bolt-through cable lugs | Factory hardware |
| Terminal Layout | Positive and negative fixed by tray orientation — photograph before removal | Installation practice |
| Hold-Down Method | Strap over the top of the case | Factory installation |
| Replacement Interval | 3–5 years, shorter in Florida/Gulf heat | Service experience |
| Charging Method | AGM-specific tender only — never a car-sized boost charger | Battery manufacturer guidance |
A note on the blanks above. Harley revises part numbers and CCA ratings across model years, and the Limited does not always share a spec with the base Road Glide. We stock accessories and hardware, not the OEM battery itself, so we are not going to print a number we cannot stand behind. Pull the number off the label on your existing battery or call your dealer with the VIN. That is the number that's right.
Difficulty & Time Estimate
- Difficulty Level: Beginner (1 out of 5) — no special tools, no electrical diagnosis required
- Estimated Time: 25–35 minutes for someone who has done it before; 45–60 minutes the first time
- Tools at hand: Everything here lives in a basic metric socket set plus a Torx driver. If you own a T25 and a 10mm, you are most of the way there. Check the fastener heads on your own bike before you start — Harley mixes Torx and hex across trim levels and mid-year runs.
- Seasonal Note: Above 40°F is more comfortable and makes the cables less stiff. Cold AGM batteries also read lower on a meter, which can fool you into replacing a good one.
- Limited-specific: The Tour-Pak and saddlebag on the battery side may want to come off or swing clear depending on how you're set up for room. Give yourself working space before you start turning fasteners.
Tools Required
| Tool | Purpose |
|---|---|
| Safety glasses | Battery acid and sparks — non-negotiable |
| Nitrile or mechanic's gloves | Keeps acid residue and corrosion off your hands |
| Torx driver set (T25, T27) | Side cover and trim fasteners |
| Metric socket set with 10mm socket | Terminal bolts and hold-down hardware |
| 3/8" ratchet with short extension | Reaching the lower hold-down nut |
| Torque wrench (in-lb range) | Terminal bolts are easy to overtighten and strip |
| Multimeter | Resting voltage and charging system check |
| Battery terminal brush | Cleaning corrosion off the cable lugs |
| Baking soda and water solution | Neutralizing acid residue in the tray |
| Shop rags | Drying the tray, wiping cables |
| Dielectric grease | Sealing the finished terminals against moisture |
| Smart AGM battery tender | Charging the new battery and keeping it healthy |
| Phone camera | Photographing cable routing before you touch anything |
Battery Location & Access
On the Road Glide Limited, the battery sits low in the frame on the left side of the motorcycle, behind a removable side cover, under and slightly forward of the seat area. It is not under the seat like a dirt bike — you come at it from the side.
What has to come off first, in order:
- Clear the left saddlebag area. On the Limited you have hard bags and a Tour-Pak. You don't necessarily have to remove the bag, but you need room to get your hands and a ratchet in. If you fight it, pull the bag — it's four fasteners and it makes the rest of the job pleasant instead of miserable.
- Remove the left side cover. This is the panel that hides the battery box. Depending on your build it's held by Torx fasteners or a push-fit with a retaining tab. Work gently — the tabs are plastic and they snap when cold.
- Expose the battery strap. Once the cover is off you'll see the top of the battery and the hold-down strap running across it.
The Road Glide's frame-mounted fairing means you do not have to deal with the handlebar-mounted fairing sweep the way you would on a Street Glide — the bars turn independently and don't crowd the work area. That's one small advantage the Road Glide has for this job.
Tip: Before you remove anything, turn the ignition off and pull the key. The Limited has enough always-on modules that leaving it in accessory mode while you disconnect terminals is asking for a fault code on the dash.
Step-by-Step Replacement
Step 1: Park, Stabilize, and Gear Up
Put the bike on level ground with the kickstand fully down, or better, on a lift with the wheels chocked. A Road Glide Limited is a heavy motorcycle and you'll be leaning on the left side to work. Safety glasses on, gloves on. No smoking, no grinder running nearby, no open flame. Lead-acid batteries vent hydrogen and it does not take much to light it.
Step 2: Ignition Off, Key Out
Switch the ignition fully off and remove the key fob from the immediate area if your bike uses proximity unlock. You want the electrical system asleep before you break a connection.
Step 3: Remove the Left Side Cover
Take off the left side cover using the correct Torx driver. Keep the fasteners in a magnetic tray or a cup — they are small and they roll. If the cover uses locating tabs, lift straight out rather than prying at an angle.
Warning: Do not force a cold plastic cover. If it doesn't want to release, warm the shop or the panel slightly and try again.
Step 4: Photograph Everything
Before a single wrench touches a terminal, take clear photos of the battery from two angles. You want the cable routing, which lug sits on which post, and how the hold-down strap is threaded. This thirty-second step has saved more people than any diagram ever will. Cable colors fade and corrode — your own photo doesn't.
Step 5: Disconnect the Negative Cable First
Loosen the negative (−) terminal bolt with a 10mm socket and lift the cable clear of the post. Tuck it aside where it cannot spring back and touch anything metal.
Why negative first: the negative terminal is tied to the frame and the entire chassis is at that same potential. If you loosen the positive first and your wrench brushes the frame, tank, or any bracket, you've completed the circuit through your tool — big spark, welded socket, possibly a ruined battery or a burned hand. With negative removed first, the chassis is isolated and a slipped wrench on the positive post does nothing.
Step 6: Disconnect the Positive Cable
Now loosen the positive (+) terminal bolt and lift that cable off. Move it well away from the negative cable and away from the battery posts. Some riders slip a rag over the positive lug as insurance. Do that.
Step 7: Release the Hold-Down Strap
Undo the hold-down hardware securing the strap across the top of the battery and swing the strap clear. On touring models this hardware sits low and tight — a short extension on the ratchet earns its keep here.
Step 8: Lift the Old Battery Out
Grip the battery by its case or its factory carry strap and lift it straight up and out. Keep it level. It's roughly the weight of a full gallon-and-a-half jug and it's awkward in a confined space, so lift with your legs and take your time. Set it on concrete or a plastic tray — not on carpet, not on a painted surface.
Warning: Never lift or drag a battery by its cables or terminal posts. You will damage the internal post seal and create a slow leak that ruins the tray and the surrounding paint.
Step 9: Inspect and Clean the Tray
Look at the tray with a light. You're checking for white or green crust, softened rubber, cracks, and standing moisture. Mix baking soda into water and scrub away any corrosion, then rinse lightly and dry completely. Any residue you leave behind will eat the tray and eventually the frame paint. While you're in there, check the tray's mounting studs and rubber isolators — worn isolators let the battery hammer itself to death over Florida expansion joints.
Step 10: Clean the Cable Lugs
Take the terminal brush to both cable ends until you see bright metal. A corroded lug adds resistance, and resistance on a bike drawing starter current shows up as slow cranking that you'll wrongly blame on the new battery. If a lug is cracked, thinned, or green all the way through the strands, replace the cable — don't reuse it.
Step 11: Set the New Battery in Place
Lower the new AGM battery into the tray in the same orientation as the old one — check your photo from Step 4. It should sit flat and level with no rocking. If it rocks, something is under it or the tray isolators are wrong.
Tip: Confirm the new battery's resting voltage with a multimeter before it goes in. A brand-new AGM off a parts shelf can sit at 12.3V after months in a warehouse. Charge it on an AGM tender to full before installation and it will last years longer.
Step 12: Secure the Hold-Down Strap
Route the strap over the battery exactly as it came off and snug the hardware. Firm is correct — the battery should not move when you push it with your palm, but you are not trying to compress the case. Overtightening cracks AGM cases and the damage is often invisible until the battery fails months later. If you don't have a verified torque figure for this model year, verify against your owner's manual or dealer rather than guessing with a long breaker bar.
Step 13: Connect the Positive Cable First
Positive goes back on first. Seat the lug flat on the post, thread the bolt by hand, then snug it with the socket. Tight enough that you cannot twist the lug by hand — and no more. These are small threads in soft lead-alloy posts and they strip easily. If you're unsure of the spec, verify against your owner's manual or dealer.
Step 14: Connect the Negative Cable Last
Negative goes on last, for the mirror image of the reason it came off first: while the positive is live and the negative is still disconnected, the chassis is isolated and nothing you touch can complete a circuit. The final connection is the negative, made deliberately, with the wrench nowhere near the positive side. Expect a small spark as the bike's modules wake up — that's normal.
Apply a thin film of dielectric grease over both finished terminals, reinstall the side cover, reinstall the saddlebag if you pulled it, then turn the key. Let the dash and infotainment complete their boot cycle before you hit the starter. Start the bike and confirm the charging voltage as described below.
Charging & Maintenance
An AGM battery is sealed. You never add water, you never open it, and you never treat it like the flooded battery in your truck.
Use an AGM-specific smart tender. Modern maintainers run a multi-stage profile — bulk, absorption, float — and back off to a trickle when the battery is full. That's what you want on a bike that sits between rides. A cheap trickle charger with no float logic will cook an AGM by holding it at charge voltage forever.
Charging voltage matters. AGM chemistry wants a tighter window than flooded lead-acid. Most quality tenders with an AGM mode handle this for you. If your charger has an AGM setting, use it. If it doesn't have one, buy one that does — it costs less than the battery.
Check your charging system, not just the battery. With the engine running at a fast idle, put a meter across the terminals. A healthy charging system holds the battery voltage above its resting level and below the point where it starts gassing. If you're reading at or below the resting voltage with the engine running, the stator or regulator is the problem and a new battery will die the same death as the old one. Specific output figures for this model year: verify against your owner's manual or dealer.
What actually kills an AGM battery:
- Chronic undercharging. Short rides that never fully recharge the pack. The Limited's accessory load — audio, heated gear, lighting — makes this worse than on a bare-bones bike.
- Sitting discharged. Sulfation starts within days at low state of charge and it is largely permanent.
- Heat. Gulf-coast summers are harder on batteries than northern winters. Heat accelerates internal corrosion and self-discharge.
- Vibration. A loose hold-down or worn tray isolators shake the plates apart from the inside.
- Overcharging. A failed regulator or a dumb charger drives the electrolyte out of an AGM's mat. Once it's gone, it's gone — you can't top it up.
- Parasitic draw. Alarms, GPS, USB chargers, and aftermarket accessories wired to constant power will drain a battery over a few weeks of sitting.
Winter Storage
Even in Florida there are stretches where the bike doesn't move. Do this before it sits:
- Charge to full before storage. A battery going into storage at 80% comes out at 50% and sulfated.
- Keep the tender on it. Leave the battery in the bike and plug a smart AGM maintainer into the pigtail. This is the easiest and best option.
- If you can't leave it plugged in, pull the battery. Store it indoors on a shelf at moderate temperature — not on a concrete garage floor in an unheated space, and never anywhere it can freeze. A fully charged AGM resists freezing; a discharged one does not.
- Check it monthly. Meter the resting voltage. Anything below 12.4V means it needs a charge cycle before it goes any lower.
- Clean the terminals before storing. Corrosion left on the posts over a few months will be twice the problem in spring.
- Waking it up: put it on the tender for a full cycle, confirm resting voltage, reinstall, then start the bike. Don't try to crank a heavy touring twin on a battery you haven't verified.
Testing a Suspect Battery
Before you spend money, find out whether the battery is actually the problem.
Step one: resting voltage. Let the bike sit with the ignition off for at least 4 hours — overnight is better. Then meter across the terminals.
| Resting Voltage | State of Charge | What It Means |
|---|---|---|
| 12.8V – 13.0V | 100% | Healthy AGM, fully charged |
| 12.6V – 12.8V | ~75–100% | Good; top it off on a tender |
| 12.4V – 12.6V | ~50–75% | Undercharged — find out why before blaming the battery |
| 12.0V – 12.4V | ~25–50% | Significantly discharged; sulfation is starting |
| Below 12.0V | Under 25% | Deeply discharged. May recover with a proper AGM charge cycle, but expect reduced capacity |
| Below 10.5V | Dead cell | Internal failure. Replace it — no charger fixes this |
Step two: load test. Resting voltage tells you the charge level, not the health. A battery can read 12.8V and still collapse the instant the starter pulls current. A load test applies a heavy draw and watches what the voltage does. You want the voltage to hold up under load and recover quickly when the load is removed. A battery that dives hard and stays low is finished regardless of what it reads at rest. Most parts stores and dealers will load test free.
Step three: cranking voltage. Meter across the terminals while a helper hits the starter. Watch the number during cranking. A sharp drop that keeps falling as the engine turns points at the battery. A momentary dip that recovers and holds is normal.
Step four: rule out the alternatives. A slow crank is not automatically a bad battery. Check for corroded or loose terminals, a corroded ground strap at the frame, a failing starter drawing excess current, or a charging system that isn't keeping up. Fix those first or the new battery goes the same way.
Replacement Parts We Stock
These are V-Twin Manufacturing part numbers that fit FLTRK / FLTR / FLT / GL applications. These are the only part numbers in this guide we will state as fact.
| Part Number | Description | Price | Category |
|---|---|---|---|
| 48-2316 | Battery Label | $4.50 | Battery / Batteries |
| 53-0566 | *UPDATE Battery Top Plug Set | $7.15 | Battery / Batteries |
| 12-0538 | Parkerized 6 Volt Battery Rod Wing Nuts | $7.92 | Straps / Battery |
| 28-0749 | Battery Tray ISO Stud Set | $8.87 | Trays & Carriers |
| 53-0579 | Battery Top Set | $8.87 | Battery / Batteries |
| 37-0589 | Zinc Speedometer Cable Clamps | $8.87 | Cables |
| 37-9025 | Speedometer Cable Clamp | $8.87 | Cables |
| 28-0547 | Battery Tray ISO Stud | $10.02 | Trays & Carriers |
| 28-2217 | Rubber Battery Strap | $10.02 | Straps |
| 12-0538 | Battery Box Wing Nut Set | $10.08 | Straps |
Note that part 12-0538 appears in our catalog under two descriptions — Parkerized 6 Volt Battery Rod Wing Nuts at $7.92 and Battery Box Wing Nut Set at $10.08. Confirm which listing you're ordering before you check out.
The tray ISO studs (28-0749 set, 28-0547 individual) are worth a look any time you have the battery out. Worn isolators are the quiet cause of a lot of "bad battery" complaints.
Tips, Warnings & Common Mistakes
Tips that pay off: - Charge the new battery to full before installing it. Out-of-the-box does not mean fully charged. - Photograph the install before you disturb it. Every time. - Buy the tender at the same time as the battery. It will pay for itself on this battery and the next two. - Write the install date on the case with a paint marker. In three years you will not remember. - Check the ground strap at the frame while you're in there. A corroded ground mimics every symptom of a dying battery.
| Common Mistake | Consequence |
|---|---|
| Disconnecting positive terminal first | Wrench touches frame, dead short, sparks, possible welded tool and ruined battery |
| Reconnecting negative before positive | Same short risk on reassembly; the last connection should always be negative |
| Overtightening terminal bolts | Stripped soft-lead posts — battery is scrap before it ever cranked the engine |
| Overtightening the hold-down strap | Cracked AGM case, slow internal failure months later |
| Using a car battery charger or jump box | Overvoltage drives electrolyte out of the mat; permanent capacity loss |
| Using a non-AGM charger profile | Chronic under- or overcharging, drastically shortened life |
| Reusing corroded cable lugs | Added resistance, slow cranking, heat at the connection |
| Leaving the bike stored without a tender | Sulfation; often a dead battery by spring |
| Skipping the charging system check | New battery dies exactly like the old one did |
| Lifting the battery by its cables | Broken post seal, acid leak, damaged tray and paint |
| Ignoring worn tray isolators | Vibration destroys the plates from the inside |
| Guessing at the OEM part number | Wrong case size, wrong terminal layout, battery that won't fit or won't strap down |
Warning: If a battery case is swollen, cracked, leaking, or hot to the touch, do not charge it and do not install it. Handle it with gloves, get it into a containment tray, and take it straight to a recycler.
Disposal & Recycling
Lead-acid batteries — AGM included — are fully recyclable and it is illegal in most states to put one in household trash. There is no reason to anyway, because they're worth money.
Core charge. Most retailers charge a core deposit when you buy the new battery and refund it when you bring the old one back. Hold onto your receipt. Bring the old battery in within the window they specify.
Who takes them: - The shop that sold you the new battery — almost always, and usually where your core refund lives - Auto parts chains — nearly all accept lead-acid cores whether or not you bought there - Harley-Davidson dealerships - Municipal household hazardous waste collection sites - Scrap metal recyclers, who will typically pay you for it
How to transport it: keep the battery upright, in a plastic tray or tub, strapped so it cannot tip in the truck bed or trunk. Tape over the terminals with electrical tape so nothing can bridge them in transit. Do not lay it on its side, even sealed — a damaged case will leak.
If it leaked: neutralize spilled acid with baking soda until it stops fizzing, then wipe up with disposable rags and bag them. Wash any skin contact with plenty of water.
Verification Notes
The specs below are model-year and VIN specific. We've deliberately left them blank rather than print a number that looks authoritative and isn't. Confirm each against your own service manual, the label on your existing battery, or your dealer with the VIN in hand.
| Item to Verify | Where to Confirm | Why It Matters |
|---|---|---|
| OEM battery part number | Owner's manual, dealer parts counter with VIN, or the label on your current battery | Harley revises numbers across model years; the Limited may differ from the base Road Glide |
| BCI group size | Owner's manual or dealer | Wrong group means wrong case size and it won't strap down |
| CCA rating | Owner's manual or dealer | A touring bike with full accessory load needs the factory rating or better — never less |
| Reserve capacity | Owner's manual or dealer | Determines how long accessories run with the engine off |
| Exact case dimensions | Measure your tray, then compare to the replacement's published spec | A battery that's 1/4" too tall fouls the cover |
| Terminal polarity and orientation | Your own photo from Step 4, plus the manual | Reversed terminals mean cables won't reach or will route across the posts |
| Terminal bolt torque | Service manual | Too loose causes resistance and heat; too tight strips the posts |
| Hold-down strap torque | Service manual | Too tight cracks the AGM case |
| Charging system output spec | Service manual | You need the target range to know whether your reading is healthy |
| Main fuse rating and location | Owner's manual or fuse block legend | Needed if the bike is dead and you're diagnosing rather than replacing |
| Side cover fastener type and size | Inspect your own bike before ordering tools | Harley mixes Torx and hex across trim levels and mid-year production |
| Core charge amount and return window | Your receipt and the selling retailer | It's your money — claim it |
Parts for this job
Fits FLTRK, FLTR, FLT, FL — from our catalogue of 41,000+ aftermarket parts.
 Battery Label$5.40
 *UPDATE Battery Top Plug Set$8.58
 Parkerized 6 Volt Battery Rod Wing Nuts$9.50
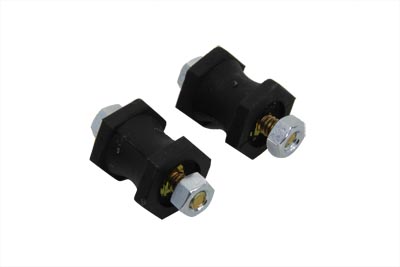 Battery Tray ISO Stud Set$10.64
 Zinc Speedometer Cable Clamps$10.64
 Speedometer Cable Clamp$10.64
 Battery Top Set$10.64
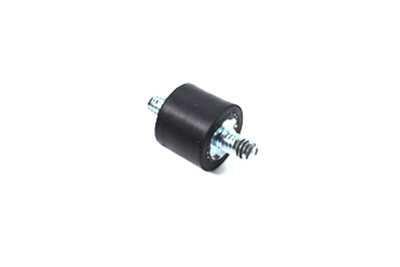 Battery Tray ISO Stud$12.02
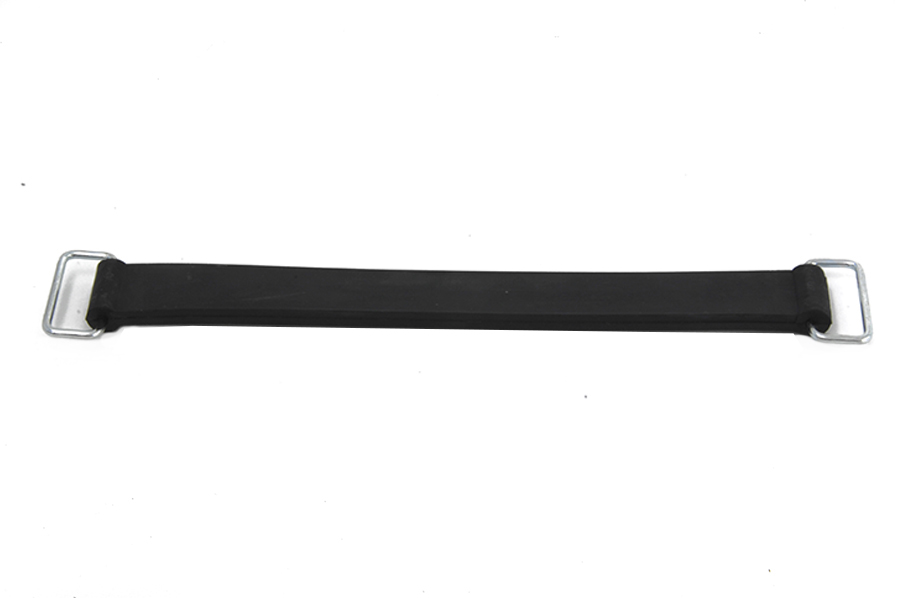 Rubber Battery Strap$12.02Battery Box Wing Nut Set$12.10
 Bright Chrome Battery Carrier Bracket$12.80
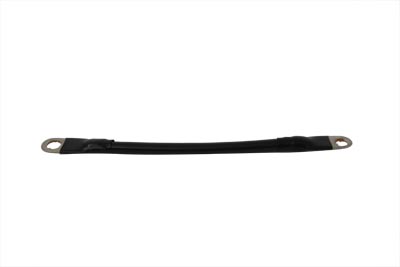 Battery Cable 8-1/2" Black Positive$12.80