Battery Guide: 2026 Harley-Davidson Low Rider S FXLRS
Battery Guide: 2026 Harley-Davidson Low Rider S FXLRS
The Low Rider S is a Softail, and that changes the battery job compared to a bagger. There's no fairing to work around and no side cover with Torx screws hiding a battery box — on this chassis the battery lives under the seat, and the seat is the access panel. That makes it one of the easier batteries in the Harley lineup to service, but the tight tray and the short factory cables leave no room for sloppy work.
Quick Reference Table
| Spec | Value | Source |
|---|---|---|
| Battery Type | AGM (Absorbed Glass Mat), sealed, 12V | Harley-Davidson Genuine Parts |
| OEM Part Number | Verify against your owner's manual or dealer | — |
| Group Size | Verify against your owner's manual or dealer | — |
| Cold Cranking Amps (CCA) | Verify against your owner's manual or dealer | — |
| Reserve Capacity | Verify against your owner's manual or dealer | — |
| Nominal Voltage | 12V | Electrical System Specs |
| Fully Charged Voltage (resting) | 12.6V - 12.8V | AGM Maintenance Guidelines |
| Discharged Threshold | Below 12.4V = partially discharged | AGM Maintenance Guidelines |
| Dimensions (LxWxH) | Verify against your owner's manual or dealer | — |
| Weight (approx) | Verify against your owner's manual or dealer | — |
| Terminal Type | Threaded post with bolt-through cable lug | Hardware Specification |
| Terminal Position | Confirm orientation before seating — positive and negative must line up with the factory cable routing without stretching either cable | Installation Practice |
| Hold-Down Method | Strap over the top of the battery, secured to the tray | Factory Installation |
| Charging System Output | 13.8V - 14.8V at cruising RPM | General Charging System Spec |
| Replacement Interval | 3-5 years depending on climate and use | Maintenance Schedule |
| Acceptable Replacements | Harley-Davidson Genuine AGM, or a sealed AGM matching the OEM group size, terminal layout and CCA rating — confirm all three before buying | Dealer Recommendations |
Read this before you buy anything: we are not going to hand you a Harley part number for this model year that we can't stand behind. Pull the old battery, read the label on its side, and match the group size, CCA and terminal layout. Five minutes with a flashlight beats a return shipping label.
Difficulty & Time Estimate
- Difficulty Level: Beginner (1 out of 5) — no special tools, no diagnostics, no disassembly beyond the seat
- Estimated Time: 15-25 minutes for an experienced mechanic, 30-45 minutes for a first-timer
- Tools at Hand: Everything you need lives in a basic metric socket set plus a Torx driver for the seat fastener. If you own a 1/4" drive kit and a multimeter, you're already equipped.
- Seasonal Note: Do this above 40°F if you can. Cold hands drop small nuts into the frame, and a cold battery reads lower than it actually is, which can trick you into replacing a good one.
- Shop Note: Set the bike on level ground on the jiffy stand before you start. The Low Rider S leans hard to the left, and a battery that isn't strapped down will shift toward the low side when the bike settles.
Tools Required
| Tool | Purpose |
|---|---|
| Torx driver set (T27/T40 typical for seat hardware) | Remove the seat fastener — check the size on your bike before you reach for a driver |
| Socket wrench, 1/4" drive, with metric sockets | Loosen and tighten the terminal bolts and the hold-down hardware |
| Combination wrenches (metric) | Backing up a nut where the socket won't fit in the tray |
| Insulated screwdriver or nut driver | Terminal hardware in tight spots without risking a short across the frame |
| Digital multimeter | Resting voltage and charging system output — the single most useful tool in this job |
| Safety glasses | Non-negotiable. Batteries vent hydrogen and carry acid |
| Nitrile or mechanic's gloves | Keeps acid residue and terminal grime off your hands |
| Battery terminal brush | Cleans corrosion off cable lugs and posts |
| Baking soda and water solution | Neutralizes any acid residue found in the tray |
| Shop rags and a stiff brush | Cleaning the tray and drying it before the new battery goes in |
| Dielectric grease | Seals the finished terminal connections against moisture |
| Flashlight or headlamp | Under-seat space is dark even in a bright garage |
| Torque wrench (inch-pound range) | Terminal and hold-down hardware are low-torque fasteners — guessing cracks cases |
| Battery tender / smart AGM charger | Charging the new battery before first use and maintaining it afterward |
Battery Location & Access
On the Low Rider S, the battery sits under the rider's seat, low in the frame between the shocks and the oil tank area, in a molded tray with a strap across the top. Nothing structural has to come off — that's the good news on a Softail.
What has to come off first:
- The seat. This is the only thing standing between you and the battery. The Low Rider S seat is retained by a fastener at the rear (commonly a Torx screw under the rear fender lip) with the front of the seat tongued into a bracket under the tank. Remove the rear fastener, then slide the seat rearward and lift it clear. Do not yank straight up with the tongue still engaged — you'll tear the bracket or the seat pan.
- Nothing else. No side covers, no fairing, no exhaust. If you're fighting anything beyond the seat, stop and check that you're looking at the right bike.
What you'll find down there: the battery seated in its tray, the positive cable running forward toward the starter, the negative cable grounded to the frame or engine case, and the hold-down strap. There may be a plastic or rubber positive terminal boot — it's there to keep a dropped tool from arcing the positive post to the frame. Put it back when you're done.
Warning: The positive terminal on this chassis is uncomfortably close to painted frame tubing and the seat pan. A wrench bridging the positive post to bare metal will weld itself in place and dump enough current to start a fire. Work slowly, and keep only one tool in the battery box at a time.
Step-by-Step Replacement
Step 1: Safety Preparation
Put on safety glasses and gloves. Park on level ground with the jiffy stand down. Kill the ignition, pull the key, and make sure the run/stop switch is off. Work away from open flame, cigarettes, grinders, or anything else that throws a spark — a charging or recently charged battery vents hydrogen, and hydrogen doesn't need much encouragement.
Step 2: Remove the Seat
Back out the rear seat fastener with the correct Torx driver and set the hardware somewhere it can't roll into the frame. Slide the seat back to disengage the front tongue, then lift it off and set it upside down on a clean towel so you don't scuff the cover.
Step 3: Document What You're Looking At
Before a single nut turns, take two photos with your phone: one of the whole battery box, one close-up of the terminals showing which cable lands on which post and how the cables route. Memory is a liar three days later when a part is on backorder. Note the position of any vent tube, terminal boot, or wire tie.
Step 4: Disconnect the Negative Cable First
Loosen the negative (−) terminal bolt and lift the cable lug off the post. Tuck it aside where it cannot spring back and touch the battery.
Why negative first: the negative post is tied to the frame and the engine — the whole bike is the negative side of the circuit. With the ground disconnected first, if your wrench slips and touches the frame while you're working on the positive post, there's no complete circuit and nothing happens. Do it the other way around and that same slip puts the full cranking current of the battery through your wrench. This isn't a tradition, it's the physics of the thing.
Step 5: Disconnect the Positive Cable
Slide back the positive terminal boot if one is fitted, then loosen the positive (+) terminal bolt and lift the cable off. Move it clear of the battery and clear of the negative cable. If the cables want to flop back into the box, run a zip tie or a rag around them to hold them out of the way.
Step 6: Release the Hold-Down Strap
Unfasten the hold-down strap at the tray and swing it clear. If the strap is a worn rubber or fabric piece that's stretched, cracked, or frayed, this is the moment to replace it rather than the moment to shrug at it — see the parts table below.
Step 7: Lift the Old Battery Out
Grip the battery by its carry strap if it has one, or firmly by the sides, and lift straight up and out. It's heavier than it looks and the box is tight, so use your legs and don't twist. Set it upright on a surface that won't be harmed by acid residue — a scrap of plywood or an old baking sheet, not your workbench top.
Tip: Take the battery straight to a flat surface where it can't tip. A sealed AGM won't slosh like a flooded battery, but a dropped battery can crack a case and a cracked case is a disposal problem, not a warranty claim.
Step 8: Inspect and Clean the Tray
With the box empty, get the flashlight in there. Look for white or green crusty corrosion, acid staining, cracks in the tray, or a broken isolation stud. Scrub any corrosion with baking soda and water on a stiff brush, rinse lightly, and dry it completely before anything goes back in. Check that the tray's drain path and any vent routing is clear, not packed with road grit.
While you're in there: check the battery cable lugs. Corroded, green, or crumbling lugs will cause hard starting that a new battery won't fix. Same for a frayed ground cable. These are cheap parts and you'll never have better access to them than right now.
Step 9: Check the Battery Pads and Isolation Hardware
The battery sits on pads and isolation studs that keep it from drumming against the tray and cracking over time. If the pads are compressed flat, torn, or missing, replace them. A battery that can move in the tray will chew its own case and work its terminals loose — on a Softail with a solid-mounted engine, vibration is the number one killer of battery hardware.
Step 10: Seat the New Battery
Lower the new AGM into the tray, keeping it level, and push it fully down onto the pads. Before you commit, check terminal orientation — the positive and negative posts must sit where the factory cables reach them without stretching, bending, or crossing either cable. If a cable won't reach comfortably, the battery is in backward. Lift it and turn it. Never force a cable to stretch to a post.
Step 11: Secure the Hold-Down Strap
Fasten the hold-down strap back over the battery and snug it down. The battery should not rock, slide, or lift when you push on it with a flat hand. Snug means snug — over-tightening a strap bows and cracks an AGM case, and a cracked case leaks and dies. If you're unsure of the torque figure for your hold-down hardware, verify against your owner's manual or dealer rather than leaning on the wrench.
Step 12: Connect the Positive Cable First
Positive goes on first, because the ground is still disconnected and the circuit is still open. Set the positive cable lug flat on the post, start the bolt by hand to avoid cross-threading, and tighten it until the lug cannot be twisted by hand. Terminal hardware on a motorcycle battery is an inch-pound fastener, not a foot-pound fastener — if you don't have the exact figure for this model, verify against your owner's manual or dealer. Snug and immovable is the target; stripped posts are scrap batteries.
Step 13: Connect the Negative Cable Last
Ground goes on last, for the mirror image of the reason it came off first: until the negative is connected, there is no complete circuit, so nothing you do on the positive side can arc. Set the lug flat, start the bolt by hand, and tighten to the same snug-and-immovable standard. You may see a small spark as the ground lands — that's the bike's electronics drawing their standby current, and it's normal.
Step 14: Grease, Boot, and Button Up
Wipe a thin film of dielectric grease over both finished connections to keep moisture and road salt out. Refit the positive terminal boot. Re-route and secure any vent tube or wiring exactly as your photos show. Do a final sweep of the battery box with the flashlight and your hand — every tool, socket, nut, and rag comes out before the seat goes on. Slide the seat tongue into its front bracket, seat it down, and reinstall the rear fastener. Turn the ignition on and confirm the gauges, lights, and horn all behave before you thumb the starter.
Charging & Maintenance
An AGM battery is sealed and maintenance-free in the sense that you never add water to it. It is not maintenance-free in the sense that you can ignore it.
Charge the new battery before first use. Most new AGM batteries arrive at partial charge after sitting in a warehouse. Put it on a smart charger until it reads full before you install it — a battery that gets its first deep discharge on day one never recovers the capacity it lost.
Use an AGM-rated smart charger or tender. This is the whole ballgame. A modern tender monitors voltage and tapers to a float charge; an old-school trickle charger just pushes current at the battery forever. AGM batteries are far less tolerant of overcharging than the flooded batteries those old chargers were designed for. Look for "AGM mode" on the charger and use it.
Charging rules:
| Practice | Do This | Not This |
|---|---|---|
| Charger type | Microprocessor-controlled AGM smart charger/tender | Unregulated trickle charger or automotive fast charger |
| Charge rate | Low and slow — around 1/10th of the battery's amp-hour rating | High-amp "boost" or "jump start" modes |
| Charge voltage | Within the charger's AGM float/absorb profile | Anything above 15V — it cooks an AGM from the inside |
| Storage charging | Tender connected any time the bike sits over two weeks | "I'll ride it next weekend" |
| Terminal condition | Clean, greased, torqued | Corroded, loose, wrapped in electrical tape |
What actually kills an AGM battery:
- Chronic undercharging. Short rides that never fully replace what starting the bike took out. Sulfate builds on the plates, capacity drops, and one cold morning the bike won't turn over.
- Sitting discharged. A battery left at 12.0V for months is a battery you're replacing. The damage is permanent and no charger reverses it.
- Overcharging. An unregulated charger or a failed voltage regulator drives voltage too high, the sealed cells vent, and the electrolyte they lose is gone for good.
- Vibration. A loose hold-down on a solid-mount V-twin shakes the internal plate structure apart. This is the failure mode riders blame on "cheap batteries" when it was actually a missing pad.
- Parasitic draw. Alarms, accessory lights, USB chargers, and aftermarket electronics pull current with the key off. If the bike sits a week and won't start, you have a draw, not a bad battery.
- Heat. Florida and Arizona batteries die younger than Michigan batteries. Heat accelerates every chemical process inside the case, including the ones you don't want.
Routine habit: check resting voltage with your multimeter once a month and after every long layup. Thirty seconds, and it tells you everything.
Winter Storage
Even where winter is short, a bike that sits is a bike whose battery is quietly dying.
- Charge it full before storage. Start at 12.6V or better. A battery stored at partial charge sulfates, and a battery stored discharged in freezing temperatures can freeze and crack its case.
- Put it on a tender. A quality AGM tender left connected all winter is the single best thing you can do. It maintains float charge and does not overcharge.
- If you can't run a tender, disconnect the negative cable to eliminate parasitic draw, and top the battery up with a charger every four to six weeks. Set a phone reminder — this is the step everybody intends to do and forgets.
- Consider pulling the battery if the bike is stored somewhere unheated. A battery on a shelf in a heated basement with a tender on it fares far better than one bolted into a bike in a freezing barn. Store it upright, off concrete if you like, though modern sealed cases make the concrete rule more tradition than physics.
- Clean and grease the terminals before storage, not after. Corrosion that forms over four idle months is harder to remove than corrosion you prevented.
- Come spring: check resting voltage before you hit the starter. If it's below 12.4V, charge it fully and test it before you trust it on a ride.
Testing a Suspect Battery
Before you spend money, spend five minutes with a multimeter. A lot of "dead batteries" are loose grounds, and a lot of "good batteries" are about to strand somebody.
Step 1: Resting voltage. Let the bike sit at least a few hours after riding or charging — surface charge inflates the reading. Set the meter to DC volts and touch the probes to the terminals.
| Resting Voltage | State of Charge | What It Means |
|---|---|---|
| 12.7V - 12.8V+ | 100% | Healthy and fully charged |
| 12.6V | ~100% | Normal full charge for an AGM |
| 12.4V | ~75% | Partially discharged — charge it and find out why |
| 12.2V | ~50% | Significantly discharged — charge now, damage may already be starting |
| 12.0V | ~25% | Deeply discharged — charge immediately, expect reduced life |
| Below 11.8V | Effectively dead | Sulfation likely permanent; plan on replacement |
Step 2: Cranking voltage. Have a helper watch the meter across the terminals while you hit the starter. Voltage will dip — that's normal. If it drops below roughly 9.6V during cranking on a warm engine, the battery can't deliver current under load even if resting voltage looked fine. That's the classic signature of a battery with good voltage and no capacity left.
Step 3: Load test. A carbon-pile load tester or a decent electronic tester applies a controlled load and measures how the battery holds up. This is the definitive test and most auto parts stores will do it free. A battery that passes resting voltage but fails a load test is finished, no matter how new it is.
Step 4: Charging system check. Start the engine, bring it up to a fast idle or light cruising RPM, and measure across the terminals. You want roughly 13.8V to 14.8V. Below that, the stator or regulator isn't keeping up and your new battery will die the same way the old one did. Above 15V, the regulator is overcharging and cooking the battery. Fix the charging system before you install a new battery, or you'll buy two.
Step 5: Check for parasitic draw. With everything off, put the meter in DC amps in series with the disconnected negative cable. A small standby draw is normal; a large one means an accessory is eating your battery overnight. Pull fuses one at a time to find the circuit.
Replacement Parts We Stock
These are V-Twin Manufacturing parts from our own catalog that fit FXLRS, FXLR and FX applications. Confirm fitment for your specific year and configuration before ordering.
| Part Number | Description | Price | Category |
|---|---|---|---|
| 28-0539 | Battery Pad Set | $8.67 | Trays & Carriers |
| 28-0749 | Battery Tray ISO Stud Set | $8.87 | Trays & Carriers |
| 28-0547 | Battery Tray ISO Stud | $10.02 | Trays & Carriers |
| 32-1024 | Brass Battery Terminal Adapter Kit | $10.67 | Cables |
| 37-8933 | Zinc Battery Vent Clamp | $10.67 | Cables |
| 28-0619 | Battery Tray ISO Stud | $12.27 | Trays & Carriers |
| 42-0515 | Stainless Steel Battery Strap | $14.27 | Straps |
| 36-0125 | *UPDATE 35" Stainless Steel Speedometer Cable | $14.42 | Cables |
| 28-0549 | Battery Tray ISO Stud Set | $15.42 | Trays & Carriers |
| 36-2410 | 46.5" Black Speedometer Cable | $17.25 | Cables |
| 31-4186 | Chrome Battery Tray Carrier Bracket | $17.87 | Trays & Carriers |
| 32-0313 | Black Ground 10-1/4" Battery Cable | $17.98 | Cables |
| 31-0149 | Chrome Speedometer Cable Guide | $18.02 | Cables |
| 28-0546 | Battery Tray ISO Stud | $18.64 | Trays & Carriers |
What to grab while you're in there: the battery pad set (28-0539) and the isolation studs are the parts most often found flattened or missing when the battery comes out, and they're what keeps vibration from destroying the next battery. The stainless battery strap (42-0515) replaces a stretched or cracked hold-down. If your ground cable looks tired, 32-0313 is a ten-and-a-quarter-inch black ground cable. Note that the battery itself is not in this list — match it at the counter using the specs off your old battery's label.
Tips, Warnings & Common Mistakes
Tips that save you a second trip:
- Photograph the terminals before you touch anything. Every time.
- Lay a shop rag over the positive post while you work on the negative side. Costs nothing, prevents the worst outcome in this job.
- Buy the battery locally if you can. Shipping a lead-acid battery is expensive, and if it's dead on arrival you want a counter to walk it back to.
- Write the install date on the battery with a paint pen. In three years you'll want to know.
- If the bike has an alarm, security fob, or aftermarket electronics, expect to re-pair or re-sync after power loss. Check your manual for the procedure before you disconnect.
- A battery that tests fine but won't crank is usually a ground problem. Clean the frame ground before you buy anything.
Warnings:
Never lay a wrench or socket extension across the battery while both terminals are connected. A tool bridging positive to frame is how garages catch fire.
Never jump-start this bike from a running car. The car's charging system can push far more current than a motorcycle's electrical system is built for, and you can take out the regulator and the ECM along with the battery.
Never use an automotive fast charger or a "boost/start" setting on a motorcycle AGM. It will destroy the battery, and it may do it violently.
Battery acid is sulfuric acid. If a case is cracked or weeping, handle it with gloves and eye protection, neutralize spills with baking soda, and flush any skin contact with water immediately.
Common Mistakes and What They Cost You:
| Mistake | Consequence |
|---|---|
| Disconnecting positive first | Wrench slips to frame, dead short, sparks, burned wrench, possible fire |
| Reconnecting negative first | Same short risk while you're still working on the positive terminal |
| Over-tightening the hold-down strap | Bowed or cracked AGM case, slow leak, early failure |
| Under-tightening the hold-down | Battery walks in the tray, vibration destroys plates and loosens terminals |
| Skipping the battery pads | Direct vibration into the case; battery dies in a season on a solid-mount V-twin |
| Loose terminal bolts | Intermittent no-start, voltage drop under load, arcing and heat at the post |
| Over-torquing terminal hardware | Stripped or snapped posts — the battery is scrap and no one warranties it |
| Installing a new battery without charging it | Permanent capacity loss from the first deep discharge |
| Using a trickle charger instead of an AGM tender | Overcharging, vented cells, dried-out plates |
| Ignoring a 15V+ charging system reading | The new battery dies exactly like the old one did |
| Reversing battery polarity | Blown main fuse at best; fried ECM, regulator and wiring harness at worst |
| Leaving a tool in the battery box | Rattles until it bridges the terminals — then it's an electrical fire under your seat |
| Storing the bike without a tender | Sulfated battery by spring, often unrecoverable |
| Buying on price alone with the wrong CCA | Marginal cranking in cold weather and a battery that ages fast under strain |
| Reusing corroded cable lugs | Hard starting that a new battery won't fix, because the battery was never the problem |
Disposal & Recycling
Lead-acid batteries — AGM included — are one of the most recycled products in the country, and they are illegal to throw in household trash in every US state.
- Core charge: most retailers charge a core deposit (commonly around $10-$20, varies by state and seller) when you buy a new battery, refunded when you bring the old one back. Keep your receipt and bring the old battery in — that money is yours.
- Who takes them, free: auto parts stores (AutoZone, O'Reilly, Advance, NAPA), Harley-Davidson dealerships, battery specialty shops, most motorcycle shops, and municipal household hazardous waste collection sites. Scrap metal yards will usually pay you a few dollars for one.
- How to transport it: upright, in a plastic tote or a box lined with a garbage bag, wedged so it can't tip. Cover the terminals with tape or the caps from the new battery so nothing metal in your trunk can bridge them.
- If the case is cracked or leaking: double-bag it, keep it upright, and call your local hazardous waste facility first — some recyclers handle damaged cases differently.
- Do not attempt to open, drain, burn, or bury a battery. Lead and sulfuric acid are exactly the environmental problem they sound like, and the recycling infrastructure already exists and costs you nothing to use.
Verification Notes
We've been deliberately conservative with numbers in this guide. Model-year specifics change, and a spec that's wrong is worse than a spec that's missing. Confirm every item below against your own 2026 Low Rider S owner's manual, the factory service manual, or your dealer's parts counter before ordering or wrenching.
| Item to Verify | Why It Matters | Where to Confirm |
|---|---|---|
| Harley OEM battery part number | Determines the exact replacement; we do not list an OEM number we can't confirm for this model year | Owner's manual, dealer parts counter, or the label on your existing battery |
| BCI group size | Wrong group size won't fit the tray or reach the cables | Label on the old battery; dealer parts counter |
| Cold Cranking Amps rating | Undersizing CCA causes cold-weather no-starts and shortens battery life | Old battery label; factory service manual |
| Battery dimensions (L x W x H) | The Softail tray is tight — a few millimeters either way matters | Measure the old battery; confirm with the seller |
| Battery weight | Affects how you lift it and whether the hold-down is adequate | Manufacturer's spec sheet for the replacement |
| Terminal layout and orientation | Reversed posts mean cables won't reach, or will reach the wrong post | Compare directly to the old battery before purchase |
| Terminal bolt torque spec | Under-torque causes arcing; over-torque strips the post | Factory service manual |
| Hold-down hardware torque spec | Over-torque cracks the case | Factory service manual |
| Seat fastener Torx size | Wrong driver rounds the fastener | Check your own bike before removing |
| Main fuse rating and location | Needed if a short blows it during the job | Owner's manual fuse chart |
| Charging system output range | Confirms the regulator and stator are healthy before you install a new battery | Factory service manual |
| Security fob / alarm re-sync procedure | Power loss may require re-pairing before the bike will start | Owner's manual, security system section |
| Reserve capacity rating | Determines how long accessories run with the engine off | Replacement battery's spec sheet |
| Parasitic draw specification | Tells you whether your measured standby draw is normal or a problem | Factory service manual |
| V-Twin part fitment for your exact configuration | Catalog fitment covers FXLRS/FXLR/FX broadly; your year and options may narrow it | Our parts counter, with your VIN |
Parts for this job
Fits FXLRS, FXLR, FX — from our catalogue of 41,000+ aftermarket parts.
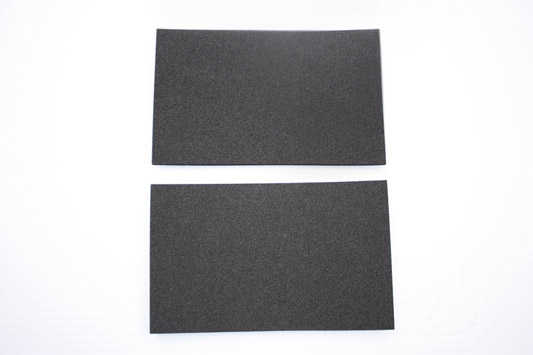 Battery Pad Set$10.40
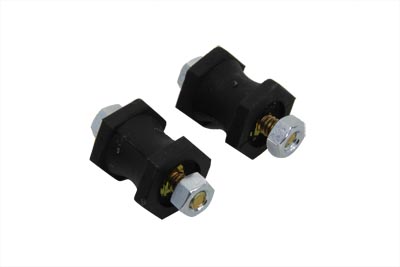 Battery Tray ISO Stud Set$10.64
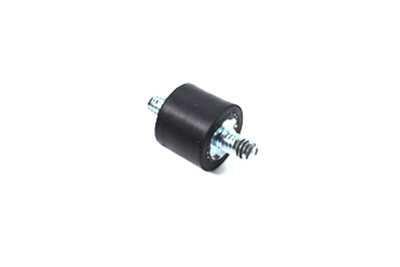 Battery Tray ISO Stud$12.02
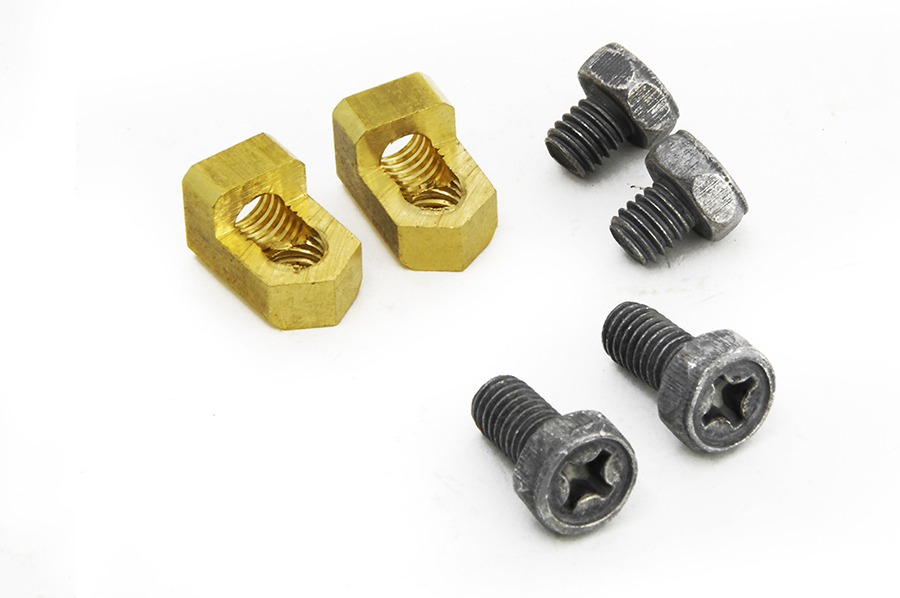 Brass Battery Terminal Adapter Kit$12.80
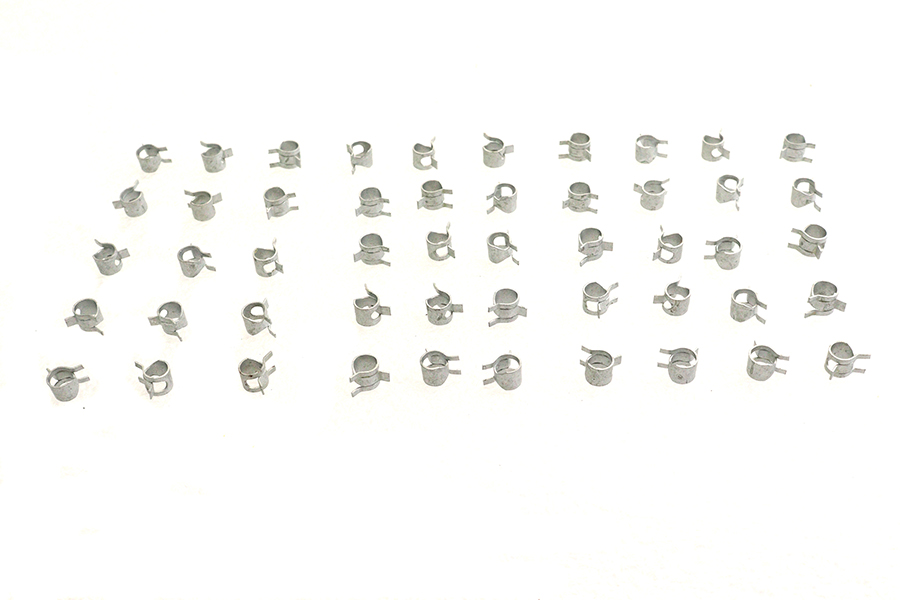 Zinc Battery Vent Clamp$12.80
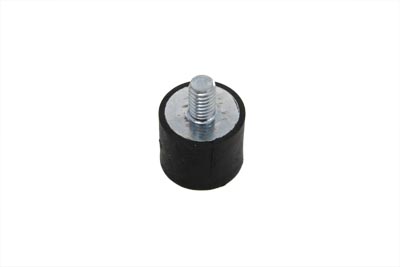 Battery Tray ISO Stud$14.72
 Stainless Steel Battery Strap$17.12
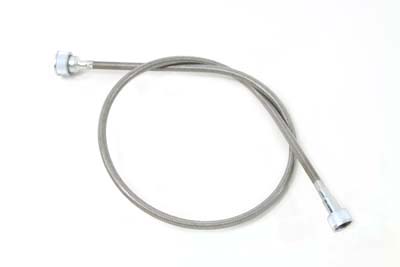 *UPDATE 35" Stainless Steel Speedometer Cable$17.30
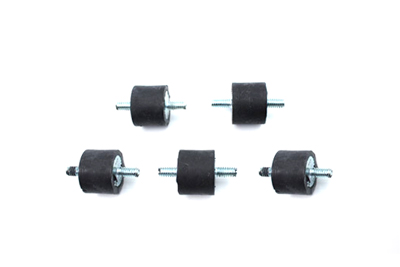 Battery Tray ISO Stud Set$18.50
 46.5" Black Speedometer Cable$20.70
 Chrome Battery Tray Carrier Bracket$21.44
 Black Ground 10-1/4" Battery Cable$21.58