Battery Guide: 2026 Harley-Davidson Heritage Classic FLHCS
Battery Guide: 2026 Harley-Davidson Heritage Classic FLHCS
Quick Reference Table
| Spec | Value | Source |
|---|---|---|
| Battery Type | AGM (Absorbed Glass Mat), sealed, 12V | Harley-Davidson Genuine Parts |
| OEM Part Number | verify against your owner's manual or dealer | Harley-Davidson Parts Catalog |
| Group Size | verify against your owner's manual or dealer | Battery Council International |
| Cold Cranking Amps (CCA) | verify against your owner's manual or dealer | Harley-Davidson Service Manual |
| Reserve Capacity | verify against your owner's manual or dealer | Battery Specifications |
| Nominal Voltage | 12V | Electrical System Specs |
| Fully Charged Voltage | 12.6V - 12.8V (AGM often reads 12.8V - 13.0V) | Maintenance Guidelines |
| Dimensions (LxWxH) | verify against your owner's manual or dealer | OEM Battery Spec |
| Weight (approx) | verify against your owner's manual or dealer | Manufacturer Data |
| Terminal Type | Threaded post with bolt-through cable lug | Hardware Specification |
| Terminal Position | Confirm orientation on your own bike before lifting the old battery out | Installation Check |
| Hold-Down Method | Strap or bracket over the top of the battery | Factory Installation |
| Replacement Interval | 3-5 years depending on climate and use | Maintenance Schedule |
| Charging System Output | Roughly 13.8V - 14.8V at cruising RPM | General Service Range |
The Heritage Classic runs a Milwaukee-Eight in a Softail chassis with a fat front end, floorboards, locking hard bags and a detachable windshield. None of that changes the battery chemistry, but it does change what you have to move to get at the thing. Any spec above marked "verify" is model-year sensitive. Read it off the label on the battery you pull out, or off your manual, before you buy.
Difficulty & Time Estimate
- Difficulty Level: Beginner (1 out of 5) — hand tools only, no special equipment
- Estimated Time: 25-35 minutes for an experienced wrench, 45-60 minutes the first time
- Seasonal Note: Do this above 40°F if you can. Cold hands drop small nuts into the frame.
- Tools at Hand: Everything you need lives in a basic metric socket set plus a Torx driver. If you have a magnetic pickup tool, keep it on the bench — the hold-down nut is the one that gets away.
- Battery weight is real. Support it with both hands on the way out, not with your fingertips on the terminals.
Tools Required
| Tool | Purpose |
|---|---|
| Socket wrench with metric sockets (8mm, 10mm) | Terminal bolts and hold-down hardware |
| Torx driver set (T25, T27) | Seat bolt and any cover fasteners |
| Short 1/4" drive extension | Reaching the hold-down nut without fighting the frame |
| Digital multimeter | Resting voltage and charging system check |
| Battery terminal brush or small wire brush | Cleaning corrosion off cable lugs |
| Baking soda and water solution | Neutralizing acid residue in the tray |
| Shop rags | Drying the tray, wiping terminals |
| Safety glasses and nitrile gloves | Acid and spark protection |
| Dielectric grease | Sealing terminals against moisture after assembly |
| Torque wrench (in-lb range) | Terminal bolts — these are easy to overtighten |
| Smart AGM-capable battery tender | Topping off the new battery before and after install |
| Magnetic pickup tool | Retrieving dropped hardware from the frame |
Battery Location & Access
On the Heritage Classic the battery sits under the seat, low and central in the Softail frame, between the rider's legs and ahead of the rear shock area. It is not behind a side cover the way it is on a Touring bike — you get to it from the top.
What has to come off first:
- The seat. Single fastener at the rear of the seat, typically a Torx or Allen head into a threaded boss over the rear fender. Loosen it, then slide the seat rearward to release the tongue from the tank bracket. Lift it clear and set it upside down on a towel so you do not scuff the leather.
- The battery cover or strap, if fitted. Depending on trim there may be a cover or retaining bracket over the battery top. Note how it sits before you remove it.
- Nothing else. You should not need to remove bags, exhaust, or the windshield. If you find yourself pulling bodywork, stop and re-check — you are in the wrong spot.
A note on the saddlebags: they don't block the battery, but the left bag lid will swing into your elbow while you work. Unclip it or leave it open and out of the way.
Before the seat goes back on, remember that the seat bolt boss is also where a lot of riders stash the tender pigtail. Route it so the seat does not pinch the wire.
Step-by-Step Replacement
Step 1: Park, Cool, Ventilate
Park on level ground with the jiffy stand down and the transmission in gear. Let the bike cool — the exhaust and the rear cylinder head sit close to where your hands will be. Work outside or in a ventilated garage. Batteries vent hydrogen, and hydrogen and sparks make a bad afternoon.
Step 2: Kill the Ignition and Remove the Key
Turn the ignition fully off and take the key out of the bike. On a modern Harley with a security fob, walk the fob out of range or leave it on the bench so the alarm does not arm and disarm while you are working.
Tip: Some riders lose radio presets and clock settings when the battery comes out. Write down anything you care about first.
Step 3: Remove the Seat
Back out the seat fastener, slide the seat rearward, and lift it off. Put the fastener somewhere it cannot roll — a magnetic tray or your pocket. Set the seat cover-side up on a clean surface.
Step 4: Expose the Battery Top
Remove any cover, trim panel, or retaining bracket sitting over the battery. Keep the hardware with the part it came from. Take a photo of the battery in place before you touch a single cable.
Step 5: Photograph the Cable Routing
This matters more than people think. Photograph which cable lands on which post and how the cables route around the frame rail. Positive is usually red with a boot over it; negative is usually black and bare. Do not trust a generic diagram over your own photo.
Step 6: Disconnect the Negative Cable First
Loosen the negative (-) terminal bolt and lift the cable clear. Negative comes off first, always. Here is why: the negative post is bonded to the frame. If your wrench slips while you are working on the negative side and touches metal, nothing happens — the frame is already at that potential. If you loosen positive first and your wrench bridges the positive post to the frame, you get a dead short through the tool, a shower of sparks, and possibly a ruined battery or a burned hand.
Tuck the negative cable away from the battery so it cannot spring back onto the post.
Step 7: Disconnect the Positive Cable
Fold back the red boot, loosen the positive (+) terminal bolt, and lift the cable off. Move it clear of the battery and clear of the negative cable. Some riders slip a rag over the positive lug as insurance.
Step 8: Release the Hold-Down
Undo the strap, bracket, or hold-down nut securing the battery. Swing it clear. This is the fastener most likely to drop into the frame — use the magnetic pickup if it goes.
Step 9: Lift the Battery Out
Grip the carry strap if the battery has one, otherwise take it by opposite corners of the case. Lift straight up and out. Keep it upright even though AGM batteries are sealed — you don't want to test that seal. Set it on a stable surface off the floor.
Warning: Do not lift the battery by its cables or terminals. You will tear a post loose and turn a 30-minute job into a parts order.
Step 10: Clean and Inspect the Tray
Look at the tray for corrosion, cracks, white powder, or standing moisture. Scrub any residue with baking soda and water, rinse lightly, and dry it completely. Check the tray studs and any isolator hardware for damage — a chewed-up stud means the new battery will never sit tight.
Step 11: Set the New Battery In
Charge the new battery fully before installation if it has been sitting on a shelf. Lower it into the tray with the terminals oriented exactly as the old one sat — match your photo from Step 5. It should drop in flat with no rocking. If you have to force it or wedge it, you have the wrong size battery. Stop and check the group size against what came out.
Step 12: Secure the Hold-Down
Refit the strap or bracket and snug the hardware. The battery should not move when you push it side to side, but the case should not be visibly flexing either. Torque figure: verify against your owner's manual or dealer. Snug plus a quarter turn by feel is the practical answer if you don't have a spec — an overtightened hold-down cracks AGM cases.
Step 13: Connect the Positive Cable First
Positive goes on first, for the same reason negative came off first. With negative still disconnected, the frame is isolated, so a slipped wrench on the positive post has nowhere to short to. Seat the lug flat on the post, thread the bolt, and tighten. Terminal torque: verify against your owner's manual or dealer — these are small threads into soft lead-alloy posts and they strip easily. Tight enough that the cable will not twist by hand is the working standard. Slide the red boot back over the terminal.
Step 14: Connect the Negative Cable Last, Then Test
Land the negative cable on the negative post and tighten to the same standard. You may see a small spark as the bike's electronics wake up — that is normal. Apply a thin film of dielectric grease over both terminals. Refit any cover, reinstall the seat, and torque the seat fastener. Turn the key on, confirm the gauges light, and start the bike. Let it idle and check charging voltage at the terminals — you should see roughly 13.8V to 14.8V above idle.
Charging & Maintenance
AGM batteries are sealed. You never add water, and you never crack them open. What they want is to live near full charge, all the time.
Use a smart tender, not a trickle charger. A modern microprocessor-controlled maintainer with an AGM setting will charge, then float, then stop. A dumb trickle charger pushes current forever and cooks the electrolyte out of an AGM cell through the pressure valves. That water never comes back and the capacity never returns.
Charge rate matters. Slow and low beats fast and hot. A 1-2 amp maintainer is right for a motorcycle battery. Automotive chargers set to 10A or higher, and anything with an "engine start" or "boost" mode, will overheat a motorcycle AGM.
Ride it, or tender it. The single most common way to kill an AGM on a bagger-style Softail is short trips. The Heritage draws current for the security system and ECM memory even parked, and a fifteen-minute ride does not replace what a cold start took out plus what the parasitic draw is pulling. If you ride short and infrequent, keep it on a tender between rides.
What kills an AGM battery:
- Sitting discharged. Sulfate crystals harden on the plates and permanently reduce capacity. A battery left at 11V for a month may never come back.
- Overcharging with an unregulated charger — venting and dry-out.
- Heat. Florida summers age a battery faster than a northern winter does.
- Vibration from a loose hold-down, which shakes plate material loose internally.
- Corroded or loose terminals, which make the charging system look like it is working while the battery slowly starves.
Routine checks: Read resting voltage monthly with a multimeter. Inspect terminals for corrosion every oil change. Confirm the hold-down is still tight after the first few hundred miles on a new battery.
Winter Storage
If the bike sleeps for a season:
- Charge it fully before storage. A partially charged battery freezes at a higher temperature and sulfates faster.
- Keep it on a maintainer. Leave the battery in the bike and connect a tender through a permanently installed pigtail, or pull the battery and tender it on a bench. Either works. The pigtail is easier and you are less likely to damage terminals with repeated removal.
- Disconnect if you cannot tender. If there is no power where the bike is stored, disconnect the negative cable to eliminate parasitic draw, and plan to charge the battery every 4-6 weeks.
- Store off concrete only for comfort's sake. The old "concrete drains a battery" rule came from tar-cased batteries decades ago. A modern AGM on a garage floor is fine. A cold floor still ages it faster than a shelf at room temperature, so put it up if you have room.
- Do not store a discharged battery in freezing conditions. A fully charged AGM resists freezing well below 0°F. A discharged one can freeze near 20°F and crack the case.
- Spring wake-up: Charge fully, check resting voltage after it sits 12 hours, then load test before you plan a long first ride.
Testing a Suspect Battery
Test in this order. Each step tells you something the previous one did not.
1. Resting voltage. The battery must sit unconnected and untouched for at least 12 hours, or at minimum 2 hours after a ride, before this number means anything. Surface charge from a recent ride will make a dying battery read healthy.
| Resting Voltage | State of Charge | What It Means |
|---|---|---|
| 12.8V - 13.0V | 100% | Healthy AGM at full charge |
| 12.6V - 12.8V | ~100% | Normal and fine |
| 12.4V - 12.6V | ~75% | Undercharged. Tender it and retest. |
| 12.2V - 12.4V | ~50% | Significantly discharged. Charge now; sulfation is starting. |
| 12.0V - 12.2V | ~25% | Deeply discharged. Charge, then load test — it may not recover. |
| Below 12.0V | Near dead | Likely damaged. Charge and load test before spending money on a charging system diagnosis. |
| Below 10.5V after full charge | Dead cell | Replace. A shorted cell will not recover. |
2. Load test. Voltage alone lies. A sulfated battery can show 12.7V at rest and collapse the instant it has to turn a Milwaukee-Eight over. Use a carbon-pile or electronic load tester, or watch cranking voltage on the multimeter while a helper hits the starter.
- Cranking voltage should stay above 9.6V at moderate temperature.
- Dropping to 9.0V or below under crank means the battery is finished, even if resting voltage looked fine.
- A battery that recovers to 12.6V within a few seconds of releasing the starter is generally sound.
3. Charging system check. Before you blame the battery, rule out the charging system. With the engine running above idle, measure across the battery terminals.
- 13.8V - 14.8V: charging system is working
- Below 13.0V running: the battery is not being recharged. Suspect stator, regulator, or a bad connection — replacing the battery will not fix this and the new one will die the same way.
- Above 15.0V: overcharging. Regulator fault. This will boil an AGM battery in short order. Fix it before installing a new battery.
4. Parasitic draw. If the bike kills batteries repeatedly, put an ammeter in series with the negative cable, key off, and read the draw. A few milliamps is normal for the security system and ECM. Hundreds of milliamps means something is staying awake — accessory wiring, an aftermarket alarm, or a relay that isn't dropping out.
Replacement Parts We Stock
These are V-Twin Manufacturing part numbers from our own catalog that fit FLHCS, FLHC, FLH and CL applications. Prices as listed.
| Part Number | Description | Price | Category |
|---|---|---|---|
| 48-2316 | Battery Label | $4.50 | Battery |
| 48-2316 | Battery Label | $4.50 | Batteries |
| 53-0566 | *UPDATE Battery Top Plug Set | $7.15 | Battery |
| 53-0566 | *UPDATE Battery Top Plug Set | $7.15 | Batteries |
| 12-0538 | Parkerized 6 Volt Battery Rod Wing Nuts | $7.92 | Straps |
| 12-0538 | Parkerized 6 Volt Battery Rod Wing Nuts | $7.92 | Battery |
| 28-0749 | Battery Tray ISO Stud Set | $8.87 | Trays & Carriers |
| 37-0589 | Zinc Speedometer Cable Clamps | $8.87 | Cables |
| 37-9025 | Speedometer Cable Clamp | $8.87 | Cables |
| 53-0579 | Battery Top Set | $8.87 | Battery |
| 53-0579 | Battery Top Set | $8.87 | Batteries |
| 28-0547 | Battery Tray ISO Stud | $10.02 | Trays & Carriers |
| 12-0538 | Battery Box Wing Nut Set | $10.08 | Straps |
| 12-0538 | Battery Box Wing Nut Set | $10.08 | Battery |
We do not list a Harley OEM battery part number for this model here. Confirm the correct OEM number and group size against your owner's manual or your dealer before ordering the battery itself.
Tips, Warnings & Common Mistakes
Tips that save you time:
- Buy the battery charged, or charge it the night before. An AGM shipped at 60% will start the bike once and then leave you guessing.
- Keep a tender pigtail permanently wired to the battery with an inline fuse. Route it out under the seat where you can reach it without tools.
- Clean the cable lugs, not just the posts. Corrosion hides inside the lug where it contacts the post.
- Write the install date on the new battery with a paint pen. Three years from now you will want to know.
- Take the old battery to the counter when buying the new one. It settles the core charge and guarantees the size matches.
Warnings:
- Never put a metal tool across both terminals. A motorcycle battery can deliver hundreds of amps into a dead short and will weld a wrench in place.
- No smoking, no grinding, no open flame near a charging battery.
- Battery acid eats clothing and skin. Safety glasses are not optional. If you get acid on you, flush with water immediately.
- Never jump-start off a running car. The car's charging system can push far more current than a motorcycle battery is built to accept.
Common mistakes and what they cost you:
| Mistake | Consequence |
|---|---|
| Disconnecting positive first | Wrench shorts to frame, sparks, possible battery damage or burns |
| Connecting negative first on reassembly | Same short risk, now with a brand new battery in the tray |
| Overtightening terminal bolts | Stripped threads or a cracked post — battery is scrap |
| Overtightening the hold-down | Cracked AGM case, slow leak, early failure |
| Leaving the hold-down loose | Vibration destroys the plates internally within a season |
| Using an automotive charger or boost mode | AGM vents, dries out, permanently loses capacity |
| Using a dumb trickle charger long-term | Continuous overcharge, dry cells, ruined battery |
| Reading voltage right after a ride | Surface charge masks a failing battery |
| Replacing the battery without checking charging output | New battery dies the same way in weeks |
| Installing an undercharged new battery | Poor first impression, permanent capacity loss from day one |
| Ignoring terminal corrosion | Voltage drop under load, hard starts, false charging-system diagnosis |
| Storing the bike discharged all winter | Sulfation, or a frozen and cracked case |
| Skipping the photo of cable routing | Reversed polarity — blown fuses, damaged ECM |
On reversed polarity: it is the single most expensive mistake on this list. Modern Harleys have sensitive electronics. Check twice before you tighten the second terminal.
Disposal & Recycling
Lead-acid batteries, including sealed AGM units, are recyclable and in most states it is illegal to put one in household trash. They are also one of the most successfully recycled products in the country — over 95% of the lead in a new battery is reclaimed material.
Core charge: most retailers, including us, apply a core charge when you buy a battery and refund it when you turn in the old one. Bring the old battery back and you get that money. Keep your receipt.
Who takes them:
- The shop that sold you the new battery — this is the easiest route and settles the core charge at the same time
- Auto parts chains (AutoZone, O'Reilly, Advance, NAPA) — they take motorcycle batteries whether or not you bought there, and many pay a small gift-card bounty
- Harley-Davidson dealerships
- Municipal household hazardous waste collection sites
- Scrap metal yards, which will usually pay by weight
Handling for transport: keep the battery upright, put it in a plastic tub or a doubled trash bag in case of residue, and do not let anything metal rest across the terminals in the back of the truck. Tape over the posts if you have electrical tape handy.
Never: throw it in the trash, bury it, burn it, or try to open a sealed AGM case.
Verification Notes
Everything in this guide that is chemistry or procedure applies broadly. Everything that is a number specific to the 2026 FLHCS needs confirmation against your own documentation before you spend money. Confirm the following:
| Item to Verify | Where to Confirm | Why It Matters |
|---|---|---|
| OEM battery part number | Owner's manual, dealer parts counter, or the label on the battery you remove | Ordering the wrong battery wastes a shipping cycle |
| Group size / BCI designation | Battery label or manual | Wrong size will not sit in the tray or will not stay put |
| Cold cranking amps (CCA) rating | Service manual specification | Undersizing CCA means hard cold starts and short battery life |
| Exact battery dimensions | OEM spec or measure the old battery | Aftermarket "equivalents" vary by a quarter inch, which matters in a tight tray |
| Battery weight | Manufacturer data | Only matters for handling and shipping cost |
| Terminal orientation (positive side) | Photograph your own bike before removal | Reversed polarity damages electronics |
| Terminal bolt torque | Service manual | Stripped posts are not repairable |
| Hold-down torque | Service manual | Overtightening cracks the case |
| Seat fastener torque | Service manual | Strips into the fender boss if overdone |
| Main fuse rating and location | Owner's manual fuse chart | Needed if the bike is dead and you are diagnosing |
| Reserve capacity rating | Battery specification sheet | Relevant if you run heated gear or extra lighting |
| Charging system output range | Service manual | Confirms whether your measured voltage is actually in spec |
| Model-year hold-down design | Visual inspection before removal | Softail hold-down hardware has changed between years |
If your bike came from a dealer with an accessory battery tender pigtail, security system, or aftermarket audio, treat the parasitic draw figures in the testing section as a starting point only. Every added accessory changes the baseline.
Parts for this job
Fits FLHCS, FLHC, FLH, FL — from our catalogue of 41,000+ aftermarket parts.
 Battery Label$5.40
 *UPDATE Battery Top Plug Set$8.58
 Parkerized 6 Volt Battery Rod Wing Nuts$9.50
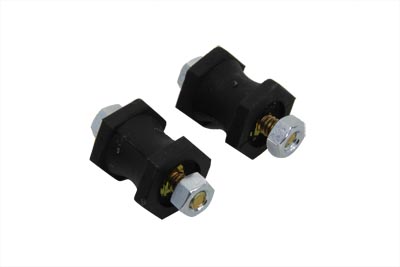 Battery Tray ISO Stud Set$10.64
 Zinc Speedometer Cable Clamps$10.64
 Speedometer Cable Clamp$10.64
 Battery Top Set$10.64
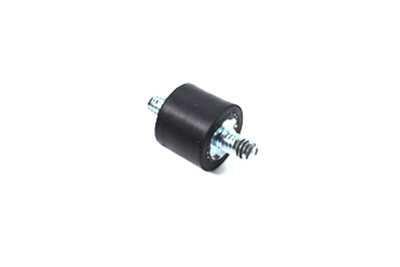 Battery Tray ISO Stud$12.02Battery Box Wing Nut Set$12.10
 Bright Chrome Battery Carrier Bracket$12.80
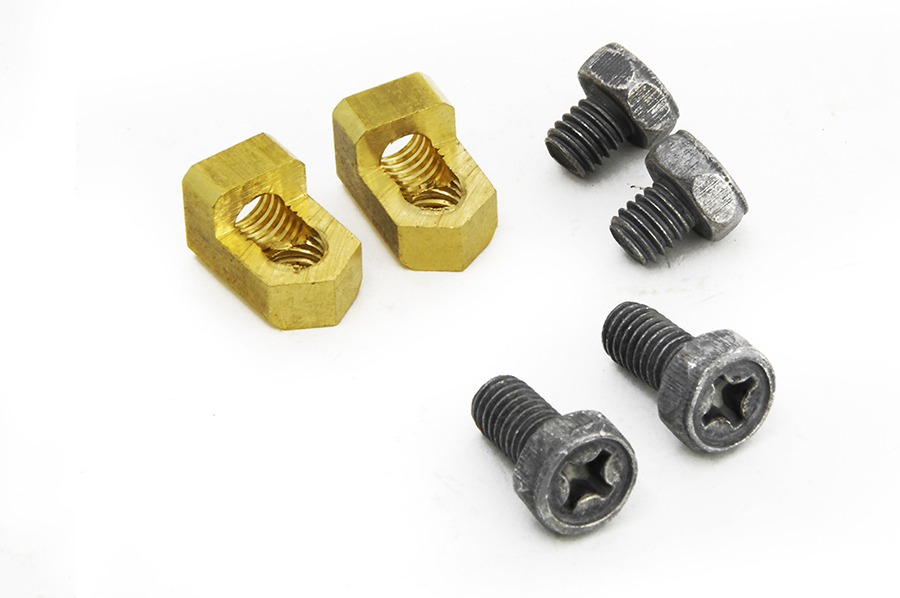 Brass Battery Terminal Adapter Kit$12.80
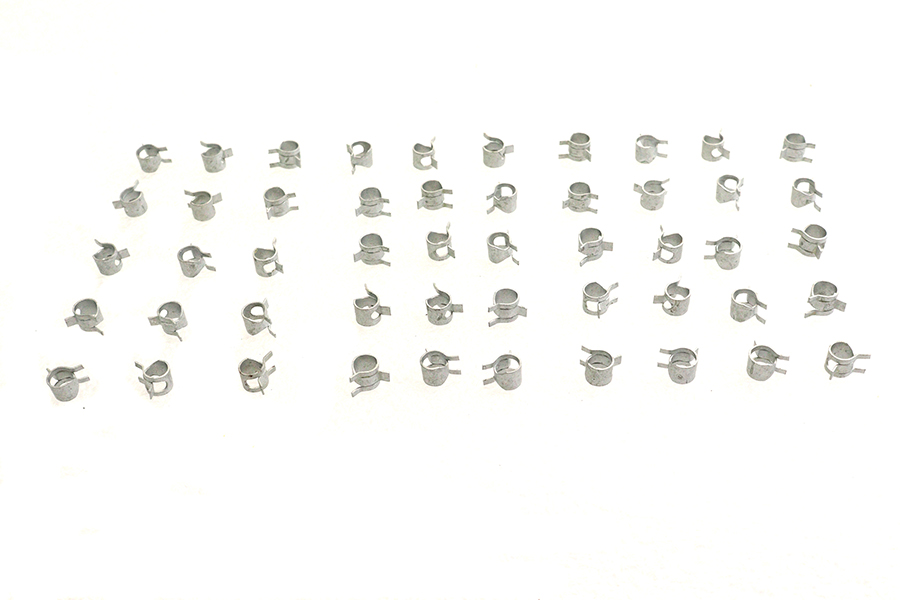 Zinc Battery Vent Clamp$12.80