Battery Guide: 2026 Harley-Davidson Freewheeler FLRT
Battery Guide: 2026 Harley-Davidson Freewheeler FLRT
Quick Reference Table
| Spec | Value | Source |
|---|---|---|
| Battery Type | AGM (Absorbed Glass Mat), sealed, 12V | Harley-Davidson Genuine Parts |
| OEM Part Number | Verify against your owner's manual or dealer | — |
| Group Size | Verify against your owner's manual or dealer | — |
| Cold Cranking Amps (CCA) | Verify against your owner's manual or dealer | — |
| Reserve Capacity | Verify against your owner's manual or dealer | — |
| Nominal Voltage | 12V | Electrical System Specs |
| Fully Charged Voltage (resting) | 12.6V – 12.8V | Maintenance Guidelines |
| Dimensions (LxWxH) | Verify against your owner's manual or dealer | — |
| Weight (approx) | Verify against your owner's manual or dealer | — |
| Terminal Type | Threaded post with bolt and nut | Hardware Specification |
| Terminal Layout | Confirm orientation before lifting the old battery out — photograph it | Installation Practice |
| Hold-Down Method | Strap or clamp over the top of the case | Factory Installation |
| Charging System Output | 13.8V – 14.8V at cruising RPM | General Charging System Spec |
| Replacement Interval | 3–5 years depending on climate and use | Maintenance Schedule |
| Vent Tube | Not required — AGM batteries are sealed | Battery Design |
The Freewheeler is a trike, and that matters more than any single number in the table above. It carries more weight, it has a reverse motor that pulls hard current on demand, and it tends to live a different life than a two-wheel tourer — shorter trips, more idling, more parade duty. All three of those things are hard on a battery. Do not assume a battery that "still starts it" is healthy.
Difficulty & Time Estimate
- Difficulty Level: Beginner (1 out of 5) — hand tools only, no special equipment
- Estimated Time: 25–35 minutes for an experienced mechanic, 45–60 minutes for a first-timer
- Tools at Hand: Everything you need for this job fits in a small tray — a Torx driver, a 10mm wrench, safety glasses, and a wire brush. You do not need a lift, a jack, or a service stand.
- Seasonal Note: Work above 40°F if you can. Cold fingers on a battery terminal with a wrench in hand is how ratchets get dropped into places they should not go.
- Trike Note: The Freewheeler sits on three wheels and does not need to be held up. That is a genuine advantage over the two-wheel bikes in this series — nothing is going to tip while your hands are full.
Tools Required
| Tool | Purpose |
|---|---|
| Safety glasses | Battery acid and sparks both go for the eyes first |
| Nitrile or rubber gloves | Keeps acid residue and terminal grime off your skin |
| Torx driver set (T25/T27 range) | Removes the seat and side cover fasteners — check which size yours uses before you lean on it |
| 10mm wrench or socket with ratchet | Terminal bolts and hold-down hardware |
| Digital multimeter | Resting voltage and charging system checks — non-negotiable for diagnosis |
| Battery terminal brush or small wire brush | Cleans corrosion off posts and cable ends |
| Baking soda and water solution | Neutralizes acid residue in the tray |
| Shop rags | Drying the tray, wiping the case |
| Dielectric grease or terminal protectant | Slows corrosion on the reassembled terminals |
| Smart battery tender (AGM-capable) | Charging the new battery and maintaining it between rides |
| Phone camera | Photographing cable routing before you disturb anything |
| Torque wrench (inch-pound range, optional) | If you want a measured figure rather than feel — verify the spec against your manual |
Battery Location & Access
On the Freewheeler, the battery lives under the seat, in the space between the frame rails behind the fuel tank. This is a different arrangement than the Road Glide and other FL touring bikes in this series, where you work through a side cover — on the Freewheeler you go in from the top.
What has to come off first:
- The rider's seat. A single fastener at the rear of the seat releases it; the front of the seat slides forward under a tab or tongue. Lift the rear first, then draw the seat back and up. Do not yank straight up on a seat that is still hooked at the front.
- The battery cover or top strap, if your bike has one over the case. Some configurations use a plastic shield; some use a fabric or metal strap across the top of the battery.
- The hold-down hardware, once the terminals are off.
Look before you pull. Loose wiring, the main fuse block, and the security module often live in the same area. Note where every connector and ground sits so you can put it all back the same way.
Step-by-Step Replacement
Step 1: Safety Preparation
Put on safety glasses and gloves. Turn the ignition fully off and remove the key or fob. Park the trike on level ground, in gear or with the parking brake set. Work in a ventilated space — AGM batteries are sealed, but charging and shorting both make gas. No smoking, no grinders, no open flames.
Step 2: Remove the Seat
Remove the seat fastener with the correct Torx driver. Lift the rear of the seat, slide it rearward to clear the front mount, and set it upside down on a clean towel — seat covers scratch on concrete. Put the fastener somewhere it cannot roll away; a magnetic tray earns its keep here.
Step 3: Expose the Battery
Remove any plastic shield or top strap covering the battery case. Tip: Photograph the whole battery area before you touch a single cable. Two minutes with a camera saves an hour of guessing later.
Step 4: Note Cable Positions
Identify which cable is on which post. Positive is usually red and typically wears a protective boot; negative is usually black and often bolts to a ground point as well. Confirm with your own eyes rather than assuming — do not rely on which side the posts sit on in any other bike's guide, including this one.
Step 5: Disconnect the Negative Cable First
Using a 10mm wrench, loosen and remove the negative (−) terminal bolt. Lift the cable clear and tuck it well away from the battery. Why negative first: the negative post is tied to the chassis. With it removed, the frame is no longer part of the circuit — if your wrench then touches metal while you are working on the positive side, nothing happens. Do it the other way around and a wrench bridging the positive post to the frame becomes a dead short with a few hundred amps behind it.
Step 6: Disconnect the Positive Cable
Fold back the protective boot and remove the positive (+) terminal bolt with the same 10mm wrench. Lift the cable clear and position it where it cannot fall back onto the post or touch the negative cable. Warning: Never let a tool span both posts. That is the single most common way a battery job turns into a burn, a ruined wrench, and a damaged battery.
Step 7: Release the Hold-Down
Remove the hold-down strap, clamp, or bracket that secures the battery in the tray. Keep the hardware together — the nuts and washers here are easy to lose and annoying to source on a Saturday.
Step 8: Lift the Old Battery Out
Lift the battery straight up and out. It is heavier than it looks and there is not much room to get your fingers under it, so use the factory lift strap if the case has one. Keep it upright. Set it down on a surface you do not care about, away from where you are working, so you cannot confuse it with the new one.
Step 9: Clean and Inspect the Tray
Look for white or green powder, staining, cracks, or standing moisture. Scrub any acid residue with baking soda and water, then dry the tray completely. Clear the drain path if the tray has one. A damaged tray lets the new battery move, and movement kills batteries.
Step 10: Clean the Cable Ends
Brush both cable terminals until the metal is bright. Corrosion is resistance, and resistance is exactly what causes the hard-starting complaint most people blame on the battery. Replace any cable with green corrosion wicking up under the insulation or with brittle, cracked jacketing — a bad cable will make a brand-new battery look defective.
Step 11: Install the New Battery
Set the new AGM battery into the tray in the same orientation the old one came out, terminals matching the cables that have to reach them. It should sit flat with no rocking. If it rocks or the cables do not reach comfortably, stop and check that you have the right battery before you force anything.
Step 12: Secure the Hold-Down
Reinstall the strap, clamp, or bracket and snug it down until the battery cannot shift by hand. Warning: Snug, not gorilla-tight. An AGM case will crack under a hold-down that has been leaned on, and a cracked case is a battery you just bought and cannot return. For a torque figure, verify against your owner's manual or dealer.
Step 13: Connect the Positive Cable First
Fit the positive (+) cable to the positive post and thread the bolt in by hand before touching it with a wrench — cross-threading a battery post is a genuinely expensive mistake. Tighten until the cable will not twist by hand. For a torque figure, verify against your owner's manual or dealer. Seat the protective boot back over the terminal.
Step 14: Connect the Negative Cable Last, Then Test
Fit the negative (−) cable to the negative post and tighten the same way. Why negative last: the frame stays isolated until the final connection, so the one moment a short is possible is the moment you are making the last, deliberate connection — with no other loose cable in play. Apply dielectric grease to both terminals. Turn the key on and confirm the dash lights and gauges come up, then start it. Reinstall the shield and the seat, and be sure no wiring is pinched under the seat pan before you drop the fastener in.
After the job: the clock, trip meters, and radio presets may have reset. Some accessory modules relearn on their own after a short ride; others need to be set by hand.
Charging & Maintenance
AGM batteries are sealed. You never add water, and you should never try — anything that gets you inside the case has already ruined it.
Use a smart tender, not a shop charger. A modern microprocessor-controlled maintainer with an AGM setting will charge, taper, and then hold the battery at float voltage indefinitely. An old unregulated trickle charger will cook it. If your charger has a lithium setting, make sure it is not selected.
Charge rate. Slow beats fast. A charge rate at or below roughly one tenth of the battery's amp-hour rating is gentle and thorough. High-amp "boost" modes generate heat, and heat drives moisture out of a sealed case — moisture it can never get back.
Keep it topped up. A lead-acid battery left partly discharged sulfates: lead sulfate crystals harden on the plates and permanently reduce capacity. This is the number one battery killer on bikes that get ridden seasonally. A tender plugged in between rides costs nothing and adds years.
What kills an AGM battery:
- Sitting discharged for weeks — sulfation, and it is not reversible
- Chronic undercharging from short trips that never replace what starting took out
- Overcharging or an unregulated charger — dries the mats out permanently
- Heat — an engine bay in a Florida summer ages a battery faster than mileage does
- Vibration from a loose hold-down, which shakes the plate material apart internally
- Repeated deep discharges from parasitic draws: accessory lights, alarms, phone chargers, poorly wired farkles
- A charging system that is out of spec, quietly starving the battery every mile
Check the charging system, not just the battery. Put a multimeter across the posts with the engine running at cruising RPM. You want somewhere in the 13.8V–14.8V range. Much below that and the battery is never getting full; much above and it is being cooked. Either way, replacing the battery only buys you time.
Winter Storage
If the trike is going to sit:
- Charge it fully before it sits. Storing a partly discharged battery is how you buy a new one in spring.
- Put it on a maintainer. Leave a smart tender connected for the whole layup. This is the single best thing you can do.
- If you cannot leave it plugged in, disconnect the negative cable. That kills the parasitic draw from the security system and accessories. You will lose the clock and presets; that is a fair trade for a battery that still works in March.
- Remove the battery if the space is unheated. A fully charged battery resists freezing well; a discharged one does not, and a frozen battery is scrap. Store it indoors on a shelf, not on a bare concrete floor.
- Check it monthly if it is not on a tender. Any reading under 12.4V means charge it now.
- Plan for the reverse motor. A weak battery may crank the engine and still fail to work reverse under load. Test reverse on the first ride out of storage somewhere you can afford to push, not in a packed lot.
Testing a Suspect Battery
Test in order, and do not skip the first step.
1. Resting voltage. Let the bike sit with the ignition off for at least a few hours — overnight is better. Surface charge from a recent ride reads high and lies. Put the meter across the posts:
| Resting Voltage | State of Charge | What It Means |
|---|---|---|
| 12.7V or above | 100% | Healthy and full |
| 12.5V – 12.6V | ~75–90% | Acceptable; charge it and find out why it is not full |
| 12.3V – 12.4V | ~50–75% | Undercharged. Charge and retest before you condemn it |
| 12.0V – 12.2V | ~25–50% | Significantly discharged; sulfation is likely starting |
| Below 12.0V | Under 25% | Deeply discharged. It may recover on a slow charge; it may not |
| Below 10.5V after a full charge | Dead cell | Internal failure. Replace it — no charger fixes this |
2. Load test. Voltage alone will not catch a battery that reads fine and collapses under current. Charge it fully, then have it load tested — a dedicated load tester or a conductance tester, which most dealers and parts stores will run for free. Under load, voltage should stay above roughly 9.6V at room temperature. A battery that sags into the 8V range is finished no matter what it read at rest.
3. Cranking test. With the meter still on the posts, hit the starter and watch the number. A healthy battery dips and holds in the high 9s to low 10s. A drop below about 9.5V while cranking means the battery, the cables, or the connections are not up to the job.
4. Parasitic draw. If a known-good battery keeps going flat in a week, the battery is not the problem. Put an ammeter in series with the negative cable, key off, and look at the current with everything asleep. Anything more than a few tens of milliamps means something is not shutting down — start with whatever was added to the bike most recently.
Replacement Parts We Stock
These are V-Twin Manufacturing parts from our own catalog that fit FLRT and FL applications. Every part number and price below is exactly as it appears in our stock list.
| Part Number | Description | Price | Category |
|---|---|---|---|
| 48-2316 | Battery Label | $4.50 | Battery / Batteries |
| 53-0566 | *UPDATE Battery Top Plug Set | $7.15 | Battery / Batteries |
| 12-0538 | Parkerized 6 Volt Battery Rod Wing Nuts | $7.92 | Straps / Battery |
| 28-0749 | Battery Tray ISO Stud Set | $8.87 | Trays & Carriers |
| 37-0589 | Zinc Speedometer Cable Clamps | $8.87 | Cables |
| 37-9025 | Speedometer Cable Clamp | $8.87 | Cables |
| 53-0579 | Battery Top Set | $8.87 | Battery / Batteries |
| 28-0547 | Battery Tray ISO Stud | $10.02 | Trays & Carriers |
| 12-0538 | Battery Box Wing Nut Set | $10.08 | Straps / Battery |
Note that part number 12-0538 appears in our catalog under two descriptions and two prices. Call before ordering if you need a specific configuration. For the battery itself, and for any Harley-Davidson OEM part number, verify against your owner's manual or dealer — we are not going to guess a number that ends up being the wrong battery in your hands.
Tips, Warnings & Common Mistakes
- Photograph everything before you disconnect it. Cable routing, boot position, ground points. It takes two minutes and it removes all the guesswork.
- Buy the battery fresh. Check the manufacturing date on the case. A battery that sat on a shelf for a year has already lost capacity before you paid for it.
- Charge a new battery before you install it. Most arrive around 80% charged. Installing it and riding off means it starts its life undercharged.
- Terminal bolts, not terminal clamps. These posts take a bolt through the cable lug. Hand-thread first, every time.
- Do not chase a battery problem that is a cable problem. Corroded or loose cables produce identical symptoms and cost a fraction as much to fix.
- The reverse motor is a real load. If reverse gets slow and hesitant before anything else does, the battery is often the reason.
- Keep one wrench in play. Work with a single tool in your hand near the posts and set it down outside the battery area whenever you reach for something else.
| Common Mistake | Consequence |
|---|---|
| Disconnecting positive first | Wrench bridges positive to frame — dead short, sparks, burns, possible battery damage |
| Reconnecting negative first | Same exposure while installing the positive cable, at the worst possible moment |
| Overtightening the hold-down | Cracked AGM case; battery ruined and usually not warrantable |
| Overtightening terminal bolts | Stripped or snapped post — the battery is scrap even though it is brand new |
| Leaving a terminal loose | Intermittent no-start, arcing at the post, voltage drop under load, melted lug |
| Using an unregulated trickle charger | Overcharges and dries the mats — permanent capacity loss on a sealed battery |
| Selecting the lithium mode on a smart charger | Wrong voltage profile; damages an AGM battery |
| Reversing polarity | Blown fuses and fried electronics — expensive and entirely avoidable |
| Skipping the resting-voltage test | Replacing a good battery when the real fault is the charging system or a draw |
| Storing it discharged | Sulfation; the battery is dead by spring |
| Installing without cleaning the tray | Residual acid attacks the new case and the tray metal |
| Pinching wiring under the seat pan | Chafed insulation, an intermittent short you will chase for months |
| Ignoring a low charging-system reading | New battery slowly dies the same way the old one did |
Disposal & Recycling
Do not put a lead-acid battery in household trash, and do not leave it sitting in the garage. Lead is toxic and it is also valuable — the recycling stream for these is well established and nearly universal.
- Core charge. Most retailers add a core charge to a new battery, refunded when you hand over the old one. Bring the old battery with you when you buy, or keep the receipt and return it within the window on the slip.
- Where they go: Harley-Davidson dealers, independent motorcycle shops, auto parts chains, and scrap metal yards all take lead-acid batteries. Auto parts stores generally accept them free of charge whether or not you bought there. Many county household-hazardous-waste sites take them too.
- How to transport it: upright, in a plastic tote or on a tray, in a place where it cannot tip or slide. A sealed AGM leaks less than a flooded battery, but a cracked case still leaks.
- If the case is cracked or leaking: double-bag it, keep it upright, call ahead, and get it to a hazardous waste facility rather than a retail counter.
- Do not open it, drain it, or burn it. There is nothing serviceable inside and everything in there is hazardous.
Verification Notes
The procedure in this guide is sound for the Freewheeler. The specific numbers are what you must confirm against your own documentation — the correct figures for your VIN and model year live in your service manual, not in an article.
| Item to Verify | Where to Confirm | Why It Matters |
|---|---|---|
| Battery group size and exact dimensions | Owner's manual, service manual, or dealer parts counter | A case that is close but not right will not secure properly in the tray |
| Harley-Davidson OEM battery part number | Dealer parts counter or the H-D parts catalog for your VIN | We are not guessing this — the wrong number is a wasted trip |
| CCA rating required | Service manual specifications section | Trikes ask more of a starter; under-spec is a cold-morning problem |
| Terminal orientation and polarity layout | The battery coming out of your own bike — photograph it | Cables must reach without stretching or rerouting |
| Hold-down torque specification | Service manual | Prevents both a cracked case and a battery that moves |
| Terminal bolt torque specification | Service manual | Prevents stripped posts and loose, arcing connections |
| Seat and cover fastener sizes (Torx) | Visual check before applying a driver | The wrong driver rounds the fastener |
| Main and accessory fuse ratings | Fuse block legend and service manual | Wrong fuse either nuisance-blows or fails to protect |
| Charging system output specification | Service manual | Confirms the range your bike should actually read |
| Reverse motor current draw and fuse | Service manual | This circuit is specific to the trike models |
| Battery manufacturing date | Sticker or stamp on the new battery case | Shelf-aged batteries start life down on capacity |
| Whether your bike has a security module | Owner's manual | Affects parasitic draw and storage strategy |
Parts for this job
Fits FLRT, FL — from our catalogue of 41,000+ aftermarket parts.
 Battery Label$5.40
 *UPDATE Battery Top Plug Set$8.58
 Parkerized 6 Volt Battery Rod Wing Nuts$9.50
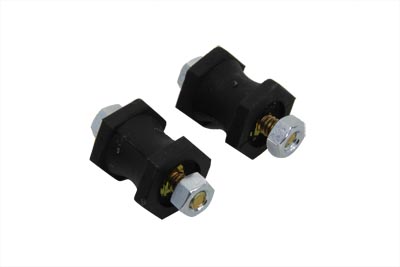 Battery Tray ISO Stud Set$10.64
 Zinc Speedometer Cable Clamps$10.64
 Speedometer Cable Clamp$10.64
 Battery Top Set$10.64
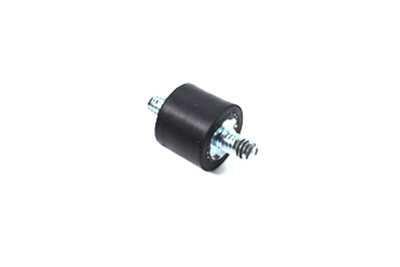 Battery Tray ISO Stud$12.02Battery Box Wing Nut Set$12.10
 Bright Chrome Battery Carrier Bracket$12.80
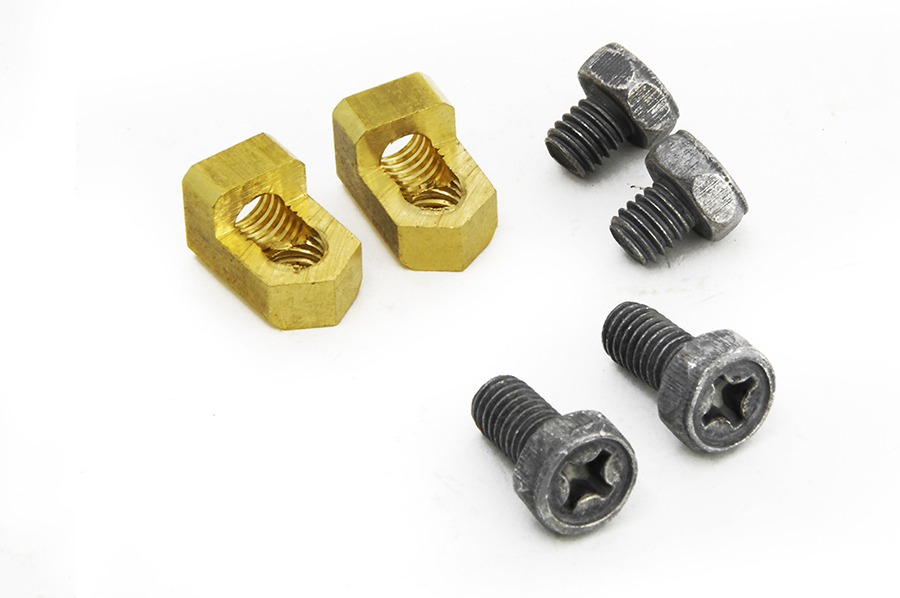 Brass Battery Terminal Adapter Kit$12.80
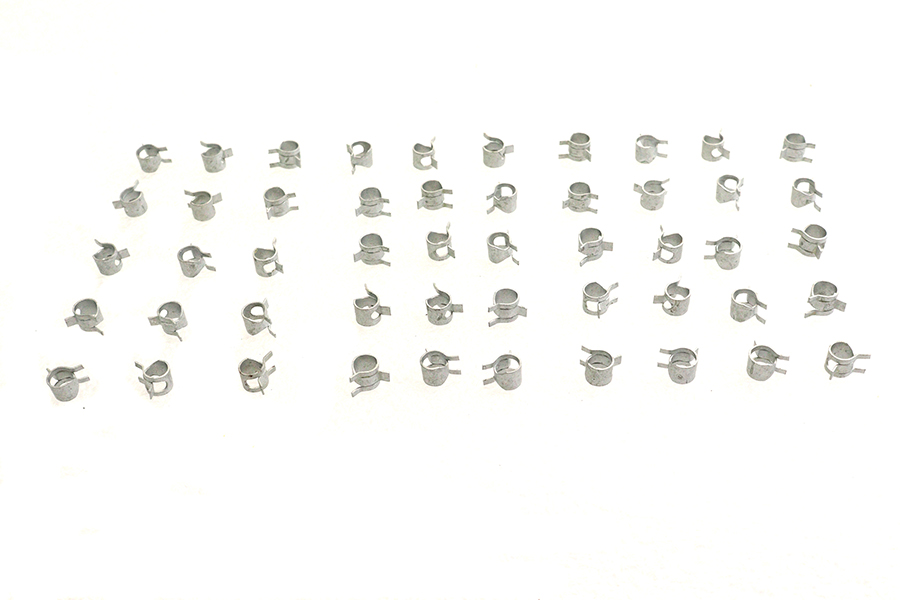 Zinc Battery Vent Clamp$12.80