Battery Guide: 2026 Harley-Davidson Fat Boy FLFBS
Battery Guide: 2026 Harley-Davidson Fat Boy FLFBS
The Fat Boy is a Softail, and that changes the battery job compared to a Touring bike. There's no side cover with two screws hiding the battery — on a Softail the battery lives under the seat, and the seat has to come off before you touch anything. It's still a beginner job, but the access is different enough that a rider coming off a Road Glide will go looking in the wrong place.
Quick Reference Table
| Spec | Value | Source |
|---|---|---|
| Battery Type | AGM (Absorbed Glass Mat), sealed, 12V | Standard fitment on current Softail models |
| Harley OEM Part Number | Verify against your owner's manual or dealer | Not confirmed for this model year |
| Group Size / Common Equivalent | Verify against your owner's manual or dealer | Confirm before ordering |
| Cold Cranking Amps (CCA) | Verify against your owner's manual or dealer | Do not guess — match or exceed OEM rating |
| Nominal Voltage | 12V | Electrical system standard |
| Fully Charged Resting Voltage | 12.7V - 12.9V (AGM) | AGM chemistry standard |
| Considered Discharged | 12.4V or below | AGM chemistry standard |
| Dimensions (LxWxH) | Verify against your owner's manual or dealer | Measure the old battery before ordering |
| Weight (approx) | Verify against your owner's manual or dealer | Expect a two-hand lift |
| Terminal Type | Threaded post with bolt (not clamp-on) | Standard H-D AGM fitment |
| Terminal Position | Confirm on your own bike before disconnecting | Photograph before removal |
| Hold-Down Method | Strap or bracket over the top of the case | Confirm visually during removal |
| Terminal Bolt Torque | Verify against your service manual | Snug firmly; do not strip the post |
| Replacement Interval | 3-5 years depending on climate and use | General maintenance guidance |
| Charger Type Required | AGM-compatible smart tender | Required — see Charging section |
Difficulty & Time Estimate
- Difficulty Level: Beginner (1 out of 5) — hand tools only, no special equipment
- Estimated Time: 20-30 minutes if you've done it before, 40-50 minutes the first time
- Tools at hand: Everything you need probably lives in the top drawer of your box. The only item riders commonly lack is a multimeter, and you should own one before you start replacing batteries — otherwise you're guessing at whether the battery is even the problem.
- Seasonal Note: Work above 40°F if you can. Cold hands drop small fasteners into the frame, and a cold battery reads lower voltage than it actually has.
- Skip the dealer? Yes. This is one of the few jobs on a modern Harley where the dealer premium buys you nothing.
Tools Required
| Tool | Purpose |
|---|---|
| Safety glasses | Battery acid and sparks — non-negotiable, even on a sealed AGM |
| Nitrile or mechanic's gloves | Keeps corrosion and grease off your hands |
| Seat removal fastener tool (Allen or Torx — check your bike) | Removes the single seat fastener at the rear of the seat |
| Socket set with ratchet, metric | Terminal bolts and hold-down hardware |
| Combination wrench set, metric | Backup for tight terminal access where a socket won't seat |
| Insulated screwdriver or nut driver | Working near live terminals |
| Digital multimeter | Resting voltage and charging system output — the diagnostic tool |
| Battery terminal brush | Cleans corrosion off cable ends and posts |
| Baking soda and water solution | Neutralizes acid residue in the tray |
| Shop rags | Cleanup and insulating a loose cable end |
| Dielectric grease | Protects terminals from corrosion after reassembly |
| Smart charger / tender with AGM mode | Charging the new battery and long-term maintenance |
| Torque wrench (inch-pound range) | Correct terminal torque if your manual specifies one |
| Flashlight or headlamp | Seeing into the battery box under the seat |
Battery Location & Access
On the Fat Boy, the battery sits under the seat in the frame's central battery box, between your legs and behind the rear cylinder. You will not find it behind a side cover.
To reach it:
- The seat comes off first. There is a single fastener at the rear of the seat. Remove it, then slide the seat rearward to release the tab at the front that hooks under the frame tongue. The seat does not lift straight off — it slides back, then up.
- Look for wiring under the seat. Some bikes have a heated seat connector, an accessory lead, or a security fob antenna routed beneath. Unplug anything attached before you walk away with the seat.
- Clear the battery top. Depending on how the bike is optioned, you may find a plastic cover, a fuse block, or a relay bracket sitting over the battery. These lift or unclip clear. Note where they sat.
- Identify the hold-down. A strap or bracket runs over the top of the case. This has to come loose before the battery will move.
Tip: Set the seat somewhere safe, upside down on a towel. A scratched Fat Boy seat costs more than the battery.
Warning: Check whether your bike has a security system. Disconnecting the battery may trigger the alarm or require you to re-enter a PIN. Have your key fob with you and know your PIN before you cut power.
Step-by-Step Replacement
Step 1: Set Up Safely
Park on level ground with the kickstand down and the bike in gear. Turn the ignition fully off and pull the key. Put on safety glasses and gloves. Work in a ventilated space away from open flame — even sealed AGM batteries vent hydrogen under fault conditions.
Step 2: Remove the Seat
Remove the seat fastener at the rear, slide the seat back to release the front tab, and lift it clear. Disconnect any wiring harness plugged into the underside. Set the seat aside face down on a clean towel.
Step 3: Expose the Battery
Lift or unclip any cover, fuse block, or bracket sitting over the battery top. Take a photo of how everything sits before you move it. You will want that picture in twenty minutes.
Step 4: Photograph the Terminals
Before you loosen a single bolt, take a clear photo of both terminals with the cables attached. Note which cable lands where and how the cable routing runs. Do not rely on memory or on "red goes on the right." Confirm on your own bike.
Step 5: Disconnect the Negative Terminal First
Loosen and remove the bolt on the negative (-) terminal. Lift the cable clear and tuck it away from the battery so it cannot spring back onto the post.
Why negative first: The negative cable connects to the frame. If your wrench touches the frame while you're working on the positive terminal, you've created a dead short through the tool — sparks, a ruined wrench, potentially a damaged battery. With the negative already disconnected, the frame is dead and a slipped wrench does nothing.
Step 6: Disconnect the Positive Terminal
Remove the positive (+) terminal bolt and lift the cable clear. Route it away from both the battery and the negative cable. Some riders drape a shop rag over the positive cable end as cheap insurance against it flopping back onto metal.
Step 7: Release the Hold-Down
Loosen and remove the hold-down strap or bracket hardware. Keep the fasteners together in a magnetic tray or a cup — dropping one into the frame means fishing it out with a magnet on a stick.
Step 8: Lift the Battery Out
Lift straight up. If the battery has a strap handle, use it. If not, get your fingers under the case and lift with your back straight. The battery is heavier than it looks and the space is tight.
Warning: Do not lift by the terminals. You will loosen the post-to-plate connection inside the case and ruin a battery you may have wanted to keep as a spare.
Step 9: Inspect and Clean the Battery Box
Look for corrosion, white or green crust, cracks in the tray, and debris. Clean any residue with a baking soda and water solution on a rag, then dry it completely. Check that drainage paths are clear. If you find acid damage, find out why — a battery that vented was overcharged, and the new one will do the same thing unless the charging system gets checked.
Step 10: Clean the Cable Ends
Run a terminal brush over both cable ends until you see clean metal. Corroded connections cause hard starting that gets blamed on a perfectly good battery. Inspect the cables themselves for cracked insulation, green corrosion wicking up under the jacket, or brittle spots. Replace any cable that looks tired.
Step 11: Test and Seat the New Battery
Check the new battery's resting voltage with your multimeter before installing. A new AGM should read at or above 12.7V. If it reads lower, charge it fully on an AGM-mode charger before installing — installing a partly charged AGM and expecting the bike to top it off is how new batteries die in their first year.
Lower the battery into the box in the correct orientation, matching the terminal positions in your photo from Step 4. It should sit flat, level, and without rocking.
Step 12: Reinstall the Hold-Down
Refit the hold-down strap or bracket and tighten the hardware. Snug, not crushed. Overtightening a hold-down cracks the case. The battery should not shift when you push it side to side, and that is the whole standard.
Step 13: Connect the Positive Terminal First
Land the positive (+) cable on the positive post and tighten the bolt. Firm and secure — you should not be able to twist the cable end by hand. Torque to your service manual's figure if one is specified; these are small threads into soft lead and they strip easily.
Step 14: Connect the Negative Terminal Last, Then Reassemble
Land the negative (-) cable and tighten. Negative goes on last for the same reason it came off first — until the ground is connected, the frame is dead and a slipped wrench is harmless. Expect a small spark as the circuit completes; that's normal.
Apply a light film of dielectric grease over both terminals. Refit any cover, fuse block, or bracket you removed. Reconnect the seat wiring, slide the seat forward to hook the front tab, seat it down, and install the rear fastener. Turn the key, check that the lights and gauges wake up, enter your security PIN if prompted, and start the bike.
Charging & Maintenance
An AGM battery is sealed. You do not add water, you do not open it, and you do not touch it with an old-fashioned high-amp shop charger.
Use a smart tender with an AGM mode. Modern maintainers monitor voltage and cycle between charge and float automatically. Leave one on any bike that sits more than two weeks. This is the single highest-return thing you can do for battery life on a Harley — a tender costs a fraction of a battery and doubles the battery's usable life.
Correct charging: - Charge at a low rate. A slow charge over several hours beats a fast one every time. - Use the AGM or sealed setting if your charger has one. Flooded-battery profiles run higher voltage and will cook an AGM. - Charge in a ventilated space at moderate room temperature. - Bring the battery to a full charge before installing a new one or after any deep discharge.
What kills an AGM battery:
- Sitting discharged. Sulfation starts as soon as voltage drops and becomes permanent. A battery left at 12.0V over a winter may never come back.
- Heat. Florida summers and engine-bay heat age a battery faster than cold ever will. Cold reveals a weak battery; heat is what made it weak.
- Overcharging. A failed voltage regulator or a dumb charger boils electrolyte out of a sealed case permanently. It cannot be replaced.
- Repeated short rides. Ten minutes of riding does not replace the amps a start pulls. Short-trip bikes need a tender.
- Parasitic draw. Alarms, GPS units, USB chargers, and aftermarket accessories pull current with the key off. If you keep killing batteries, measure the key-off draw before buying another one.
- Deep discharge cycles. Each full drain permanently reduces capacity. Three or four is enough to end a battery.
Check your charging system, not just the battery. With the bike running, measure across the battery terminals. Charging voltage should be meaningfully above resting voltage and stable — verify the target range against your service manual. Voltage that never rises means the battery isn't charging. Voltage that runs high means the regulator is cooking it. Either way, a new battery will not fix the problem.
Winter Storage
- Charge the battery fully before storage. A partly charged battery freezing is the classic way to end a battery over a Florida-cold or northern winter.
- Keep a tender on it for the entire layup. Modern maintainers are safe for months unattended.
- If you can't run a tender, disconnect the negative cable to eliminate parasitic draw and plan to charge the battery every 4-6 weeks.
- Store above freezing if possible. A fully charged AGM resists freezing far better than a discharged one, but temperature swings still shorten life.
- Check voltage monthly even on a tender. A tender that failed silently in November is discovered in April, and by then the damage is done.
- Removing the battery from the bike? Store it on a shelf, not on a concrete floor, and label it with the date you pulled it.
Testing a Suspect Battery
Before spending money, find out whether the battery is actually the problem.
Resting voltage — measured with the bike off, key out, and after sitting at least an hour (overnight is better; surface charge from a recent ride reads artificially high):
| Resting Voltage | Meaning | Action |
|---|---|---|
| 12.8V+ | Fully charged, healthy | No action |
| 12.7V | Fully charged | No action |
| 12.5V | Roughly 75% charged | Charge it; find out why it dropped |
| 12.4V | Roughly 50% charged — discharged | Charge fully, then retest resting voltage |
| 12.0V | Roughly 25% — deeply discharged | Charge, retest; sulfation damage likely |
| Below 11.8V | Deeply discharged or failed cell | Likely replacement; charge and retest to confirm |
Load test — the real answer. A battery can read 12.7V at rest and still fail the moment you hit the starter. A load tester applies a load for several seconds and watches for voltage sag. Most parts stores will run this test free.
- Voltage that holds up under load: battery is good, look elsewhere.
- Voltage that collapses quickly under load: battery is done regardless of its resting reading.
- Verify the correct test load and minimum voltage threshold against the battery manufacturer's specification, not a generic number.
Cranking voltage — the poor man's load test. Put the meter on the terminals and hit the starter. A healthy battery holds a solid voltage while cranking; one that plunges into single digits and makes the starter grind is finished.
Rule out the rest first: corroded terminals, a loose ground strap, a failing starter drawing excess current, or a parasitic draw will all mimic a bad battery. Clean and tighten before you condemn.
Replacement Parts We Stock
These are V-Twin Manufacturing parts listed as fitting FLFBS, FLFB, and FL applications. Confirm fitment for your specific year and build before ordering.
| V-Twin Part # | Description | Price | Category |
|---|---|---|---|
| 48-2316 | Battery Label | $4.50 | Battery / Batteries |
| 53-0566 | *UPDATE Battery Top Plug Set | $7.15 | Battery / Batteries |
| 12-0538 | Parkerized 6 Volt Battery Rod Wing Nuts | $7.92 | Straps / Battery |
| 28-0749 | Battery Tray ISO Stud Set | $8.87 | Trays & Carriers |
| 37-0589 | Zinc Speedometer Cable Clamps | $8.87 | Cables |
| 37-9025 | Speedometer Cable Clamp | $8.87 | Cables |
| 53-0579 | Battery Top Set | $8.87 | Battery / Batteries |
| 28-0547 | Battery Tray ISO Stud | $10.02 | Trays & Carriers |
| 12-0538 | Battery Box Wing Nut Set | $10.08 | Straps / Battery |
Note on the battery itself: the part numbers above are hardware and accessories. For the replacement battery, verify the correct group size and CCA rating against your owner's manual or dealer before ordering. Measure the old battery's length, width, and height as a cross-check — a battery that's 10mm too tall will not clear the hold-down.
Tips, Warnings & Common Mistakes
Tips that save you time:
- Take three photos before you touch anything: terminals, hold-down, and anything sitting on top of the battery.
- Keep fasteners in a magnetic tray. The Fat Boy's frame is a fastener-eating machine.
- Buy the tender at the same time as the battery. It pays for itself once.
- Write the install date on the new battery with a paint pen. In four years you'll want to know.
- Charge the new battery fully before it goes in, not after.
Common mistakes and what they cost you:
| Mistake | Consequence |
|---|---|
| Disconnecting positive first | Wrench touches frame, dead short, sparks, possible damaged battery or melted tool |
| Reconnecting negative before positive | Same short risk, this time with a brand-new battery on the line |
| Lifting the battery by its terminals | Internal post connection loosens; battery ruined before it's even installed |
| Overtightening the hold-down | Cracked case, acid leak, destroyed battery and corroded tray |
| Overtightening terminal bolts | Stripped soft-lead threads — the post is scrap, and so is the battery |
| Using a flooded-battery charge profile on an AGM | Boils out electrolyte that cannot be replaced; permanent capacity loss |
| Installing a new battery without charging it | Bike's charging system never fully tops it off; short service life |
| Replacing the battery without checking charging output | New battery dies the same way the old one did |
| Ignoring corroded cable ends | Hard starting blamed on the battery; problem returns in a week |
| Leaving the bike parked for months with no tender | Sulfation, permanently reduced capacity, dead battery in spring |
| Forgetting the security PIN before disconnecting | Bike won't start, alarm triggered, and you're stuck in the garage |
| Losing track of which cover or bracket went where | Rattles, chafed wiring, or a fuse block flopping onto the battery top |
| Not confirming terminal orientation on your own bike | Cables won't reach, or worse, get forced onto the wrong posts |
Warnings:
- Battery acid causes burns and destroys clothing. Sealed AGM batteries rarely leak, but a cracked case will. Glasses and gloves, every time.
- Never place metal tools across the top of a connected battery. A dropped wrench bridging both posts is a fire.
- Do not attempt to open, drill, or "service" a sealed AGM battery.
- If a battery is bulged, cracked, or hot to the touch, do not charge it. Recycle it.
Disposal & Recycling
Lead-acid batteries — including AGM — are recyclable and are not household trash. Throwing one away is illegal in most US states and pointless besides, because the core is worth money.
Core charge: Most retailers, including us, charge a refundable core fee when you buy a battery. Bring the old battery back and the fee comes back to you. Keep your receipt.
Who takes them:
- Any auto parts store. Advance, AutoZone, O'Reilly, NAPA and equivalents all accept lead-acid batteries, usually whether or not you bought it there, and many pay a small credit.
- Harley-Davidson dealers. They handle battery cores as a matter of course.
- Motorcycle shops and independent mechanics. Most will take a core.
- Municipal household hazardous waste facilities. Free drop-off in most counties.
- Scrap metal yards. They'll pay you by weight for the lead.
Transport it safely: keep the battery upright, put it in a plastic tub or a sturdy box, and don't let anything metal sit across the terminals in the back of the truck.
Verification Notes
Everything in this guide that we could not confirm for the 2026 FLFBS specifically is marked for verification. Confirm the following against your own owner's manual, factory service manual, or dealer before ordering parts or turning a wrench.
| Item to Verify | Why It Matters | Where to Confirm |
|---|---|---|
| Harley OEM battery part number | Ordering the wrong battery wastes a shipping cycle | Owner's manual or H-D parts catalog |
| Battery group size / equivalent | Determines physical fit and terminal layout | Owner's manual or dealer |
| CCA rating | Undersized CCA means hard starts in cold weather | Owner's manual or service manual |
| Exact battery dimensions | A battery too tall won't clear the hold-down | Measure the old battery; confirm against spec |
| Terminal orientation (which post is which side) | Cables must reach without strain or rerouting | Photograph your own bike before removal |
| Terminal bolt torque spec | Soft lead posts strip easily when overtightened | Factory service manual |
| Hold-down hardware torque | Overtightening cracks the case | Factory service manual |
| Seat fastener type and size | Determines which driver you need before you start | Owner's manual or inspect the fastener |
| Charging system output range at RPM | Confirms whether the battery or the regulator is at fault | Factory service manual |
| Main fuse rating and location | Needed if the bike is dead and the battery tests fine | Owner's manual fuse diagram |
| Security system PIN / fob procedure | Required to restart after power loss | Owner's manual or dealer |
| V-Twin part fitment for your build | Listed fitments are broad; verify before ordering | Confirm with us before you order |
Parts for this job
Fits FLFBS, FLFB, FL — from our catalogue of 41,000+ aftermarket parts.
 Battery Label$5.40
 *UPDATE Battery Top Plug Set$8.58
 Parkerized 6 Volt Battery Rod Wing Nuts$9.50
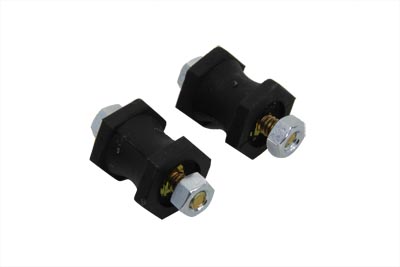 Battery Tray ISO Stud Set$10.64
 Zinc Speedometer Cable Clamps$10.64
 Speedometer Cable Clamp$10.64
 Battery Top Set$10.64
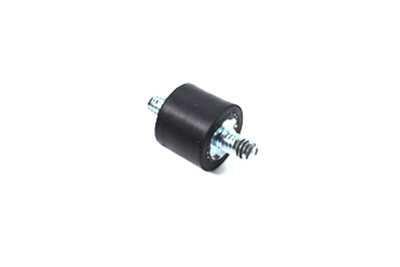 Battery Tray ISO Stud$12.02Battery Box Wing Nut Set$12.10
 Bright Chrome Battery Carrier Bracket$12.80
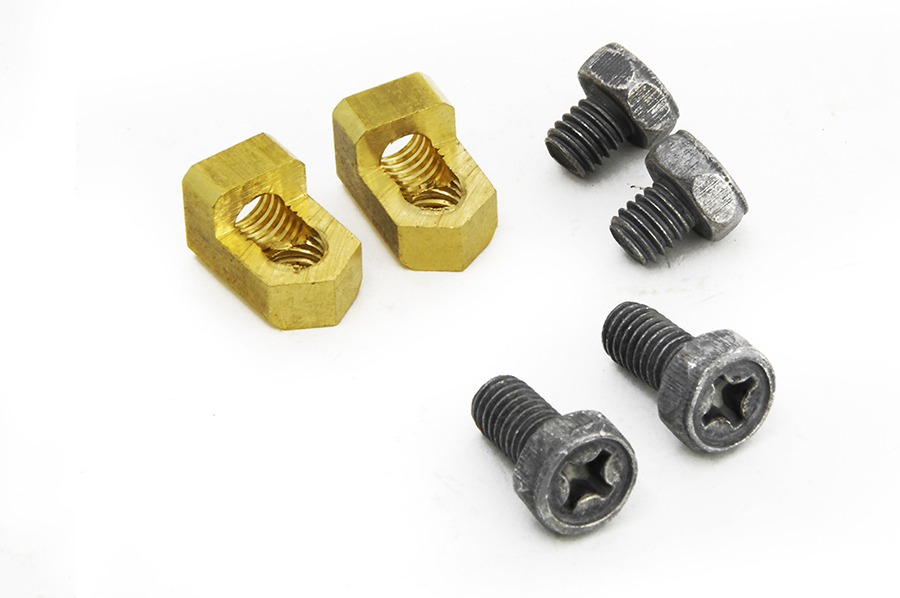 Brass Battery Terminal Adapter Kit$12.80
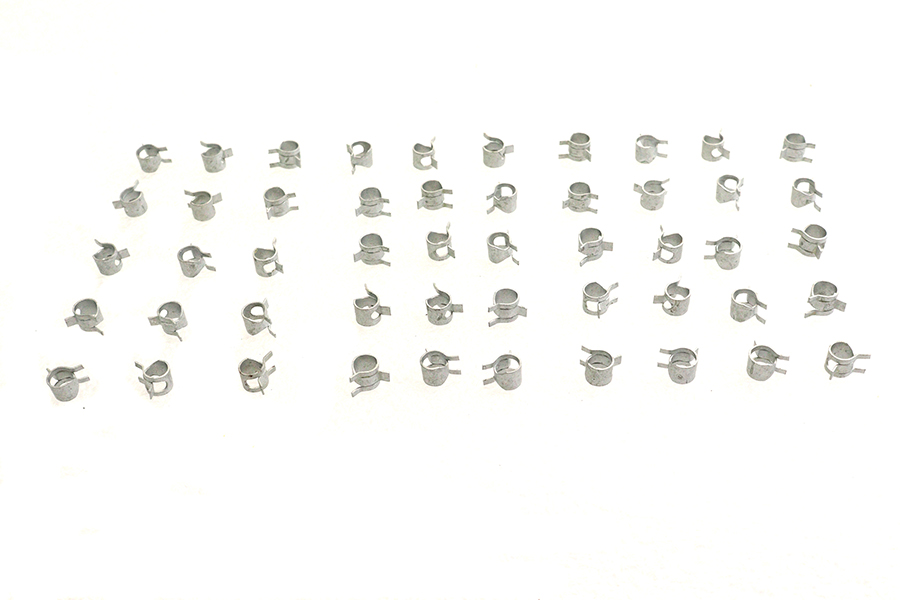 Zinc Battery Vent Clamp$12.80