Battery Guide: 2026 Harley-Davidson Fat Bob FXFBS
Battery Guide: 2026 Harley-Davidson Fat Bob FXFBS
Quick Reference Table
| Spec | Value | Source |
|---|---|---|
| Battery Type | AGM (Absorbed Glass Mat), sealed, 12V | Harley-Davidson Genuine Parts |
| OEM Part Number | Verify against your owner's manual or dealer | — |
| Group Size | Verify against your owner's manual or dealer | — |
| Cold Cranking Amps (CCA) | Verify against your owner's manual or dealer | — |
| Reserve Capacity | Verify against your owner's manual or dealer | — |
| Nominal Voltage | 12V | Electrical System Specs |
| Fully Charged Resting Voltage | 12.8V - 13.0V (AGM) | AGM Maintenance Guidelines |
| Dimensions (LxWxH) | Verify against your owner's manual or dealer | — |
| Weight (approx) | Verify against your owner's manual or dealer | — |
| Terminal Type | Threaded post with bolt-through cable lug | Hardware Specification |
| Terminal Position | Confirm orientation before dropping the new battery in — see Step 3 | Installation Practice |
| Hold-Down Method | Strap over the top of the battery, anchored to the tray | Factory Installation |
| Charging System Output | 13.8V - 14.8V at cruising RPM (typical Milwaukee-Eight range) | General Service Practice |
| Replacement Interval | 3-5 years depending on climate and use | Maintenance Schedule |
| Battery Chemistry Note | Sealed AGM — never open, never add water | Manufacturer Data |
The Fat Bob runs the Milwaukee-Eight in a Softail frame, which means the battery lives in a very different place than it does on a Touring bike. It is a compact installation with the battery sitting low and central, and that changes both the access procedure and how much room you have to work.
Difficulty & Time Estimate
- Difficulty Level: Beginner (1.5 out of 5) — no special tools, but the Softail battery pocket is tight and you work partly by feel
- Estimated Time: 25-35 minutes for an experienced mechanic, 45-60 minutes for a first-timer
- Tools at Hand: Everything you need fits in a basic metric socket set plus a Torx driver set. If you own a T27 Torx, a 10mm and a 3/8" ratchet, you are already equipped. Nothing here requires a lift, an impact gun, or a shop press.
- Seasonal Note: Do this above 40°F if you can. Cold hands in a tight battery pocket is how bolts get dropped into the frame.
- Radio/Electronics Note: Disconnecting the battery may reset the clock and any trip data. Note your mileage and settings before you start.
Tools Required
| Tool | Purpose |
|---|---|
| Safety glasses | Battery acid and spark protection — non-negotiable |
| Nitrile or mechanic's gloves | Keeps acid residue and grime off your hands |
| Torx driver set (T25/T27 typical) | Seat fastener and side cover hardware |
| Metric socket set with 3/8" ratchet | Terminal nuts and hold-down hardware |
| Short extension and swivel | Reaching terminal hardware in the recessed pocket |
| Combination wrench set (metric) | Backing up hardware where a socket won't fit |
| Digital multimeter | Testing resting voltage and charging output |
| Battery terminal brush | Cleaning corrosion off cable lugs and posts |
| Baking soda and water solution | Neutralizing acid residue in the tray |
| Shop rags and a stiff brush | Cleaning the tray and cable ends |
| Dielectric grease or terminal protectant | Preventing future corrosion |
| Battery tender / smart charger (AGM mode) | Charging the new battery and long-term maintenance |
| Torque wrench (in-lb range) | Terminal and hold-down hardware done right |
| Flashlight or headlamp | The battery pocket is dark and recessed |
| Plastic trim tool | Popping covers without scratching paint |
Tip: Lay a shop towel over the fender and exhaust before you start. The Fat Bob's paint and that 2-into-1 exhaust are both easier to protect than to repair.
Battery Location & Access
On the Fat Bob, the battery sits down in the frame beneath the seat, tucked into a pocket between the frame rails rather than behind a side cover like a Touring model. This is the standard Softail arrangement: the battery is low and central for mass centralization, which is great for handling and less great for access.
What has to come off first:
- The seat. This is the primary access point. The Softail seat is typically retained by a single fastener at the rear, then slides rearward off a tongue at the front. Remove the fastener, lift the rear of the seat slightly, and pull straight back. Do not yank — there may be a seat strap or a wiring lead for heated seat options.
- Any bracketry or cover over the battery pocket. Depending on how the bike is optioned, you may find a plastic cover, a strap, or a fuse block sitting on top of the battery. Note how each piece is oriented before you remove it.
- Nothing else. You should not need to remove the tank, the exhaust, or the rear fender. If you find yourself heading in that direction, stop and re-check — you are going down the wrong path.
Warning: The main fuse and several relays typically live in or adjacent to this same area. Be deliberate about what you unplug. If you pull a connector "just to get it out of the way," photograph it first.
Access reality check: The pocket is narrow. The battery comes out mostly straight up, but you may need to tilt it slightly to clear the hold-down and the cable routing. Do not force it — if it is binding, the hold-down is still engaged somewhere or a cable is trapped.
Step-by-Step Replacement
Step 1: Park, Cool Down, Prepare
Put the bike on a level surface with the kickstand fully extended, or better, on a stand. Let the exhaust cool — the Fat Bob's 2-into-1 runs right along the side you'll be working near. Turn the ignition off and remove the key. Put on your safety glasses and gloves. Work in a ventilated space away from flames, grinders, or anything that throws sparks. Lead-acid batteries vent hydrogen, and AGM batteries are no exception.
Step 2: Remove the Seat and Expose the Battery
Remove the seat fastener with the appropriate Torx or hex driver, then slide the seat rearward and lift it clear. Set it on a clean surface where it won't get stepped on or scratched. Remove any cover, strap, or bracket sitting on top of the battery. Keep the hardware in a labeled tray or a magnetic dish — nothing disappears faster than a small fastener near a frame full of cavities.
Step 3: Document Everything Before You Touch a Terminal
Take clear photos of the battery from directly above and from the side. Capture which cable lands on which post, how the cables route, where the vent or breather (if fitted) runs, and the orientation of the hold-down. Do not assume the new battery goes in the same way around as the old one — confirm terminal orientation against your photos before you drop it in. Getting this backwards can leave a cable stretched across the case or, worse, reversed.
Step 4: Disconnect the Negative Cable First
Loosen the negative (-) terminal nut with the correct metric socket. Negative always comes off first. Here is why: the negative cable is bonded to the frame and engine, so the entire bike is at negative potential. If your wrench slips while you're on the positive terminal and it touches any metal on the bike, you complete a dead short through the tool — a hard, instant arc that can weld the wrench, burn you, and damage the battery. With the negative already disconnected, that path is broken and a slipped wrench does nothing.
Pull the negative cable clear and tuck it where it cannot spring back onto the post. Wrapping the lug in a rag or a strip of electrical tape is cheap insurance.
Step 5: Disconnect the Positive Cable
Fold back the red insulating boot if fitted, loosen the positive (+) terminal nut, and lift the cable off. Move it away from both the battery and the negative cable. Tip: On a tight Softail pocket, a swivel and a short extension will save your knuckles here.
Step 6: Release the Hold-Down
Locate the hold-down strap over the top of the battery and release its hardware. Lift the strap clear and set it with the rest of your hardware. Inspect the strap while it is out — a stretched, cracked, or rusted strap is a $14 part that keeps a 10+ pound battery from moving under you. If yours is tired, replace it.
Step 7: Lift the Old Battery Out
Grip the battery firmly — by its handle strap if it has one — and lift straight up. Tilt only as much as needed to clear the pocket. Warning: Do not lift by the terminals or the cables. Do not pry with a screwdriver against the case. AGM cases crack, and a cracked case is a mess and a hazard. Set the old battery upright on a stable, acid-resistant surface, well away from your work area.
Step 8: Clean and Inspect the Tray
With the battery out, you finally have room to see what's going on. Look for white or green corrosion, acid staining, cracks in the tray, and any deteriorated rubber isolators or pads. Scrub corrosion with a baking soda and water solution, then rinse lightly and dry completely. Make sure any drain path is clear. Check the rubber isolation pads and ISO studs — if they are flattened, torn, or missing, replace them. They are what keep engine vibration from beating the battery to death, and on a Softail with a Milwaukee-Eight, that vibration is real.
Step 9: Clean the Cable Ends
Take a terminal brush to both cable lugs until you see bright metal. Inspect the cable insulation for cracks, chafing, or green corrosion creeping up under the jacket. A corroded cable will cost you cranking voltage no matter how good the new battery is — this is the single most overlooked cause of a "bad battery" that isn't. Replace any cable that looks questionable.
Step 10: Prepare and Seat the New Battery
If the new AGM battery did not arrive fully charged, put it on a smart charger in AGM mode and bring it to full charge before installation. Installing a partially charged AGM and letting the bike's charging system finish the job is a good way to shorten its life.
Lower the new battery into the pocket in the orientation you confirmed in Step 3. It should sit flat and level, with no rocking and no pressure on the case from surrounding hardware. If a battery pad set is called for, get it in place under and around the battery before you seat it.
Step 11: Secure the Hold-Down
Refit the hold-down strap over the battery and tighten its hardware until the battery is firmly held with no movement when you push on it. Warning: Snug, not gorilla-tight. Overtightening a hold-down cracks AGM cases and distorts trays. If you want a specific torque figure, verify it against your owner's manual or dealer rather than guessing — this is one spot where "tight enough" beats a number you made up.
Step 12: Connect the Positive Cable First
Positive goes on first, for the mirror image of the reason negative came off first: with the negative still disconnected, there is no completed circuit, so a slipped wrench on the positive post has nowhere to short to. Seat the positive cable squarely on the post, thread the nut by hand to avoid cross-threading, then tighten until the connection is solid and the cable cannot be rotated by hand. Refit the insulating boot.
Step 13: Connect the Negative Cable Last
Negative goes on last. This is the connection that energizes the bike, and by making it last you guarantee that the only live post you were working around is already covered and torqued. Expect a small spark as the system's capacitors charge — that is normal. Seat the lug, hand-thread the nut, and tighten to a solid, non-rotating fit. Tug both cables firmly. Neither should move.
Step 14: Reassemble, Test, and Verify
Refit any cover or bracket you removed, then reinstall the seat and torque its fastener. Turn the ignition on and confirm the instrument cluster lights normally. Start the engine. With the engine running at a fast idle, put your multimeter across the battery terminals — you should see charging voltage in the 13.8V to 14.8V range. If you see battery voltage (around 12.6V) with the engine running, or anything above 15V, stop and diagnose the charging system before you ride. Reset the clock and any settings that were lost.
Charging & Maintenance
An AGM battery is sealed and maintenance-free in the sense that you never add water. It is not maintenance-free in the sense that you can ignore it.
Use a smart tender with an AGM setting. Modern battery tenders monitor voltage and switch to a float stage once the battery is full. A dumb trickle charger that pushes constant current has no idea when to stop and will cook an AGM battery from the inside. If your charger has a "conventional/AGM/lithium" selector, get it on AGM. If it has no selector and no float stage, do not use it on this bike.
Charge slowly. For a motorcycle-size AGM, a charge rate around 1-2 amps is right. High-amp automotive chargers and "jump start / boost" modes generate heat that AGM construction does not shed well. Fast charging is a shortcut that costs you years.
Never exceed the manufacturer's voltage limits. AGM batteries are sensitive to overcharge. Excess voltage vents gas through the pressure valves, and that gas does not come back. Every venting event is permanent capacity gone. If you are unsure of the correct charging voltage for your specific battery, verify against the battery manufacturer's label or your owner's manual.
Keep it on a tender when parked more than a couple of weeks. The Fat Bob, like every modern Harley, has parasitic draws — the ECM, the security system if fitted, the clock. A bike sitting in a garage is slowly discharging every day. A tender costs less than one battery.
What kills an AGM battery, in order: 1. Sitting discharged. Sulfation starts within days at low state of charge and becomes permanent. This is the number one killer, and it is entirely preventable with a tender. 2. Overcharging. Vented gas is lost capacity. Cheap chargers and failing regulators both do this. 3. Heat. Chemical degradation accelerates with temperature. A bike parked in a hot garage or a battery run next to an unshielded exhaust ages faster. 4. Vibration. A loose hold-down or dead isolation pads let the internal plates work against each other. This is why Step 8 and Step 11 matter. 5. Deep discharge cycles. Repeatedly running the battery flat — leaving the key on, extended accessory use at idle — takes capacity off the top permanently.
Short trips are hard on batteries. Starting the engine takes a significant chunk of charge, and a ten-minute ride does not put it back. If your riding is mostly short hops, use the tender between rides.
Winter Storage
If the Fat Bob is going to sit for the cold months, decide up front: tender on the bike, or battery on the bench.
Option 1 — Leave it installed on a tender. Simplest approach. Connect a quality AGM-capable tender via the battery terminals or a permanently installed pigtail. Route the pigtail so it does not chafe, and make sure it cannot contact the exhaust. Check on it once a month.
Option 2 — Remove the battery. Better if the bike is stored somewhere without power or somewhere that gets genuinely cold. Remove it following Steps 1-7 above, wipe the case clean, and store it upright on a shelf — a wood or plastic shelf, not bare concrete in an unheated space where it will sit in condensation. Keep it somewhere cool and dry but above freezing. Put it on a tender, or at minimum check voltage monthly and top it up whenever it drops below about 12.6V.
Either way: - Fully charge the battery before storage. A battery that goes into storage at partial charge comes out of storage sulfated. - A fully charged AGM resists freezing well. A discharged one can freeze and split its case. This is a real failure mode, not a theoretical one. - Do not "top off" once in March and call it good. Monthly is the interval. - If you pull the battery, tape over or cap the cable ends on the bike so nothing shorts against the frame.
Coming out of storage: Charge fully, reinstall following Steps 10-14, and check charging voltage on the first start. If the battery will not take a full charge or drops below 12.4V within a day of coming off the charger, it did not survive the winter. Replace it before the first ride rather than finding out at a gas station.
Testing a Suspect Battery
Before you buy anything, test. Most "dead batteries" are one of three things: a genuinely dead battery, a bad connection, or a charging system fault. The tests below sort them out.
Resting Voltage Test
Let the bike sit with the ignition off for at least 4 hours — ideally overnight — so surface charge dissipates. Then measure across the terminals with a multimeter.
| Resting Voltage | State of Charge | What It Means |
|---|---|---|
| 12.8V - 13.0V | 100% | Healthy, fully charged AGM |
| 12.6V - 12.8V | ~75-100% | Good; charge if it's toward the low end |
| 12.4V - 12.6V | ~50-75% | Undercharged. Charge it, then retest after resting |
| 12.0V - 12.4V | ~25-50% | Significantly discharged. Sulfation is starting |
| Below 12.0V | Under 25% | Deeply discharged. Charge and load test; likely damaged |
| Below 10.5V | Failed | One or more cells are shorted. Replace |
A reading taken right after a ride will be artificially high. That is surface charge, not capacity. Always rest the battery first.
Load Test
Resting voltage tells you state of charge. It does not tell you whether the battery can deliver current. A battery can read a perfect 12.8V and still fail to turn the engine over — that is a capacity problem, and only a load test finds it.
Start with a fully charged battery. Using a carbon pile load tester or an electronic tester, apply the specified load and watch the voltage.
| Voltage Under Load | Verdict |
|---|---|
| Stays above 9.6V for 15 seconds | Battery passes — look elsewhere for your fault |
| Drops to 9.0V - 9.6V | Marginal. It will fail in cold weather. Plan to replace |
| Drops below 9.0V | Failed. Replace the battery |
| Drops instantly and recovers instantly | Internal fault or bad connection at the tester |
The 9.6V threshold assumes room temperature. In cold weather the acceptable minimum drops. For the specific load test amperage for your battery, verify against the battery manufacturer's label or your owner's manual — it is normally derived from the CCA rating.
Cranking Voltage Test (the practical version)
If you don't own a load tester, you can approximate one with the starter. Put the meter across the battery terminals and crank the engine.
- Holds above 9.6V while cranking: battery is delivering.
- Drops to 8V or below: battery is weak or a connection is bad.
- Drops near zero and the bike clicks: likely a dead cell or a badly corroded connection.
Don't Skip the Connections
Before condemning the battery, check voltage drop: meter across the cable, from the battery post to the far end of the cable, while cranking. More than about 0.2V of drop on a cable means that cable or its connection is the problem, not the battery. This test catches the corroded ground strap that has been masquerading as a bad battery for two months.
Charging System Check
With the engine running at a fast idle, measure across the battery terminals:
- 13.8V - 14.8V: charging system is working.
- Same as battery voltage (~12.6V): the system is not charging. Suspect the stator, regulator, or main fuse. A new battery will be flat again in a week.
- Above 15V: the regulator is overcharging and will destroy your new battery. Fix this first.
Replacement Parts We Stock
These are V-Twin Manufacturing parts from our catalog that fit FXFBS, FXFB, and FX applications. Confirm fitment for your specific year and configuration before ordering.
| Part Number | Description | Price | Category |
|---|---|---|---|
| 28-0539 | Battery Pad Set | $8.67 | Trays & Carriers |
| 28-0749 | Battery Tray ISO Stud Set | $8.87 | Trays & Carriers |
| 28-0547 | Battery Tray ISO Stud | $10.02 | Trays & Carriers |
| 32-1024 | Brass Battery Terminal Adapter Kit | $10.67 | Cables |
| 37-8933 | Zinc Battery Vent Clamp | $10.67 | Cables |
| 28-0619 | Battery Tray ISO Stud | $12.27 | Trays & Carriers |
| 42-0515 | Stainless Steel Battery Strap | $14.27 | Straps |
| 36-0125 | *UPDATE 35" Stainless Steel Speedometer Cable | $14.42 | Cables |
| 28-0549 | Battery Tray ISO Stud Set | $15.42 | Trays & Carriers |
| 36-2410 | 46.5" Black Speedometer Cable | $17.25 | Cables |
| 31-4186 | Chrome Battery Tray Carrier Bracket | $17.87 | Trays & Carriers |
| 32-0313 | Black Ground 10-1/4" Battery Cable | $17.98 | Cables |
| 31-0149 | Chrome Speedometer Cable Guide | $18.02 | Cables |
| 28-0546 | Battery Tray ISO Stud | $18.64 | Trays & Carriers |
Worth ordering alongside the battery: the battery pad set (28-0539) and the appropriate ISO studs. These are the vibration isolation components, they are cheap, and they are already worn out if your old battery lasted its full service life. Replacing the battery without refreshing them means the new battery gets the same beating the old one did.
On the ground cable (32-0313): if your voltage drop test flagged the ground path, replace the cable rather than cleaning it a third time. A degraded ground is the most common electrical gremlin on an older Harley, and it will make a brand new battery look defective.
For the actual battery: we do not list the OEM battery part number here because we won't state a number we can't verify for this model year. Get the correct group size and part number from your owner's manual or your dealer, then match it.
Tips, Warnings & Common Mistakes
Tips that save you time: - Photograph everything before you disconnect it. Every time. Your memory is worse than you think it is. - A magnetic parts tray next to the bike beats a rag on the floor. - Put a wrap of electrical tape on the disconnected negative lug so it cannot spring back onto the post while you work. - If the new battery comes dry-charged with a separate acid pack, follow the manufacturer's activation instructions exactly and let it sit the specified time before charging. Rushing activation permanently reduces capacity. - Buy the battery locally if you can. Shipping a battery that has been sitting in a warehouse at partial charge for six months is a bad start. - Write the install date on the battery with a paint pen. In three years you will want to know.
Warnings: - Battery acid is sulfuric acid. Even in an AGM, a cracked case releases it. Eye protection is not optional. If you get acid on your skin, flush with water immediately; in your eyes, flush for 15 minutes and get medical attention. - Hydrogen gas is explosive. No smoking, no grinding, no open flames near a charging battery. - Never reverse the polarity. Even momentarily. Reversed polarity can destroy the ECM, the regulator, and every module on the bike — a several-thousand-dollar mistake in a two-second error. - Do not jump-start from a running car. A car's charging system can push far more current than a motorcycle battery and its wiring are built to handle. If you must jump, use another motorcycle or a proper motorcycle-rated jump pack. - Never use a car battery charger's "boost" or "engine start" mode on a motorcycle AGM.
Common Mistakes and What They Cost You
| Mistake | Consequence |
|---|---|
| Disconnecting positive first | Slipped wrench shorts to frame — arc burns, welded tools, damaged battery |
| Reconnecting negative first | Same short risk, this time with a live positive post exposed |
| Overtightening the hold-down | Cracked AGM case, acid leak, immediate replacement needed |
| Overtightening terminal hardware | Stripped posts or a snapped terminal — battery is scrap |
| Installing a partially charged AGM | Permanently reduced capacity and a shortened service life |
| Using a dumb trickle charger | Overcharge, vented gas, cooked battery in a season |
| Skipping the cable/terminal cleaning | New battery, same no-start symptom; you diagnose nothing |
| Ignoring worn ISO pads and studs | Vibration destroys the new battery in half its expected life |
| Not testing charging output after install | The fault that killed the old battery kills the new one too |
| Letting the bike sit off a tender all winter | Sulfation; a battery that never comes back to full capacity |
| Storing a battery on cold concrete | Condensation, case corrosion, accelerated self-discharge |
| Assuming the new battery is oriented like the old one | Stretched or reversed cables, potential catastrophic polarity error |
| Buying on price alone | A no-name AGM with an optimistic CCA rating fails in the first cold snap |
| Guessing at torque specs | Either loose enough to vibrate apart or tight enough to crack the case |
Disposal & Recycling
Do not put a lead-acid battery in the trash. It is illegal in most states, and it is genuinely bad — lead and sulfuric acid do not belong in a landfill. The good news is that lead-acid batteries are the most recycled consumer product in the United States, and getting rid of one correctly is easy and usually free.
Core charge. Nearly every retailer charges a core fee when you buy a battery — commonly in the $10-$20 range, though it varies by state and seller. You get it back when you return the old battery. Bring the old one with you when you pick up the new one and you pay no core charge at all. If you already paid it, keep your receipt and bring the old battery back within the seller's return window.
Where to take it: - The shop you bought the new battery from. Easiest option, and they handle the core refund on the spot. - Any auto parts chain. AutoZone, O'Reilly, Advance, NAPA and similar take lead-acid batteries for recycling whether or not you bought from them. Many pay a small gift card. - Your Harley-Davidson dealer. They accept cores. - Municipal household hazardous waste facilities. Free in most counties. Check your county's solid waste department for hours and location. - Scrap metal recyclers. They will typically pay cash by weight.
Transporting it safely: - Keep the battery upright the entire time. Do not lay it on its side in the trunk. - Put it in a plastic tub or a heavy bag in case of leakage. - Cover the terminals with tape or caps so nothing metal can bridge them in transit. - Don't let it slide around. A battery that tips and cracks in your car is a bad afternoon.
If the case is cracked or leaking: handle it with gloves and eye protection, put it in a sealed plastic container, and take it straight to a hazardous waste facility. Neutralize any spilled acid with baking soda before cleaning it up.
Verification Notes
Nothing in this guide substitutes for the service documentation for your specific bike. Harley-Davidson revises specifications between model years and between market variants, and the items below are the ones you must confirm yourself before ordering parts or torquing hardware.
| Item to Verify | Where to Verify It | Why It Matters |
|---|---|---|
| OEM battery part number | Owner's manual or your H-D dealer | Ordering the wrong group size means a battery that won't fit the pocket or the hold-down |
| Battery group size | Owner's manual or dealer parts counter | Dimensions must match the tray exactly |
| CCA rating required | Owner's manual or service manual | Undersized CCA means marginal cold starting |
| Exact battery dimensions (LxWxH) | OEM spec sheet or dealer | The Softail pocket has no spare room |
| Terminal orientation and polarity | Your own photos from Step 3, plus the service manual | Reversed polarity destroys electronics |
| Terminal hardware torque spec | Service manual | Too loose vibrates apart, too tight destroys the post |
| Hold-down hardware torque spec | Service manual | The most common cause of cracked AGM cases |
| Seat fastener torque spec | Service manual | It's the one thing holding you to the bike |
| Correct charging voltage for your battery | Battery manufacturer's label | Overcharge is permanent damage |
| Load test amperage | Battery manufacturer's label | Derived from CCA; testing at the wrong load gives a false verdict |
| Main fuse rating and location | Service manual or under-seat fuse block diagram | You'll want to know before you're diagnosing a no-crank |
| Charging system output spec | Service manual for your model year | The 13.8-14.8V figure is typical, not confirmed for this specific bike |
| Part fitment for the V-Twin numbers listed above | Our catalog fitment lookup or call us | Listed as fitting FXFBS/FXFB/FX; confirm your exact configuration |
| Battery vent requirement, if any | Owner's manual | Sealed AGM usually needs none, but confirm before discarding hardware |
Parts for this job
Fits FXFBS, FXFB, FX — from our catalogue of 41,000+ aftermarket parts.
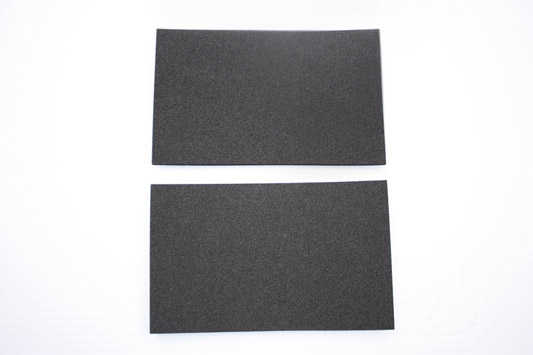 Battery Pad Set$10.40
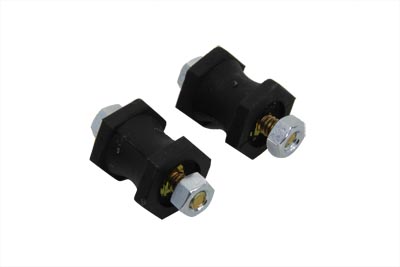 Battery Tray ISO Stud Set$10.64
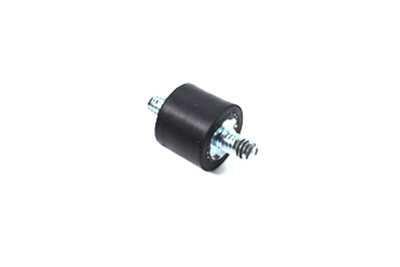 Battery Tray ISO Stud$12.02
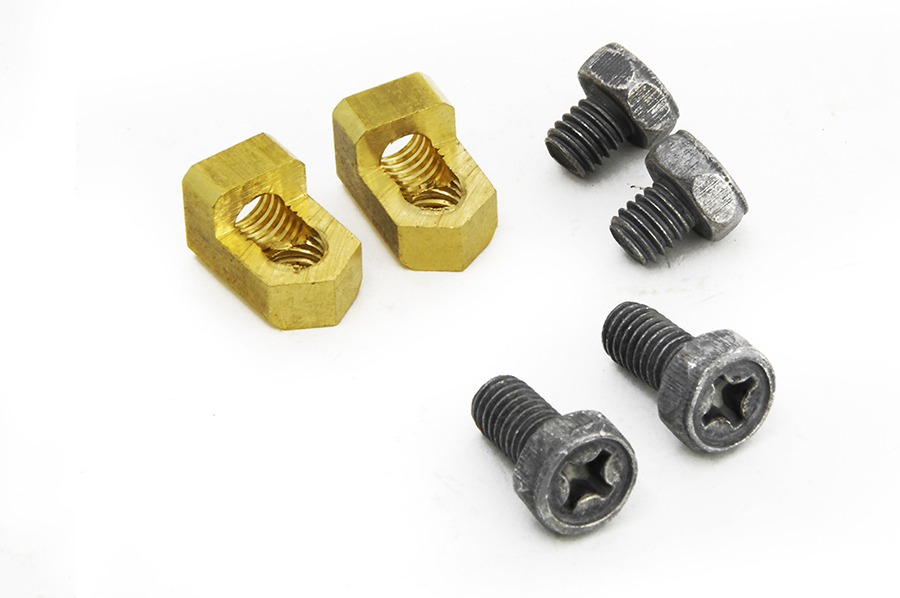 Brass Battery Terminal Adapter Kit$12.80
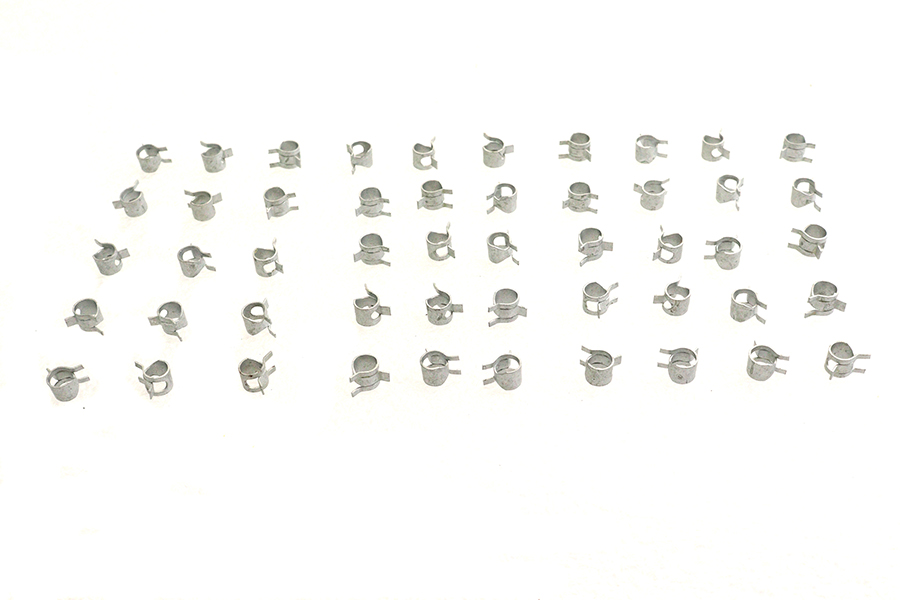 Zinc Battery Vent Clamp$12.80
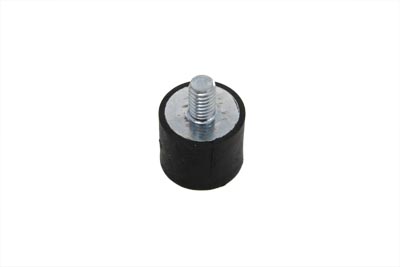 Battery Tray ISO Stud$14.72
 Stainless Steel Battery Strap$17.12
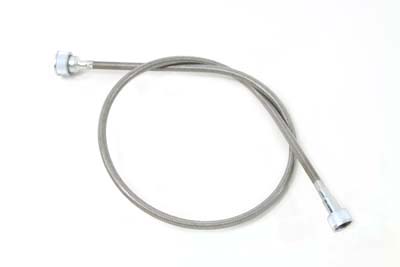 *UPDATE 35" Stainless Steel Speedometer Cable$17.30
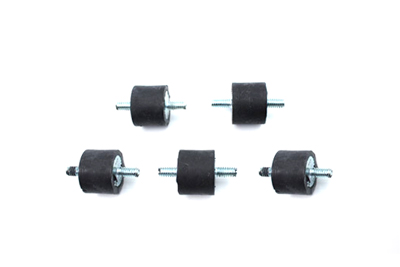 Battery Tray ISO Stud Set$18.50
 46.5" Black Speedometer Cable$20.70
 Chrome Battery Tray Carrier Bracket$21.44
 Black Ground 10-1/4" Battery Cable$21.58