Battery Guide: 2026 Harley-Davidson CVO Street Glide FLHXSE
Battery Guide: 2026 Harley-Davidson CVO Street Glide FLHXSE
The CVO Street Glide is a heavy, electrically hungry touring bike. Between the audio system, the large color display, heated grips, LED lighting and whatever accessories got added at the dealer, this bike pulls more standby current than a base Street Glide does. That makes the battery a wear item you should plan to replace on a schedule rather than wait on. This guide covers the specs you need to confirm, the tools, the replacement procedure, and how to keep the next battery alive longer than the last one.
Quick Reference Table
| Spec | Value | Source |
|---|---|---|
| Battery Type | AGM (Absorbed Glass Mat), sealed, maintenance-free, 12V | Harley-Davidson touring platform standard |
| OEM Part Number | Verify against your owner's manual or dealer | Not confirmed in our catalog data |
| Group Size | 20L-class AGM (20HL/20L family) — verify against your owner's manual or dealer | Battery Council International sizing |
| Cold Cranking Amps (CCA) | Verify against your owner's manual or dealer | Model-year specific |
| Reserve Capacity | Verify against your owner's manual or dealer | Model-year specific |
| Nominal Voltage | 12V | Electrical system standard |
| Fully Charged Resting Voltage | 12.8V - 13.0V (AGM), measured 12+ hours after charging | AGM chemistry |
| Considered Discharged | 12.4V or below at rest | AGM chemistry |
| Dimensions (LxWxH) | Verify against your owner's manual or dealer — measure the old battery before ordering | Physical fitment |
| Terminal Type | Threaded post with bolt-through cable lug | Touring platform hardware |
| Terminal Position | Confirm on your bike before disconnecting — photograph it | Installation practice |
| Hold-Down Method | Strap or bracket across the top of the battery, threaded fastener | Factory installation |
| Charging System Output | 13.8 - 14.8V at cruising RPM (typical healthy range) | General charging system spec |
| Replacement Interval | 3-5 years; shorter in hot climates or with heavy accessory load | Maintenance practice |
| Charger Requirement | AGM-specific or AGM-mode smart charger only | Battery manufacturer guidance |
Anything in that table marked "verify" is not something we can state as fact for this specific bike and model year. Measure the old battery, read the label on it, or call your dealer with the VIN. An AGM battery that is 3/8" too tall will not let the cover go back on, and a battery with too little cranking amps will feel fine in July and leave you stranded in January.
Difficulty & Time Estimate
- Difficulty Level: Beginner (1 out of 5). No special skills, no electrical diagnosis required for a straight swap.
- Estimated Time: 25-35 minutes if you have done it before. 45-60 minutes the first time, mostly spent finding and routing fasteners.
- Tools at hand: Everything on the tool list below is a basic garage item. The only thing worth buying specifically is a digital multimeter, and it pays for itself the first time it tells you the battery is fine and the problem is a loose ground.
- Working conditions: Do this above 40°F if you can. Cold hands drop fasteners into the frame, and cold batteries read low on a voltage test and make you think you have a problem you don't.
- Note on the CVO: CVO bikes carry more bodywork trim and more accessory wiring than the standard model. Take a photo before you disconnect anything, and expect one or two extra ground leads or accessory taps piggybacked on the battery terminals that a base Street Glide would not have.
Tools Required
| Tool | Purpose |
|---|---|
| Torx driver set (T25, T27) | Removing the battery access cover and trim fasteners on the left side |
| Metric socket set with ratchet (8mm, 10mm, 12mm) | Terminal bolts and hold-down hardware |
| Combination wrenches (10mm, 12mm) | Holding a nut where a socket will not reach behind the cable lug |
| 1/4" drive torque wrench (in-lb range) | Tightening terminal bolts without stripping or cracking the case |
| Digital multimeter | Resting voltage, charging system output, parasitic draw |
| Battery terminal brush or small wire brush | Cleaning corrosion off cable lugs and posts |
| Baking soda and water solution, rags | Neutralizing and cleaning any acid residue in the tray |
| Dielectric grease or terminal protectant spray | Sealing the finished connections against moisture |
| Safety glasses and nitrile gloves | Battery acid and spark protection |
| Shop light or headlamp | The battery box is a dark hole once the cover is off |
| AGM-capable smart charger / battery tender | Charging the new battery and long-term maintenance |
| Phone or camera | Photographing cable routing before you touch anything |
| Small parts tray or magnetic dish | Fasteners that roll under the bike are gone forever |
Battery Location & Access
On the Street Glide touring chassis the battery sits low in the frame on the left side of the motorcycle, below the seat area and behind a removable side cover. It is not under the seat in the way a sportbike battery is — you reach it from the side, not the top.
What has to come off first:
- The left side cover. On the CVO this is a painted or trimmed panel. It is held by fasteners or by push-in grommets depending on configuration — check yours before you pry. If it is grommet-mounted, pull straight out with even pressure at the mounting points, never at the paint edge. A painted CVO panel that gets levered against the frame is an expensive mistake.
- The battery cover or bracket behind it, typically secured by Torx fasteners.
- Any accessory wiring bundled across the battery box. CVO bikes frequently have amplifier power leads, accessory fuse blocks or heated-gear pigtails routed across the battery area. Do not cut zip ties you do not need to cut, and photograph where each one lands.
Warning: Do not lever any painted CVO bodywork against the frame or against another painted panel. Lay a shop towel over anything the cover could contact on the way out.
Tip: Put the fasteners from each cover into a separate labeled section of your parts tray. The trim fasteners and the battery bracket fasteners are usually not the same length, and running a long one into a short hole can bottom out on something you do not want to hit.
Step-by-Step Replacement
Step 1: Park, Cool Down, Prep
Park on level ground with the kickstand fully down, or on a lift with the bike strapped. Turn the ignition off and remove the key/fob from the immediate area so the bike cannot wake up. Let the exhaust cool — you will be working low on the left side, near pipes that can still be hot enough to burn. Put on safety glasses and gloves. Work in a ventilated space away from flame, cigarettes, grinders or anything that sparks.
Step 2: Record Your Radio and Accessory Settings
Pulling the battery will clear some settings and may prompt for security or infotainment re-entry on reconnect. Note your presets, and if your bike uses a security fob or a PIN, make sure you have it before you disconnect. This is the step people skip and regret.
Step 3: Remove the Left Side Cover and Battery Access Cover
Take the left side cover off using the method appropriate for yours (fasteners or grommets — see above). Then remove the battery cover or retaining bracket behind it, typically with a Torx driver. Set the covers somewhere they cannot get scratched, painted side up on a towel.
Step 4: Photograph Everything
Before a wrench touches a terminal, take clear photos of both terminals showing every cable and accessory lead, which post it lands on, the stacking order of the lugs, and how the cables route. On a CVO there may be several leads on one post. The photo is your reassembly instruction sheet.
Step 5: Disconnect the Negative (-) Terminal First
Loosen and remove the negative terminal bolt, pull the cable clear, and tuck it where it cannot spring back and touch the post. Negative comes off first because the negative terminal is tied to the frame and engine. With the negative still connected, a wrench that slips off the positive post and touches any metal on the bike completes a direct short across the battery — that is a burned wrench, a melted cable, and potentially a battery that vents or ruptures. With the negative disconnected first, that same slip does nothing.
Warning: Never let a tool bridge the positive terminal and any frame, engine or bracket surface. An AGM battery can dump hundreds of amps into a dead short instantly.
Step 6: Disconnect the Positive (+) Terminal
Loosen and remove the positive terminal bolt. Lift the cable and any accessory leads off the post and move them clear of the battery. If the positive post has a rubber boot, fold it back over the bare lug so it cannot contact anything.
Step 7: Release the Hold-Down
Remove the strap, bracket or retaining hardware holding the battery down in the tray. Keep the hardware together — hold-down fasteners are easy to lose and annoying to source.
Step 8: Lift the Old Battery Out
Lift the battery straight up and out. A touring AGM in this size class is heavy — plan on well over ten pounds, and expect it to be more awkward than heavy because of the angle you are lifting from. Use a lift strap if the battery has one. Do not lift by the cables or the posts. Set the old battery upright on concrete or in a plastic tray, never on a shelf above anything you care about.
Step 9: Clean and Inspect the Tray and Cables
Look in the tray for corrosion, white or green crust, cracks, standing moisture or debris. Clean any residue with a baking soda and water solution on a rag, then dry it thoroughly — do not let the solution run down into the frame or onto wiring. Clean the cable lugs with a terminal brush until the metal is bright. Inspect the cables themselves for cracked insulation, green corrosion wicking up under the jacket, or a lug that is loose on its cable. A corroded cable will make a brand-new battery act dead.
Step 10: Check the New Battery Before It Goes In
Confirm the new battery physically matches the old one: same length, width and height, same terminal orientation, and cranking amps equal to or greater than the original. Measure, don't assume. Then put a multimeter on it — a new AGM should read at or above 12.8V at rest. If it reads 12.4V or lower out of the box, charge it fully on an AGM charger before installing it. Installing a partly charged AGM and expecting the bike to top it off is how people kill a new battery in six months.
Step 11: Set the New Battery in the Tray
Lower it in straight, with the terminals oriented exactly as the old one was — match your photo from Step 4. It should sit flat and square with no rocking. If it rocks or sits proud, stop and figure out why rather than forcing the hold-down over it.
Step 12: Secure the Hold-Down
Reinstall the strap or bracket and snug the hardware. It should hold the battery firmly with zero movement when you push on it by hand. Do not crank it down. Overtightening a hold-down cracks AGM cases, and a cracked AGM case is a slow failure you will not notice until the bike will not start. If you want a torque figure, verify it against your owner's manual or dealer rather than guessing.
Step 13: Connect the Positive (+) Terminal First
Place the positive cable and any accessory leads on the positive post in the same stacking order shown in your photo. Thread the bolt in by hand to avoid cross-threading, then tighten it snug. Terminal bolts on a battery like this are an inch-pound fastener, not a foot-pound fastener — tight enough that the lug cannot be twisted by hand, and no tighter. The specific torque value for your model year should be verified against your owner's manual or dealer.
Step 14: Connect the Negative (-) Terminal Last, Then Reassemble
Connect the negative cable last, for the same reason it came off first — with the positive already live, a slipped wrench on the negative side while the circuit is still open cannot short anything. Expect a small spark as it seats; that is the bike's standby electronics drawing current, and it is normal. Tighten it the same way as the positive.
Apply a thin film of dielectric grease or terminal protectant over the finished connections. Reinstall the battery cover, then the side cover, checking that no wire is pinched behind either one. Turn the ignition on, confirm the display comes up, re-enter any security or infotainment settings, and start the bike. Let it idle a minute, then check charging voltage across the battery terminals with the engine running — you should see roughly 13.8V to 14.8V off idle. If you see battery voltage unchanged or over 15V, you have a charging system problem, not a battery problem.
Charging & Maintenance
An AGM battery is sealed. You do not add water, you do not open it, and you do not use an old-school unregulated trickle charger on it.
Use an AGM-capable smart charger. Modern maintainers detect chemistry or have an AGM mode, charge in stages, then drop to a float voltage that holds the battery topped off without cooking it. A cheap constant-current trickle charger left on for a week will drive an AGM past its gassing voltage, vent the electrolyte it cannot replace, and permanently reduce its capacity.
Keep it on a tender whenever the bike sits more than about two weeks. This is the single highest-value habit for a bike like this. The CVO's infotainment, security and accessory electronics pull a steady standby current even with the key out. A bike that sits three weeks in the garage can come back noticeably discharged, and every deep discharge takes a permanent bite out of an AGM's life.
What kills an AGM battery, in rough order of how often it happens:
- Sitting partially discharged for weeks. Sulfate crystals form on the plates and do not fully break up on recharge.
- Chronic undercharging from short rides. A fifteen-minute run to the store and back does not replace what starting the bike cost, especially with heated gear or the audio system running.
- Heat. Sustained high underseat temperatures age the battery faster than anything else on the list, which is why a Florida battery does not last as long as a Minnesota one.
- Overcharging from a failed voltage regulator or a dumb charger. Above roughly 15V you are boiling off electrolyte through the vents.
- Accessory loads wired direct to the battery with no relay or ignition trigger, quietly draining it while parked.
- Vibration from a loose hold-down, which breaks down the internal plate structure over time.
Charging a deeply discharged AGM: some smart chargers refuse to start on a battery below about 10V because they cannot detect it. If that happens, a charger with a recovery or repair mode may bring it back, but treat a battery that got that low as compromised. Test it before you trust it on a long ride.
Winter Storage
If the bike goes down for the season:
- Charge it fully first. Put the battery at full charge before storage — a partially charged battery sulfates in storage and also freezes at a much higher temperature than a full one.
- Pick one: tender in place, or remove it. If you have a reliable outlet in the garage, leave the battery in the bike on a quality AGM maintainer. If the bike stores somewhere without power, pull the battery, bring it inside, and keep it on a maintainer there.
- Store it cool, not cold, and never on damp concrete. A shelf in a heated garage or basement is ideal. Avoid anywhere that swings between freezing and warm.
- Do not start the bike once a month "to keep the battery up." A five-minute idle takes more out of the battery than it puts back and dumps moisture into the exhaust and crankcase. A maintainer does the job properly.
- Check it mid-winter. Pull the maintainer off, wait a few hours, and read resting voltage. If it is drifting down while on a maintainer, the charger has failed or the battery has.
- Before spring: verify resting voltage, clean and re-grease the terminals, confirm the hold-down is still tight, and check charging output on the first ride.
Testing a Suspect Battery
Test in this order. Do not replace a battery until you have done at least the first two.
1. Resting voltage. The bike must have sat with everything off for at least a few hours — overnight is better. A surface charge from a recent ride or charger will read high and lie to you. Put the meter across the terminals:
| Resting Voltage | State of Charge | What It Means |
|---|---|---|
| 12.8V - 13.0V | 100% | Healthy AGM, fully charged |
| 12.6V | ~75% | Slightly down; charge it and watch it |
| 12.4V | ~50% | Discharged. Charge fully, then re-test in 24 hours |
| 12.0V | ~25% | Deeply discharged, damage likely already done |
| Below 11.8V | Effectively dead | Sulfated or has an internal fault; usually replacement |
2. Does it hold a charge? Charge it fully on an AGM charger, disconnect the charger, and let it sit 24 hours untouched. Re-read the voltage. A good battery holds near its full-charge number. If it drops back to 12.4V or lower overnight with nothing connected, the battery has an internal problem and no amount of charging will fix it. If it holds fine off the bike but goes flat on the bike, you have a parasitic draw, not a bad battery — a very common outcome on accessory-heavy CVO bikes.
3. Load test. This is the test that actually decides it. A load tester pulls a heavy current while watching voltage. The practical rule: under a proper load, voltage should not sag below about 9.6V at room temperature, and it should recover quickly when the load comes off. A battery that reads a perfect 12.8V at rest but collapses to 8V under load is done — resting voltage alone will never catch that. Most shops and many parts stores will load test for free.
4. Cranking voltage on the bike. With a meter on the terminals, hit the starter. Voltage will dip — that is expected. A dip into the 9V range that recovers immediately is normal; a dip below about 9.5V that stays down, with slow lazy cranking, points at the battery or at a bad connection. Check your cable lugs and grounds before you blame the battery.
5. Rule out the charging system. Engine running, meter across the terminals, off idle: roughly 13.8V to 14.8V. Below that and the battery is never getting refilled — look at the stator, regulator and connections. Above about 15V and the regulator is cooking the battery, and the new one will die the same way the old one did.
6. Check for parasitic draw. Bike off, negative cable disconnected, meter set to DC amps in series between the cable and the post. A small standby draw is normal on this bike; a large one is an accessory wired direct to the battery. Pull fuses one at a time to find the circuit.
Replacement Parts We Stock
These are V-Twin Manufacturing part numbers from our own catalog that fit the FLHXSE, FLHXS, FLHX and FLH platforms. Prices as listed.
| V-Twin Part # | Description | Price | Category |
|---|---|---|---|
| 48-2316 | Battery Label | $4.50 | Battery |
| 48-2316 | Battery Label | $4.50 | Batteries |
| 53-0566 | *UPDATE Battery Top Plug Set | $7.15 | Battery |
| 53-0566 | *UPDATE Battery Top Plug Set | $7.15 | Batteries |
| 12-0538 | Parkerized 6 Volt Battery Rod Wing Nuts | $7.92 | Straps |
| 12-0538 | Parkerized 6 Volt Battery Rod Wing Nuts | $7.92 | Battery |
| 28-0749 | Battery Tray ISO Stud Set | $8.87 | Trays & Carriers |
| 37-0589 | Zinc Speedometer Cable Clamps | $8.87 | Cables |
| 37-9025 | Speedometer Cable Clamp | $8.87 | Cables |
| 53-0579 | Battery Top Set | $8.87 | Battery |
| 53-0579 | Battery Top Set | $8.87 | Batteries |
| 28-0547 | Battery Tray ISO Stud | $10.02 | Trays & Carriers |
| 12-0538 | Battery Box Wing Nut Set | $10.08 | Straps |
| 12-0538 | Battery Box Wing Nut Set | $10.08 | Battery |
A note on fitment: several of these are hardware and mounting items rather than the battery itself, and some — the 6-volt rod wing nuts in particular — are period/restoration hardware. Confirm the item matches what is actually on your bike before ordering. We do not list an OEM Harley-Davidson battery part number here because we cannot confirm one for this specific model year; get that number from your owner's manual or your dealer with the VIN in hand.
Tips, Warnings & Common Mistakes
Tips that save time:
- Photograph both terminals before you touch them. On a CVO with accessory leads, this is not optional advice.
- Clean the cable lugs even if they look fine. Bright metal to bright metal is where the amps go.
- Buy the battery from a supplier with decent turnover. An AGM that sat on a shelf for a year at 30% charge is already partly used up when you get it.
- Label the old battery with the date you pulled it and the date you installed the one before it. That tells you whether you are getting normal life or whether something on the bike is eating batteries.
- If you added accessories, wire them through a relay triggered by ignition, not straight to the battery.
Common mistakes and what they cost you:
| Mistake | Consequence |
|---|---|
| Disconnecting positive first | Wrench slip shorts the battery through the frame — burned tools, melted cable, possible battery rupture |
| Installing a new AGM without charging it first | Battery never reaches full charge on the bike; dies in months instead of years |
| Overtightening the hold-down | Cracked AGM case, slow leak, sudden no-start weeks later |
| Overtightening terminal bolts | Stripped threads or a cracked terminal seal; a very expensive repair on a cheap fastener |
| Using a non-AGM or unregulated trickle charger | Vents electrolyte the sealed battery cannot replace; permanent capacity loss |
| Leaving the bike unridden for a month with no tender | Deep discharge and sulfation; measurably shorter battery life every time |
| Reusing corroded cable lugs | High resistance, slow cranking, and a good battery blamed for a bad connection |
| Skipping the charging system check after replacement | The failed regulator that killed the last battery kills the new one too |
| Guessing at battery dimensions instead of measuring | Battery will not fit under the cover or shifts in the tray and vibrates itself apart |
| Starting the bike monthly in storage instead of using a tender | Takes more charge out than it puts in; adds moisture to oil and exhaust |
| Prying a painted CVO side cover against the frame | Paint damage on the most expensive bodywork Harley sells |
| Pinching a wire behind the reinstalled cover | Chafed insulation, an intermittent short, and a diagnosis that takes hours |
Warnings:
- Battery acid causes burns. If an AGM is cracked or leaking, glove up, and flush skin contact with water for at least fifteen minutes.
- Charging batteries produce hydrogen. Charge in ventilation, away from anything that sparks.
- Remove rings, watches and metal bracelets before working around battery terminals. A ring that bridges a terminal to the frame welds itself to your hand.
- Do not attempt to open, drill or "service" a sealed AGM battery.
Disposal & Recycling
Lead-acid and AGM batteries are recyclable and are not household trash. In most of the US they are legally required to be recycled, and lead recovery rates from them are among the highest of any recycled product.
- Core charge: most retailers add a core charge to the new battery, refunded when you bring the old one back. Bring the receipt and the old battery in the box the new one came in.
- Where they take them: the dealer or shop that sold you the battery, auto parts chains (most take batteries free whether or not you bought there), scrap metal yards, and municipal household hazardous waste collection sites.
- Transport it safely: upright, in a box or plastic tray, with the terminals covered or taped so nothing can bridge them. A loose battery rolling around a truck bed with exposed terminals is a fire waiting to happen.
- Never put a battery in household trash, curbside recycling, or leave it on the garage floor for a year. The case will eventually fail.
Verification Notes
The specifications below are model-year specific and should be confirmed against your own owner's manual, the factory service manual for your VIN, or your Harley-Davidson dealer before you order parts or torque a fastener. We have not stated numbers we cannot confirm for this bike.
| Item to Verify | Why It Matters | Where to Confirm |
|---|---|---|
| OEM battery part number | Ensures correct fitment, terminal layout and capacity | Owner's manual, dealer parts counter with VIN |
| Exact battery dimensions | A battery even slightly oversize will not clear the cover | Measure the removed battery; compare to the new one's spec sheet |
| Cold cranking amps rating | Undersized CCA means marginal cold starting on a big twin | Label on the original battery; owner's manual |
| Reserve capacity | Determines how long accessories run with the engine off | Battery manufacturer spec sheet |
| Terminal bolt torque | Too loose causes arcing; too tight cracks the terminal seal | Factory service manual for your model year |
| Hold-down fastener torque | Too tight cracks the AGM case | Factory service manual for your model year |
| Side cover and battery cover fastener sizes/torque | Prevents stripped fasteners and damaged painted bodywork | Factory service manual for your model year |
| Charging system output range | Confirms the regulator is not under- or over-charging | Factory service manual; measure at the terminals |
| Normal parasitic draw for your configuration | Distinguishes a bad battery from an accessory draining it | Factory service manual; compare before and after accessories |
| Security fob / infotainment re-entry procedure | Avoids being locked out after reconnecting the battery | Owner's manual |
| V-Twin part fitment for your specific configuration | Some listed hardware is period or restoration-specific | Compare to the hardware currently on your bike before ordering |
Parts for this job
Fits FLHXSE, FLHXS, FLHX, FLH, FL — from our catalogue of 41,000+ aftermarket parts.
 Battery Label$5.40
 *UPDATE Battery Top Plug Set$8.58
 Parkerized 6 Volt Battery Rod Wing Nuts$9.50
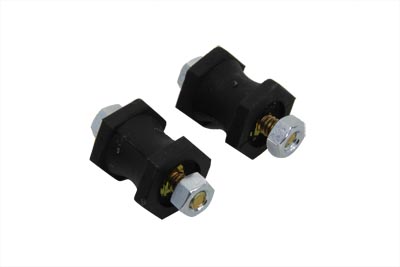 Battery Tray ISO Stud Set$10.64
 Zinc Speedometer Cable Clamps$10.64
 Speedometer Cable Clamp$10.64
 Battery Top Set$10.64
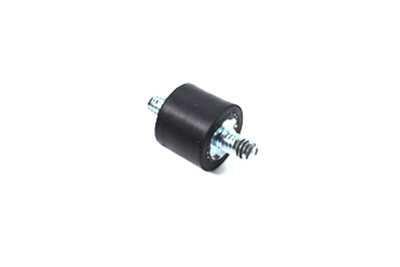 Battery Tray ISO Stud$12.02Battery Box Wing Nut Set$12.10
 Bright Chrome Battery Carrier Bracket$12.80
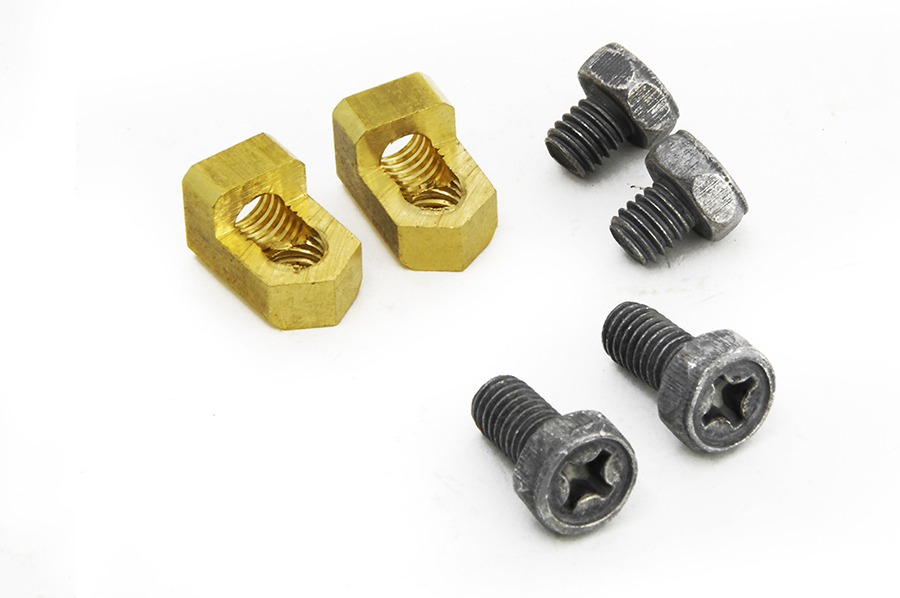 Brass Battery Terminal Adapter Kit$12.80
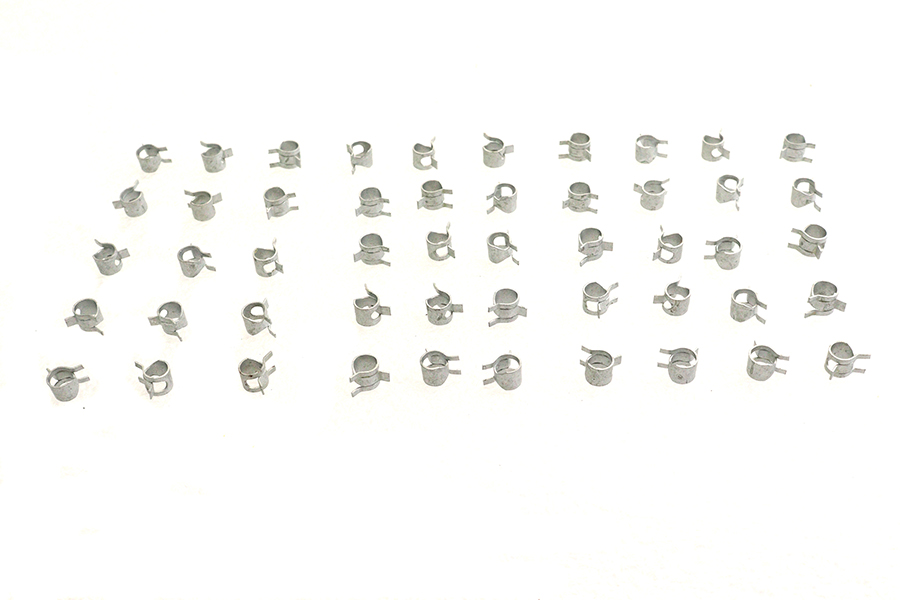 Zinc Battery Vent Clamp$12.80