Battery Guide: 2026 Harley-Davidson CVO Road Glide FLTRXSE
Battery Guide: 2026 Harley-Davidson CVO Road Glide FLTRXSE
The CVO Road Glide is the heaviest electrical load in the Road Glide family. Between the big infotainment head unit, the amplified audio system, heated grips, security, and the accessory lighting most CVO owners add on top of that, this bike asks more of its battery than a base FLTRX ever will. A battery that would limp along for another season in a stripped-down bagger will leave you thumbing a dead starter button on a CVO. Treat the battery as a wear item, not a permanent fixture.
Quick Reference Table
| Spec | Value | Source |
|---|---|---|
| Battery Type | AGM (Absorbed Glass Mat), sealed, 12V | Harley-Davidson touring platform spec |
| Harley OEM Part Number | Verify against your owner's manual or dealer | Not confirmed for this model year |
| Group Size | 20L-class AGM (confirm case size before ordering) | Verify against your owner's manual or dealer |
| Cold Cranking Amps (CCA) | Verify against your owner's manual or dealer | Manufacturer rating varies by supplier |
| Reserve Capacity | Verify against your owner's manual or dealer | Manufacturer rating varies by supplier |
| Nominal Voltage | 12V | Electrical system spec |
| Fully Charged Resting Voltage | 12.8V – 13.0V (AGM) | AGM charging guidelines |
| Considered Discharged | Below 12.4V | AGM charging guidelines |
| Dimensions (LxWxH) | Verify against your owner's manual or dealer | Measure the old battery before ordering |
| Approximate Weight | Roughly 13–15 lbs — lift accordingly | General AGM touring battery range |
| Terminal Type | Threaded post with bolt-through cable lug | Factory hardware |
| Terminal Position | Positive outboard, negative inboard — confirm on your bike before removal | Photograph before disconnecting |
| Hold-Down Method | Strap over the top of the case with threaded fastener | Factory installation |
| Vent | Sealed AGM, no external vent tube required | AGM design |
| Replacement Interval | 3–5 years; sooner in Florida-grade heat or with heavy accessory load | Service experience |
| Recommended Replacements | Harley-Davidson Genuine AGM, or a reputable 20L-class AGM that physically fits | Dealer and aftermarket guidance |
Do not order by part number off the internet and hope. Pull the old battery, measure it, read the label, and match case size, terminal orientation, and CCA rating or better. CVO trim has changed battery suppliers before, and a battery that is a quarter inch too tall will not clear the cover.
Difficulty & Time Estimate
- Difficulty Level: Beginner (1 out of 5) — hand tools only, no diagnostics required
- Estimated Time: 25–35 minutes for an experienced wrench, 45–60 minutes for a first-timer
- Tools at hand: Everything on the list below lives in a basic garage tool roll. There is no special Harley tool needed for this job, and nothing has to be pressed, pulled, or torched.
- Seasonal note: Work above 40°F if you can. Cold hands drop fasteners into the frame, and cold AGM batteries read low on a meter and will fool you into replacing a good one.
- CVO-specific note: The CVO fairing and front fender are painted, layered finishes that cost real money. Throw a fender cover or an old towel over anything a dropped wrench could reach before you start.
Tools Required
| Tool | Purpose |
|---|---|
| Safety glasses | Battery acid and spark protection — non-negotiable |
| Nitrile or mechanic's gloves | Keeps acid residue and grime off your hands |
| Torx driver set (T25/T27 range) | Battery cover and side-cover fasteners |
| 10mm combination wrench | Terminal bolts and hold-down hardware on most touring models |
| 1/4" drive ratchet and socket set | Faster than a wrench where there is room to swing |
| Digital multimeter | Resting voltage and charging system output |
| Battery terminal brush | Cleans corrosion off posts and cable lugs |
| Baking soda and water solution | Neutralizes acid residue in the tray |
| Shop rags | Cleanup and protecting painted surfaces |
| Dielectric grease | Seals terminals against corrosion after assembly |
| Torque wrench (inch-pound range) | Terminal and hold-down fasteners — verify figures against your service manual |
| Smart AGM battery tender | Bringing the new battery to full charge and maintaining it |
| Flashlight or headlamp | The battery pocket is shadowed even in daylight |
Battery Location & Access
On the touring chassis the battery sits low on the left side of the motorcycle, in a tray between the frame rails just ahead of the left saddlebag and behind the rider's left leg. It hides under a removable side cover. On the CVO Road Glide that cover is typically a painted or finished panel matched to the bike's color package, not the plain black cover you find on a base FLTRX — handle it like a body panel, not a bracket.
What has to come off first:
- Left side cover / battery cover — secured by Torx fasteners or push-in retainers depending on trim. Look before you pry.
- Left saddlebag (optional but recommended) — pulling the bag gives you a straight-in path to the tray and keeps you from scuffing the bag's painted flank with a wrench handle. On the CVO it is usually a quick-release latch and a lift-off, no tools.
- Nothing else. The fairing stays on. The seat stays on unless you need the main fuse, which lives under it.
Unlike the frame-mount fairing on a Street Glide, the Road Glide's fairing is fork-mounted, so the handlebars and fairing swing together — you get more clearance on the left side with the bars turned full right. Use it.
Before you unbolt anything, take a photo of the battery, its cables, and the strap exactly as they sit. Ten seconds now saves a lot of guessing later.
Step-by-Step Replacement
Step 1: Park and Prepare
Put the bike on level ground with the kickstand fully extended, or better, on a lift with the wheel chocked. Turn the ignition fully off and remove the key fob from the immediate area so the security system is not pinging the battery mid-job. Work in a ventilated space away from open flame, grinders, or anything that throws a spark.
Warning: Even a sealed AGM battery can vent hydrogen if it has been overcharged or overheated. Ventilation is not optional.
Step 2: Protect the Paint
Drape a clean towel or fender cover over the left saddlebag, the fender, and any painted surface within dropping range. CVO finishes are deep, layered, and expensive to repair.
Step 3: Remove the Left Side Cover
Remove the Torx fasteners securing the battery cover and set both cover and hardware in a marked container or a magnetic tray. Do not stack the painted cover face-down on concrete. If the cover uses push-in retainers rather than screws, pull it straight off with even pressure at both edges rather than levering one corner.
Step 4: Photograph and Note the Cable Layout
Before a single nut moves, photograph the terminals. Note which cable lands on positive and which on negative, how the cables route, and where any accessory leads or auxiliary fuse taps are attached. CVO bikes frequently carry extra leads — audio amp power, lighting, aux fuse blocks — piggybacked at the battery. Every one of them has to go back on the same post.
Step 5: Disconnect the Negative Cable First
With a 10mm wrench, loosen and remove the bolt on the negative (−) terminal. Lift the cable clear and tuck it back where it cannot spring onto the post.
Why negative first: The negative terminal is tied to the frame and the entire chassis is at that potential. With the negative cable off, the circuit is broken — if your wrench then brushes frame while you work the positive post, nothing happens. Do it in the other order and a slipped wrench between the positive post and any metal on the bike becomes a dead short across a battery that can deliver hundreds of amps. That means a welded wrench, sparks in your face, and a possible battery rupture.
Step 6: Disconnect the Positive Cable
Loosen the positive (+) terminal bolt and remove the cable, plus any accessory leads stacked on it. Fold the cable away from the battery and away from the negative cable. If you have any doubt about it staying put, wrap the positive lug in a rag or slip the terminal boot over it.
Step 7: Release the Hold-Down Strap
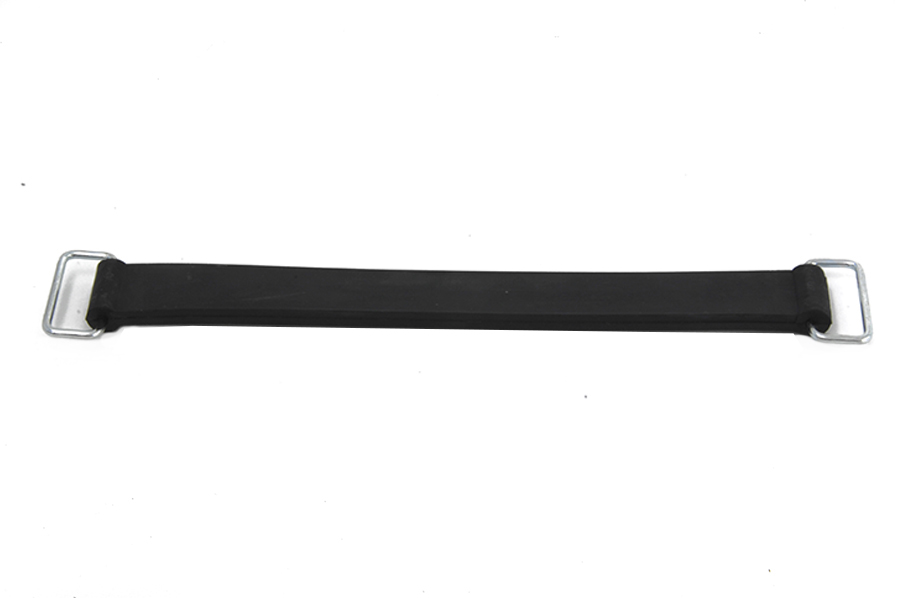
Free the strap or bracket holding the battery in the tray. This is usually a threaded fastener through a strap that crosses the top or front of the case. Keep the hardware — rubber straps and stud sets wear out, and if yours is cracked, dry, or stretched, replace it while you are in there.
Step 8: Lift the Old Battery Out
Grip the case by its strap or by both ends and lift straight up and out. Keep it level. It's roughly 13–15 lbs of dead weight in an awkward position, so set your feet and lift with your legs, not your back and one arm.
Tip: If the battery is swollen, hot, or leaking, stop and handle it as a hazardous item. Gloves on, do not squeeze the case, and get it into a plastic tub for transport.
Step 9: Clean and Inspect the Tray
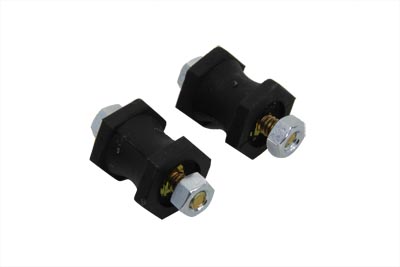
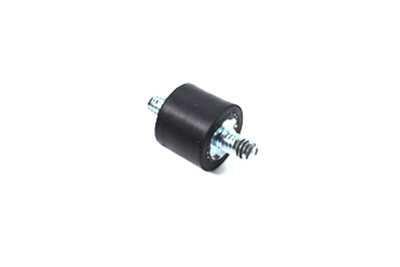
Wipe out the tray and inspect it for corrosion, acid staining, or cracks. Scrub any white or green residue with a baking soda and water solution, then dry it completely — no moisture left behind. Check that the tray's drain path is clear and that the isolation studs and rubber pads are intact. Damaged tray hardware lets the battery walk around and chew its own terminals loose.
Step 10: Clean the Cable Lugs
Run the terminal brush through both cable lugs until the metal is bright. A corroded lug adds resistance, and resistance on a bike that pulls the kind of starter current a Milwaukee-Eight does shows up as slow cranking that looks exactly like a bad battery.
Step 11: Set the New Battery in Place
Lower the new AGM battery into the tray with the terminals oriented exactly as the old one was — match your photo. It should sit flat and square with no rocking. If it rocks or sits proud of the tray, stop and confirm you have the right case size. Do not force it or shim it with junk.
Step 12: Secure the Hold-Down
Reinstall the strap or bracket and snug the fastener until the battery cannot shift by hand in any direction.
Warning: Snug, not gorilla-tight. Overtightening a hold-down cracks an AGM case, and a cracked case is a slow leak you won't find until the tray is eaten through. Verify the exact torque figure against your service manual.
Step 13: Connect the Positive Cable First
Land the positive cable — plus every accessory lead that came off it — on the positive (+) post and tighten the bolt until the lug will not twist by hand. Positive goes on first because the negative is still disconnected, so the chassis is still isolated and a slipped tool touches nothing live. Verify the terminal torque figure against your service manual rather than guessing; these are small fasteners threading into a lead post and they strip easily.
Step 14: Connect the Negative Cable Last, Then Close Up
Land the negative cable on the negative (−) post and tighten it the same way. Expect a small spark as the circuit completes and the electronics wake — that is normal and it is exactly why this connection goes last, out at the end when nothing else is exposed. Apply a thin film of dielectric grease over both terminals, reinstall the side cover, refit the saddlebag, then turn the key on. Confirm the gauges light, the infotainment boots, and the clock and radio presets are where you want them. Start the bike and let it run.
Charging & Maintenance
AGM batteries are sealed. You cannot top them off with water, you cannot look inside, and you cannot fix one once it has been cooked. Everything about keeping one alive happens before it fails.
Use a smart tender with an AGM mode. A modern microprocessor-controlled maintainer reads voltage, charges in stages, and drops to a float or maintenance mode instead of pushing current forever. Harley's own battery tender, a Battery Tender Plus, a NOCO Genius, or any comparable unit with an explicit AGM setting is fine. Connect positive first, then negative, same logic as installation.
Never use an old-school trickle charger or an automotive fast charger. A dumb trickle charger has no idea when to stop and will slowly boil an AGM dry. A shop fast charger set to 10A or higher dumps heat into a battery designed for gentle absorption. Both are one-way trips.
What actually kills an AGM battery on a CVO:
- Chronic undercharging. Short rides that never fully replace what starting consumed. On a bike with an audio system and heated accessories, a fifteen-minute ride can be a net loss.
- Parasitic draw. Security, infotainment memory, and any aftermarket accessory wired direct to the battery pull current 24/7. Park a CVO for three weeks without a tender and you may not get it started.
- Heat. Under-fairing and engine heat ages a battery faster than cold ever will. Florida and Arizona owners should plan on the short end of the 3–5 year window.
- Deep discharge. Take an AGM below about 10.5V and it permanently loses capacity. Do it twice and the battery is scrap.
- Overcharging. A failing voltage regulator pushing above roughly 15V will dry the mats out. If you are eating batteries every eighteen months, the battery is the symptom, not the problem — test charging output.
Check charging system output with the engine running at around 3,000 RPM. You want to see voltage clearly above resting — in the neighborhood of 13.8–14.8V at the battery terminals on a healthy system. Confirm the exact spec for your model year against your service manual. Under 13V at RPM means the charging system is not keeping up. Over 15V means it is cooking the battery.
Winter Storage
Even in the South, a bike that sits from Thanksgiving to March needs a plan.
- Ride it warm before you park it, then charge it full. Storing a partially discharged AGM is the single fastest way to lose one.
- Leave the battery in the bike and put it on a maintainer if you have a dry outlet in the garage. This is the preferred option — it keeps the electronics fed and the battery topped.
- If there's no power where you store it, pull the battery. Disconnect negative first, remove it, and keep it indoors on a shelf — not on bare concrete, not in an unheated shed. Charge it fully every 30–45 days while it sits.
- Do not disconnect only the negative cable and call it storage. That stops the parasitic draw but does nothing about self-discharge, which runs a few percent per month and speeds up in the heat.
- Check voltage monthly. Anything drifting below 12.4V gets charged immediately.
- Before the first spring ride, put it on the charger overnight, then confirm 12.8V or better after it has rested an hour off the charger.
Testing a Suspect Battery
Before you spend money, test. Half the batteries replaced in garages were fine and the real fault was a loose lug, a corroded ground, or a charging system going soft.
Resting voltage. Let the bike sit at least two hours after running — overnight is better. Turn nothing on. Measure across the terminals with a multimeter.
| Resting Voltage (AGM, 12V) | State of Charge | What It Means |
|---|---|---|
| 12.8V – 13.0V | 100% | Healthy and fully charged |
| 12.6V – 12.8V | ~75–100% | Fine; consider a maintenance charge |
| 12.4V – 12.6V | ~50–75% | Undercharged — charge it and retest |
| 12.0V – 12.4V | ~25–50% | Significantly discharged; charge and investigate the cause |
| Below 12.0V | Under 25% | Deeply discharged; likely damaged even if it recovers |
| Below 10.5V | Failed | Replace it — permanent capacity loss |
Load test. Voltage alone lies. A battery can read 12.7V and still collapse the moment it is asked for starter current. Either use a proper carbon-pile or electronic load tester, or do the poor-man's version: leave the multimeter on the terminals and hit the starter. Watch the number.
| Voltage While Cranking | Verdict |
|---|---|
| Stays above 9.6V | Battery is good |
| Drops to 9.0V – 9.6V | Marginal — retest after a full charge |
| Falls below 9.0V | Battery is failing under load; replace it |
| Collapses near zero, no crank | Dead cell, or a connection problem — check the lugs first |
If it fails, check the connections before you buy. Clean both terminals and the engine-to-frame ground strap, retighten, and retest. A battery that suddenly tests fine after a wrench turn was never the problem.
Parasitic draw test. Disconnect the negative cable, put your meter in DC amps in series between the cable and the post, and read. A small draw for security and memory is normal; anything large points at an accessory wired direct. Confirm the acceptable draw figure for your model against your service manual.
Replacement Parts We Stock
These are V-Twin Manufacturing parts from our own catalog that fit FLTRXSE, FLTRXS, FLTRX, and FLTR applications. Part numbers and prices are exactly as listed in our catalog.
| V-Twin Part # | Description | Price | Category |
|---|---|---|---|
| 48-2316 | Battery Label | $4.50 | Battery |
| 48-2316 | Battery Label | $4.50 | Batteries |
| 53-0566 | *UPDATE Battery Top Plug Set | $7.15 | Battery |
| 53-0566 | *UPDATE Battery Top Plug Set | $7.15 | Batteries |
| 12-0538 | Parkerized 6 Volt Battery Rod Wing Nuts | $7.92 | Straps |
| 12-0538 | Parkerized 6 Volt Battery Rod Wing Nuts | $7.92 | Battery |
| 28-0749 | Battery Tray ISO Stud Set | $8.87 | Trays & Carriers |
| 37-0589 | Zinc Speedometer Cable Clamps | $8.87 | Cables |
| 37-9025 | Speedometer Cable Clamp | $8.87 | Cables |
| 53-0579 | Battery Top Set | $8.87 | Battery |
| 53-0579 | Battery Top Set | $8.87 | Batteries |
| 28-0547 | Battery Tray ISO Stud | $10.02 | Trays & Carriers |
| 28-2217 | Rubber Battery Strap | $10.02 | Straps |
| 12-0538 | Battery Box Wing Nut Set | $10.08 | Straps |
Two notes on this list. First, the 28-0547 / 28-0749 ISO stud hardware and the 28-2217 rubber strap are the pieces most worth replacing while the battery is out — they are cheap, they are only accessible with the battery removed, and worn ones let the battery move. Second, several of these items are period or vintage-application parts (the 6-volt rod wing nuts, the battery top plug sets) — confirm fitment for your specific application with us before ordering. For the battery itself, verify the correct Harley part number against your owner's manual or dealer.
Tips, Warnings & Common Mistakes
- Photograph everything before you touch it. Especially on a CVO with accessory leads stacked at the terminals.
- Measure the old battery before ordering a new one. Case dimensions, terminal side, and post type. Don't trust a cross-reference chart alone.
- Buy a fresh battery. Check the manufacture date sticker. A battery that has been sitting on a shelf for a year has already lost capacity before you paid for it.
- Charge the new battery before first use. New AGM batteries frequently ship at partial charge. A full charge on a tender before installation is thirty minutes of effort that adds a year to its life.
- Keep metal off the terminals. No tools, no keys, no spare bolts resting on the case.
- If you're eating batteries, chase the charging system. Repeat failures are a regulator, stator, or parasitic draw problem.
- Expect to reset a few things. Clock, radio presets, and trip data may need attention after power is restored.
| Common Mistake | Consequence |
|---|---|
| Disconnecting positive first | Wrench-to-frame short, hundreds of amps, sparks, possible battery rupture |
| Connecting negative first on install | Same short risk while the positive post is still exposed |
| Overtightening the hold-down | Cracked AGM case, slow acid leak, corroded tray |
| Overtightening terminal bolts | Stripped lead post — battery is scrap, brand new |
| Using a dumb trickle charger | Battery slowly boiled dry; permanent capacity loss |
| Using a 10A+ automotive fast charger | Heat damage to the mats; drastically shortened life |
| Storing a partially charged AGM | Sulfation, permanent capacity loss over winter |
| Letting it drop below 10.5V | Irreversible damage; battery will not come back |
| Leaving accessory leads off a terminal | Audio, lighting, or aux circuits dead — and a mystery to chase later |
| Installing a battery that rocks in the tray | Vibration loosens terminals, chafes cables, cracks the case |
| Replacing the battery without testing the charging system | New battery fails the same way in a few months |
| Skipping cleaning of cable lugs | Added resistance, slow cranking, misdiagnosed as a bad battery |
| Setting the painted cover face-down on concrete | Scratched CVO finish, expensive to correct |
Disposal & Recycling
Lead-acid batteries — AGM included — are recyclable and are not household trash. Throwing one in a dumpster is illegal in most jurisdictions and carries real fines.
- Core charge. Most retailers charge a core deposit when you buy the new battery and refund it when you hand over the old one. Bring the old battery with you or bring it back, and keep the receipt.
- Who takes them, free, no purchase required: auto parts chains (AutoZone, O'Reilly, Advance, NAPA), Harley-Davidson dealerships, motorcycle shops, scrap metal yards, and municipal household hazardous waste collection sites.
- Transport it safely. Upright, in a plastic tub or a tray, terminals covered with tape or boots, wedged so it cannot tip in the back of the truck.
- If it leaked, neutralize spills with baking soda, wear gloves and eye protection, and do not rinse acid into a storm drain.
- Over 95% of a lead-acid battery gets recycled into new batteries. It is genuinely one of the best-closed material loops there is — take the five minutes.
Verification Notes
This guide covers the procedure and the principles. The specific numbers below change between model years and suppliers, and getting one wrong costs money. Confirm every line against the official 2026 Harley-Davidson CVO service manual for your VIN, or with your dealer's parts counter, before you order or torque anything.
| Item to Verify | Where to Confirm | Why It Matters |
|---|---|---|
| Harley OEM battery part number | Owner's manual or dealer parts counter | CVO trim can differ from base FLTRX |
| Battery case dimensions (L x W x H) | Measure the removed battery / manufacturer spec sheet | A battery a quarter inch too tall won't clear the cover |
| CCA rating required | Service manual or dealer | Meet or exceed the factory figure — never go under |
| Reserve capacity rating | Battery manufacturer spec sheet | Determines accessory runtime with the engine off |
| Terminal bolt torque | Service manual | Lead posts strip easily; too loose causes slow cranking |
| Hold-down fastener torque | Service manual | Overtightening cracks the case |
| Side cover fastener size and torque | Service manual | Painted CVO panel — don't distort or crack it |
| Charging system output range at RPM | Service manual | Distinguishes a bad battery from a bad regulator |
| Acceptable parasitic draw | Service manual | CVO has more standby loads than a base model |
| Battery cover fastener type (Torx vs. retainer) | Inspect your own bike | Prying a retainer cover you thought was screwed damages it |
| Accessory lead routing at the terminals | Your own photo before disassembly | Aftermarket wiring is not documented in any manual |
Parts for this job
Fits FLTRXSE, FLTRXS, FLTRX, FLTR, FLT, FL — from our catalogue of 41,000+ aftermarket parts.
 Battery Label$5.40
 *UPDATE Battery Top Plug Set$8.58
 Parkerized 6 Volt Battery Rod Wing Nuts$9.50
 Battery Tray ISO Stud Set$10.64
 Zinc Speedometer Cable Clamps$10.64
 Speedometer Cable Clamp$10.64
 Battery Top Set$10.64
 Battery Tray ISO Stud$12.02
 Rubber Battery Strap$12.02Battery Box Wing Nut Set$12.10
 Bright Chrome Battery Carrier Bracket$12.80
 Battery Cable 8-1/2" Black Positive$12.80